No edit summary |
No edit summary |
||
| (10 intermediate revisions by 3 users not shown) | |||
| Line 1: | Line 1: | ||
'''Monster Collection''' is a new form of collecting introduced recently in MapleStory. The objective is to kill monsters and add them to your collection, and then send the collections out on an Exploration to get bonus rewards. The collection is organized into different sections, as well as various sub-sections, based on the area where the monster can be found. There are rewards for completing a single row and page of collection, in addition to Exploration. Monster Collection and Exploration is accessible and shared amongst all characters in the same world. |
'''Monster Collection''' is a new form of collecting introduced recently in MapleStory. The objective is to kill monsters and add them to your collection, and then send the collections out on an Exploration to get bonus rewards. The collection is organized into different sections, as well as various sub-sections, based on the area where the monster can be found. There are rewards for completing a single row and page of collection, in addition to Exploration. Monster Collection and Exploration is accessible and shared amongst all characters in the same world. |
||
| − | To add monsters to Monster Collection, players hunt the specific monster until it is added, or use the extremely rare Monsterbloom item to randomly register a monster (there are a few Monsterblooms that register a specific monster, obtainable by completing certain rows in the Collection). Any iteration of this monster can count toward the collection as long as it has the exact same name (e.g. hunting [ |
+ | To add monsters to Monster Collection, players hunt the specific monster until it is added, or use the extremely rare Monsterbloom item to randomly register a monster (there are a few Monsterblooms that register a specific monster, obtainable by completing certain rows in the Collection). Any iteration of this monster can count toward the collection as long as it has the exact same name (e.g. hunting [[Snowman#Cooking with Tangyoon|Snowman]] in the [[Cooking with Tangyoon]] Party Quest will count for [[Snowman#El Nath|Snowman]] in El Nath). Note that lower level monsters have a higher chance of being added than higher level monsters, and certain monsters require an Elite monster version to be counted. |
| − | When all monsters in one row are collected, you can obtain a box that contains various items such as Reward Points, [[Spell Trace]]s, and [[Chaos Scroll of Goodness 50%]]. When a row of monsters is completed, the player can send the collection out on an Expedition under the Exploration tab, where players can send a row of collections out on an expedition for some set time to obtain rewards such as Reward Points, Trait Items, [[Spell Trace]]s, [ |
+ | When all monsters in one row are collected, you can obtain a box that contains various items such as Reward Points, [[Spell Trace]]s, and [[Chaos Scroll of Goodness 50%]]. When a row of monsters is completed, the player can send the collection out on an Expedition under the Exploration tab, where players can send a row of collections out on an expedition for some set time to obtain rewards such as Reward Points, Trait Items, [[Spell Trace]]s, [[Occult Cube]]s, and Potential Scrolls. |
==Victoria Island== |
==Victoria Island== |
||
| + | ===Victoria Island (I)=== |
||
| − | {{Monster Collection (Victoria Island)}} |
||
| + | {|class="wikitable mw-collapsible mw-collapsed" width="100%" style="background:#F0F8FF; text-align:center" data-expandtext="show" data-collapsetext="hide" |
||
| + | !colspan="6"|Victoria Island (I) |
||
| + | |- |
||
| + | !width="{{#expr:100/6}}%"|Monster |
||
| + | !width="{{#expr:100/6}}%"|Monster |
||
| + | !width="{{#expr:100/6}}%"|Monster |
||
| + | !width="{{#expr:100/6}}%"|Monster |
||
| + | !width="{{#expr:100/6}}%"|Monster |
||
| + | !width="{{#expr:100/6}}%"|Reward |
||
| + | |- |
||
| + | |[[File:Mob Orange Mushroom.png]]<br />[[Orange Mushroom]]<br />★ |
||
| + | |[[File:Mob Mushmom.png|100px]]<br />[[Mushmom]]<br />★★ |
||
| + | |[[File:Mob Blue Mushroom.png]]<br />[[Blue Mushroom]]<br />★ |
||
| + | |[[File:Mob Crying Blue Mushroom.png]]<br />[[Crying Blue Mushroom]]<br />★ |
||
| + | |[[File:Mob Blue Mushmom.png|100px]]<br />[[Blue Mushmom]]<br />★★ |
||
| + | |[[File:Use Trifling Exploration Box.png]]<br />[[Trifling Exploration Box]] x 1 |
||
| + | |- |
||
| + | |[[File:Mob Green Mushroom.png]]<br />[[Green Mushroom]]<br />★ |
||
| + | |[[File:Mob Horny Mushroom.png]]<br />[[Horny Mushroom]]<br />★ |
||
| + | |[[File:Mob Zombie Mushroom.png]]<br />[[Zombie Mushroom]]<br />★ |
||
| + | |[[File:Mob Annoyed Zombie Mushroom.png]]<br />[[Annoyed Zombie Mushroom]]<br />★ |
||
| + | |[[File:Mob Zombie Mushmom.png|100px]]<br />[[Zombie Mushmom]]<br />★★★ |
||
| + | |[[File:Use Adequate Exploration Box.png]]<br />[[Adequate Exploration Box]] x 1 |
||
| + | |- |
||
| + | |[[File:Mob Ribbon Pig.png]]<br />[[Ribbon Pig]]<br />★ |
||
| + | |[[File:Mob Blue Ribbon Pig.png]]<br />[[Blue Ribbon Pig]]<br />★ |
||
| + | |[[File:Mob Strange Pig.png]]<br />[[Strange Pig]]<br />★ |
||
| + | |[[File:Mob Wild Boar.png]]<br />Evasive [[Wild Boar]]<br />★★★ |
||
| + | | |
||
| + | |[[File:Use Adequate Exploration Box.png]]<br />[[Adequate Exploration Box]] x 1 |
||
| + | |- |
||
| + | |[[File:Mob Iron Hog.png]]<br />[[Iron Hog]]<br />★ |
||
| + | |[[File:Mob Iron Boar.png]]<br />[[Iron Boar]]<br />★ |
||
| + | |[[File:Mob Fire Boar.png]]<br />Beefy [[Fire Boar]]<br />★★★ |
||
| + | |[[File:Mob Portly Pig.png]]<br />[[Portly Pig]]<br />★ |
||
| + | |[[File:Mob Mr. Chomps.png|100px]]<br />[[Mr. Chomps]]<br />★★★★ |
||
| + | |[[File:Use Decent Exploration Box.png]]<br />[[Decent Exploration Box]] x 1 |
||
| + | |- |
||
| + | |[[File:Mob Fairy.png]]<br />[[Fairy]]<br />★ |
||
| + | |[[File:Mob Royal Fairy.png]]<br />[[Royal Fairy]]<br />★ |
||
| + | |[[File:Mob Slime.png]]<br />[[Slime]]<br />★ |
||
| + | |[[File:Mob Bubbling.png]]<br />[[Bubbling]]<br />★ |
||
| + | | |
||
| + | |[[File:Use Trifling Exploration Box.png]]<br />[[Trifling Exploration Box]] x 1 |
||
| + | |} |
||
| + | {|class="wikitable mw-collapsible mw-collapsed" width="100%" style="background:#F0F8FF; text-align:center" data-expandtext="show" data-collapsetext="hide" |
||
| + | !colspan="1"|Overall Reward |
||
| + | |- |
||
| + | !width="{{#expr:100/1}}%"|[[File:Use Mysterious Meso Pouch.png]]<br />[[Mysterious Meso Pouch]] x 1 |
||
| + | |} |
||
| + | |||
| + | ===Victoria Island (II)=== |
||
| + | {|class="wikitable mw-collapsible mw-collapsed" width="100%" style="background:#F0F8FF; text-align:center" data-expandtext="show" data-collapsetext="hide" |
||
| + | !colspan="6"|Victoria Island (II) |
||
| + | |- |
||
| + | !width="{{#expr:100/6}}%"|Monster |
||
| + | !width="{{#expr:100/6}}%"|Monster |
||
| + | !width="{{#expr:100/6}}%"|Monster |
||
| + | !width="{{#expr:100/6}}%"|Monster |
||
| + | !width="{{#expr:100/6}}%"|Monster |
||
| + | !width="{{#expr:100/6}}%"|Reward |
||
| + | |- |
||
| + | |[[File:Mob Evil Eye.png]]<br />[[Evil Eye (Monster)|Evil Eye]]<br />★ |
||
| + | |[[File:Mob Curse Eye.png]]<br />[[Curse Eye]]<br />★ |
||
| + | |[[File:Mob Cold Eye.png]]<br />[[Cold Eye]]<br />★ |
||
| + | |[[File:Mob Surgeon Eye.png]]<br />[[Surgeon Eye]]<br />★ |
||
| + | | |
||
| + | |[[File:Use Adequate Exploration Box.png]]<br />[[Adequate Exploration Box]] x 1 |
||
| + | |- |
||
| + | |[[File:Mob Stump.png]]<br />[[Stump]]<br />★ |
||
| + | |[[File:Mob Dark Stump.png]]<br />[[Dark Stump]]<br />★ |
||
| + | |[[File:Mob Axe Stump.png]]<br />[[Axe Stump]]<br />★ |
||
| + | |[[File:Mob Dark Axe Stump.png]]<br />[[Dark Axe Stump]]<br />★ |
||
| + | | |
||
| + | |[[File:Use Trifling Exploration Box.png]]<br />[[Trifling Exploration Box]] x 1 |
||
| + | |- |
||
| + | |[[File:Mob Ghost Stump.png]]<br />[[Ghost Stump]]<br />★ |
||
| + | |[[File:Mob Smirking Ghost Stump.png]]<br />[[Smirking Ghost Stump]]<br />★ |
||
| + | |[[File:Mob Stumpy.png|100px]]<br />[[Stumpy]]<br />★★★★ |
||
| + | |[[File:Mob Wooden Mask.png]]<br />Sticky [[Wooden Mask]]<br />★★★ |
||
| + | |[[File:Mob Rocky Mask.png]]<br />[[Rocky Mask]]<br />★ |
||
| + | |[[File:Use Adequate Exploration Box.png]]<br />[[Adequate Exploration Box]] x 1 |
||
| + | |- |
||
| + | |[[File:Mob Firefly Slime.png]]<br />[[Firefly Slime]]<br />★ |
||
| + | |[[File:Mob Fairy Slime.png]]<br />[[Fairy Slime]]<br />★ |
||
| + | |[[File:Mob Mystic Wisp.png]]<br />[[Mystic Wisp]]<br />★ |
||
| + | |[[File:Mob Water Sprite.png]]<br />[[Water Sprite]]<br />★ |
||
| + | |[[File:Mob Forest Sprite.png]]<br />[[Forest Sprite]]<br />★★ |
||
| + | |[[File:Use Trifling Exploration Box.png]]<br />[[Trifling Exploration Box]] x 1 |
||
| + | |- |
||
| + | |[[File:Mob Stone Golem.png|100px]]<br />[[Stone Golem]]<br />★ |
||
| + | |[[File:Mob Dark Stone Golem.png|100px]]<br />[[Dark Stone Golem]]<br />★ |
||
| + | |[[File:Mob Icy Mixed Golem.png|100px]]<br />[[Icy Mixed Golem]]<br />★ |
||
| + | |[[File:Mob Flaming Mixed Golem.png|100px]]<br />[[Flaming Mixed Golem]]<br />★ |
||
| + | |[[File:Mob Ice Golem.png|100px]]<br />Ice Golem<br />'''SPECIAL''' |
||
| + | |[[File:Use Decent Exploration Box.png]]<br />[[Decent Exploration Box]] x 1 |
||
| + | |} |
||
| + | {|class="wikitable mw-collapsible mw-collapsed" width="100%" style="background:#F0F8FF; text-align:center" data-expandtext="show" data-collapsetext="hide" |
||
| + | !colspan="1"|Overall Reward |
||
| + | |- |
||
| + | !width="{{#expr:100/1}}%"|[[File:Use Selective 4 Slot Coupon.png]]<br />[[Selective 4 Slot Coupon]] x 1 |
||
| + | |} |
||
| + | |||
| + | ===Victoria Island (III)=== |
||
| + | {|class="wikitable mw-collapsible mw-collapsed" width="100%" style="background:#F0F8FF; text-align:center" data-expandtext="show" data-collapsetext="hide" |
||
| + | !colspan="6"|Victoria Island (III) |
||
| + | |- |
||
| + | !width="{{#expr:100/6}}%"|Monster |
||
| + | !width="{{#expr:100/6}}%"|Monster |
||
| + | !width="{{#expr:100/6}}%"|Monster |
||
| + | !width="{{#expr:100/6}}%"|Monster |
||
| + | !width="{{#expr:100/6}}%"|Monster |
||
| + | !width="{{#expr:100/6}}%"|Reward |
||
| + | |- |
||
| + | |[[File:Mob Grumpy Tome.png]]<br />[[Grumpy Tome]]<br />★ |
||
| + | |[[File:Mob Raging Tome.png]]<br />Healer [[Raging Tome]]<br />★★★ |
||
| + | |[[File:Mob Oniony.png]]<br />[[Oniony]]<br />★ |
||
| + | |[[File:Mob Turnipy.png]]<br />[[Turnipy]]<br />★ |
||
| + | |[[File:Mob Mole King.png|100px]]<br />[[Mole King]]<br />★★★★ |
||
| + | |[[File:Use Adequate Exploration Box.png]]<br />[[Adequate Exploration Box]] x 1 |
||
| + | |- |
||
| + | |[[File:Mob Stirge.png]]<br />[[Stirge]]<br />★ |
||
| + | |[[File:Mob Jr. Wraith.png]]<br />[[Jr. Wraith]]<br />★ |
||
| + | |[[File:Mob Wraith.png]]<br />[[Wraith]]<br />★ |
||
| + | |[[File:Mob Shade.png]]<br />[[Shade (Monster)|Shade]]<br />★ |
||
| + | | |
||
| + | |[[File:Use Adequate Exploration Box.png]]<br />[[Adequate Exploration Box]] x 1 |
||
| + | |- |
||
| + | |[[File:Mob Palm Tree Slime.png]]<br />[[Palm Tree Slime]]<br />★ |
||
| + | |[[File:Mob Coconut Slime.png|100px]]<br />[[Coconut Slime]]<br />★ |
||
| + | |[[File:Mob Emerald Clam Slime.png]]<br />[[Emerald Clam Slime]]<br />★ |
||
| + | |[[File:Mob Violet Clam Slime.png]]<br />Beefy [[Violet Clam Slime]]<br />★★★ |
||
| + | | |
||
| + | |[[File:Use Adequate Exploration Box.png]]<br />[[Adequate Exploration Box]] x 1 |
||
| + | |- |
||
| + | |[[File:Mob Seagull Slime.png]]<br />[[Seagull Slime]]<br />★ |
||
| + | |[[File:Mob Red Tube Slime.png]]<br />[[Red Tube Slime]]<br />★ |
||
| + | |[[File:Mob Blue Tube Slime.png]]<br />[[Blue Tube Slime]]<br />★ |
||
| + | |[[File:Mob Shrimp Slime.png]]<br />[[Shrimp Slime]]<br />★ |
||
| + | |[[File:Mob Flying Fish Slime.png]]<br />[[Flying Fish Slime]]<br />★ |
||
| + | |[[File:Use Trifling Exploration Box.png]]<br />[[Trifling Exploration Box]] x 1 |
||
| + | |- |
||
| + | |[[File:Mob Captain Darkgoo.png|100px]]<br />[[Captain Darkgoo]]<br />★★★★ |
||
| + | |[[File:Mob Starfish Octopus Slime.png]]<br />Petrifying [[Starfish Octopus Slime]]<br />★★★ |
||
| + | |[[File:Mob Seashell Octopus Slime.png]]<br />[[Seashell Octopus Slime]]<br />★ |
||
| + | | |
||
| + | | |
||
| + | |[[File:Use Decent Exploration Box.png]]<br />[[Decent Exploration Box]] x 1 |
||
| + | |} |
||
| + | {|class="wikitable mw-collapsible mw-collapsed" width="100%" style="background:#F0F8FF; text-align:center" data-expandtext="show" data-collapsetext="hide" |
||
| + | !colspan="1"|Overall Reward |
||
| + | |- |
||
| + | !width="{{#expr:100/1}}%"|[[File:Setup Orange Mushroom Cube Chair.png]]<br />[[Orange Mushroom Cube Chair]] x 1 |
||
| + | |} |
||
| + | |||
| + | ===Victoria Island (IV)=== |
||
| + | {|class="wikitable mw-collapsible mw-collapsed" width="100%" style="background:#F0F8FF; text-align:center" data-expandtext="show" data-collapsetext="hide" |
||
| + | !colspan="6"|Victoria Island (IV) |
||
| + | |- |
||
| + | !width="{{#expr:100/6}}%"|Monster |
||
| + | !width="{{#expr:100/6}}%"|Monster |
||
| + | !width="{{#expr:100/6}}%"|Monster |
||
| + | !width="{{#expr:100/6}}%"|Monster |
||
| + | !width="{{#expr:100/6}}%"|Monster |
||
| + | !width="{{#expr:100/6}}%"|Reward |
||
| + | |- |
||
| + | |[[File:Mob Jr. Necki.png]]<br />[[Jr. Necki]]<br />★ |
||
| + | |[[File:Mob Ligator.png]]<br />[[Ligator]]<br />★ |
||
| + | |[[File:Mob Croco.png]]<br />[[Croco]]<br />★ |
||
| + | |[[File:Mob Muddy Sprout Monster.png]]<br />[[Muddy Sprout Monster]]<br />★ |
||
| + | |[[File:Mob Dyle.png|100px]]<br />[[Dyle]]<br />★★★ |
||
| + | |[[File:Use Adequate Exploration Box.png]]<br />[[Adequate Exploration Box]] x 1 |
||
| + | |- |
||
| + | |[[File:Mob Skeledog.png]]<br />[[Skeledog]]<br />★ |
||
| + | |[[File:Mob Skeleton Soldier.png]]<br />[[Skeleton Soldier]]<br />★ |
||
| + | |[[File:Mob Skeleton Officer.png]]<br />[[Skeleton Officer]]<br />★ |
||
| + | |[[File:Mob Skeleton Commander.png|100px]]<br />[[Skeleton Commander]]<br />★ |
||
| + | |[[File:Mob Lord Skeleton.png|100px]]<br />[[Lord Skeleton]]<br />★★★★ |
||
| + | |[[File:Use Adequate Exploration Box.png]]<br />[[Adequate Exploration Box]] x 1 |
||
| + | |- |
||
| + | |[[File:Mob Mushroom Chandelier.png|100px]]<br />Beefy [[Mushroom Chandelier]]<br />★★★ |
||
| + | |[[File:Mob Mushroom Knight Armor.png|100px]]<br />[[Mushroom Knight Armor]]<br />★ |
||
| + | |[[File:Mob Exhausted Viking.png]]<br />[[Exhausted Viking]]<br />★ |
||
| + | |[[File:Mob Tired Viking.png]]<br />[[Tired Viking]]<br />★ |
||
| + | | |
||
| + | |[[File:Use Trifling Exploration Box.png]]<br />[[Trifling Exploration Box]] x 1 |
||
| + | |- |
||
| + | |[[File:Mob Prime Minister.png|100px]]<br />Prime Minister<br />'''SPECIAL''' |
||
| + | |[[File:Mob Warm Viking.png]]<br />[[Warm Viking]]<br />★ |
||
| + | |[[File:Mob Generous Viking.png]]<br />[[Generous Viking]]<br />★ |
||
| + | |[[File:Mob Solemn Viking.png]]<br />Petrifying [[Solemn Viking]]<br />★★★ |
||
| + | | |
||
| + | |[[File:Use Decent Exploration Box.png]]<br />[[Decent Exploration Box]] x 3 |
||
| + | |- |
||
| + | |[[File:Mob Black Viking.png|100px]]<br />[[Black Viking]]<br />★★★★ |
||
| + | |[[File:Mob Serious Viking.png]]<br />[[Serious Viking]]<br />★ |
||
| + | |[[File:Mob Master Squid.png|100px]]<br />[[Master Squid]]<br />★ |
||
| + | |[[File:Mob Viking Squad.png|100px]]<br />[[Viking Squad]]<br />★ |
||
| + | | |
||
| + | |[[File:Use Monsterbloom.png]]<br />[[Prime Minister Monsterbloom]] x 1 |
||
| + | |} |
||
| + | {|class="wikitable mw-collapsible mw-collapsed" width="100%" style="background:#F0F8FF; text-align:center" data-expandtext="show" data-collapsetext="hide" |
||
| + | !colspan="1"|Overall Reward |
||
| + | |- |
||
| + | !width="{{#expr:100/1}}%"|[[File:Use Fusion Anvil Coupon.png]]<br />[[Fusion Anvil Coupon]] x 1 |
||
| + | |} |
||
| + | |||
| + | ===Sleepywood (I)=== |
||
| + | {|class="wikitable mw-collapsible mw-collapsed" width="100%" style="background:#F0F8FF; text-align:center" data-expandtext="show" data-collapsetext="hide" |
||
| + | !colspan="6"|Sleepywood (I) |
||
| + | |- |
||
| + | !width="{{#expr:100/6}}%"|Monster |
||
| + | !width="{{#expr:100/6}}%"|Monster |
||
| + | !width="{{#expr:100/6}}%"|Monster |
||
| + | !width="{{#expr:100/6}}%"|Monster |
||
| + | !width="{{#expr:100/6}}%"|Monster |
||
| + | !width="{{#expr:100/6}}%"|Reward |
||
| + | |- |
||
| + | |[[File:Mob Copper Drake.png|100px]]<br />[[Copper Drake]]<br />★ |
||
| + | |[[File:Mob Drake.png|100px]]<br />[[Drake]]<br />★ |
||
| + | |[[File:Mob Red Drake.png|100px]]<br />[[Red Drake]]<br />★ |
||
| + | |[[File:Mob Ice Drake.png|100px]]<br />[[Ice Drake]]<br />★ |
||
| + | |[[File:Mob Dark Drake.png|100px]]<br />[[Dark Drake]]<br />★ |
||
| + | |[[File:Use Trifling Exploration Box.png]]<br />[[Trifling Exploration Box]] x 1 |
||
| + | |- |
||
| + | |[[File:Mob Wild Kargo.png|100px]]<br />[[Wild Kargo]]<br />★ |
||
| + | |[[File:Mob Tauromacis.png|100px]]<br />[[Tauromacis]]<br />★ |
||
| + | |[[File:Mob Taurospear.png|100px]]<br />Petrifying [[Taurospear]]<br />★★★ |
||
| + | |[[File:Mob Jr. Balrog.png|100px]]<br />[[Jr. Balrog]]<br />★★★ |
||
| + | |[[File:Full Mob Balrog.png|100px]]<br />[[Balrog]]<br />★★★★ |
||
| + | |[[File:Use Adequate Exploration Box.png]]<br />[[Adequate Exploration Box]] x 1 |
||
| + | |- |
||
| + | |[[File:Mob Blazing Imp.png]]<br />[[Blazing Imp]]<br />★ |
||
| + | |[[File:Mob Pointy Imp.png|100px]]<br />[[Pointy Imp]]<br />★ |
||
| + | |[[File:Mob Blazing Imp.png]]<br />[[Elite Blazing Imp]]<br />★ |
||
| + | |[[File:Mob Pointy Imp.png|100px]]<br />[[Elite Pointy Imp]]<br />★ |
||
| + | | |
||
| + | |[[File:Use Adequate Exploration Box.png]]<br />[[Adequate Exploration Box]] x 1 |
||
| + | |- |
||
| + | |[[File:Mob Pierre.png|100px]]<br />[[Pierre/Monster#Normal|Pierre]]<br />★★★★★ |
||
| + | |[[File:Mob Von Bon.png|100px]]<br />[[Von Bon/Monster#Normal|Von Bon]]<br />★★★★★ |
||
| + | |[[File:Mob Wrathful Crimson Queen.png|100px]]<br />[[Crimson Queen/Monster#Normal|Crimson Queen]]<br />★★★★★ |
||
| + | |[[File:Mob Vellum.png|100px]]<br />[[Vellum/Monster#Normal|Vellum/Monster#Vellum]]<br />★★★★★ |
||
| + | | |
||
| + | |[[File:Use Decent Exploration Box.png]]<br />[[Decent Exploration Box]] x 1 |
||
| + | |- |
||
| + | |[[File:Mob Pierre.png|100px]]<br />[[Pierre/Monster#Chaos|Chaos Pierre]]<br />★★★★★ |
||
| + | |[[File:Mob Von Bon.png|100px]]<br />[[Von Bon/Monster#Chaos|Chaos Von Bon]]<br />★★★★★ |
||
| + | |[[File:Mob Wrathful Crimson Queen.png|100px]]<br />[[Crimson Queen/Monster#Chaos|Chaos Crimson Queen]]<br />★★★★★ |
||
| + | |[[File:Mob Vellum.png|100px]]<br />[[Vellum/Monster#Chaos|Chaos Vellum]]<br />★★★★★ |
||
| + | | |
||
| + | |[[File:Use Substantial Exploration Box.png]]<br />[[Substantial Exploration Box]] x 1 |
||
| + | |} |
||
| + | {|class="wikitable mw-collapsible mw-collapsed" width="100%" style="background:#F0F8FF; text-align:center" data-expandtext="show" data-collapsetext="hide" |
||
| + | !colspan="1"|Overall Reward |
||
| + | |- |
||
| + | !width="{{#expr:100/1}}%"|[[File:Use Character Slot Expansion Coupon.png]]<br />[[Character Slot Expansion Coupon]] x 1 |
||
| + | |} |
||
| + | |||
| + | ===Sleepywood (II)=== |
||
| + | {|class="wikitable mw-collapsible mw-collapsed" width="100%" style="background:#F0F8FF; text-align:center" data-expandtext="show" data-collapsetext="hide" |
||
| + | !colspan="6"|Sleepywood (II) |
||
| + | |- |
||
| + | !width="{{#expr:100/6}}%"|Monster |
||
| + | !width="{{#expr:100/6}}%"|Monster |
||
| + | !width="{{#expr:100/6}}%"|Monster |
||
| + | !width="{{#expr:100/6}}%"|Monster |
||
| + | !width="{{#expr:100/6}}%"|Monster |
||
| + | !width="{{#expr:100/6}}%"|Reward |
||
| + | |- |
||
| + | |[[File:Mob Typhon.png|100px]]<br />[[Typhon]]<br />★ |
||
| + | |[[File:Mob Leprechaun.png]]<br />[[Leprechaun]]<br />★ |
||
| + | |[[File:Mob Elderwraith.png]]<br />[[Elderwraith]]<br />★ |
||
| + | |[[File:Mob Crimson Stirge.png]]<br />[[Crimson Stirge]]<br />★ |
||
| + | | |
||
| + | |[[File:Use Trifling Exploration Box.png]]<br />[[Trifling Exploration Box]] x 1 |
||
| + | |- |
||
| + | |[[File:Mob Elite Stormbreaker.png|100px]]<br />[[Elite Stormbreaker]]<br />★ |
||
| + | |[[File:Mob Elite Firebrand.png]]<br />[[Elite Firebrand]]<br />★ |
||
| + | |[[File:Mob Elite Windraider.png]]<br />[[Elite Windraider]]<br />★ |
||
| + | |[[File:Mob Elite Nightshadow.png]]<br />[[Elite Nightshadow]]<br />★ |
||
| + | | |
||
| + | |[[File:Use Adequate Exploration Box.png]]<br />[[Adequate Exploration Box]] x 1 |
||
| + | |- |
||
| + | |[[File:Mob Master Red Nirg.png|100px]]<br />[[Master Red Nirg]]<br />★★★★ |
||
| + | |[[File:Mob Elite Scarlet Phoenix.png|100px]]<br />[[Elite Scarlet Phoenix]]<br />★ |
||
| + | |[[File:Mob Elite Azure Ocelot.png|100px]]<br />[[Elite Azure Ocelot]]<br />★ |
||
| + | |[[File:Mob Corrupted Imp.png|100px]]<br />[[Corrupted Imp]]<br />★ |
||
| + | | |
||
| + | |[[File:Use Adequate Exploration Box.png]]<br />[[Adequate Exploration Box]] x 1 |
||
| + | |- |
||
| + | |[[File:Mob Dark Demon Swordsman.png]]<br />[[Dark Demon Swordsman]]<br />★ |
||
| + | |[[File:Mob Dark Demon Swordmaster.png]]<br />[[Dark Demon Swordmaster]]<br />★ |
||
| + | |[[File:Mob Dark Demon Axeman.png|100px]]<br />[[Dark Demon Axeman]]<br />★ |
||
| + | |[[File:Mob Dark Demon Axemaster.png]]<br />Unstoppable [[Dark Demon Axemaster]]<br />★★★ |
||
| + | |[[File:Mob Dark Demon Shieldbearer.png|100px]]<br />[[Dark Demon Shieldbearer]]<br />★ |
||
| + | |[[File:Use Decent Exploration Box.png]]<br />[[Decent Exploration Box]] x 1 |
||
| + | |- |
||
| + | |[[File:Mob Damien.png|100px]]<br />[[Damien/Monster|Damien]]<br />★★★★★ |
||
| + | |[[File:Mob Dark Demon Eagle Rider.png|100px]]<br />[[Dark Demon Eagle Rider]]<br />★★ |
||
| + | |[[File:Mob Dark Demon Shieldmaster.png|100px]]<br />[[Dark Demon Shieldmaster]]<br />★ |
||
| + | |[[File:Mob Dark Demon Wolfrider.png|100px]]<br />[[Dark Demon Wolfrider]]<br />★ |
||
| + | |[[File:Mob Dark Demon Wolfmaster.png|100px]]<br />[[Dark Demon Wolfmaster]]<br />★ |
||
| + | |[[File:Use Substantial Exploration Box.png]]<br />[[Substantial Exploration Box]] x 1 |
||
| + | |} |
||
| + | {|class="wikitable mw-collapsible mw-collapsed" width="100%" style="background:#F0F8FF; text-align:center" data-expandtext="show" data-collapsetext="hide" |
||
| + | !colspan="1"|Overall Reward |
||
| + | |- |
||
| + | !width="{{#expr:100/1}}%"|[[File:Setup Crimson Stirge Cube Chair.png]]<br />[[Crimson Stirge Cube Chair]] x 1 |
||
| + | |} |
||
| + | ===Kerning Tower=== |
||
| + | {|class="wikitable mw-collapsible mw-collapsed" width="100%" style="background:#F0F8FF; text-align:center" data-expandtext="show" data-collapsetext="hide" |
||
| + | !colspan="6"|Kerning Tower |
||
| + | |- |
||
| + | !width="{{#expr:100/6}}%"|Monster |
||
| + | !width="{{#expr:100/6}}%"|Monster |
||
| + | !width="{{#expr:100/6}}%"|Monster |
||
| + | !width="{{#expr:100/6}}%"|Monster |
||
| + | !width="{{#expr:100/6}}%"|Monster |
||
| + | !width="{{#expr:100/6}}%"|Reward |
||
| + | |- |
||
| + | |[[File:Mob Greatest Oldies Album.png]]<br />[[Greatest Oldies Album]]<br />★ |
||
| + | |[[File:Mob Latest Hits Album.png]]<br />[[Latest Hits Album]]<br />★ |
||
| + | |[[File:Mob Cheap Amplifier.png|100px]]<br />Cheap Amplifier<br />'''SPECIAL''' |
||
| + | |[[File:Mob Fancy Amplifier.png|100px]]<br />Fancy Amplifier<br />'''SPECIAL''' |
||
| + | |[[File:Mob Next-gen Speaker.png|100px]]<br />[[Next-gen Speaker]]<br />★ |
||
| + | |[[File:Use Decent Exploration Box.png]]<br />[[Decent Exploration Box]] x 1 |
||
| + | |- |
||
| + | |[[File:Mob Blue Raspberry Jelly Juice.png]]<br />[[Blue Raspberry Jelly Juice]]<br />★ |
||
| + | |[[File:Mob Grape Jelly Juice.png]]<br />[[Grape Jelly Juice]]<br />★ |
||
| + | |[[File:Mob Enraged Espresso Machine.png|100px]]<br />Evasive [[Enraged Espresso Machine]]<br />★★★ |
||
| + | | |
||
| + | | |
||
| + | |[[File:Use Adequate Exploration Box.png]]<br />[[Adequate Exploration Box]] x 1 |
||
| + | |- |
||
| + | |[[File:Mob Green Notebook.png]]<br />[[Green Notebook]]<br />★ |
||
| + | |[[File:Mob Blue Notebook.png]]<br />[[Blue Notebook]]<br />★ |
||
| + | |[[File:Mob Yellow Headphones.png|100px]]<br />[[Yellow Headphones]]<br />★ |
||
| + | |[[File:Mob Red Headphones.png|100px]]<br />[[Red Headphones]]<br />★ |
||
| + | | |
||
| + | |[[File:Use Monsterbloom.png]]<br />[[Cheap Amplifier Monsterbloom]] x 1 |
||
| + | |- |
||
| + | |[[File:Mob Killer Cosmetics.png]]<br />[[Killer Cosmetics]]<br />★ |
||
| + | |[[File:Mob Deadly Dressing Table.png|100px]]<br />[[Deadly Dressing Table]]<br />★ |
||
| + | |[[File:Mob Harried Hair Roller.png|100px]]<br />[[Harried Hair Roller]]<br />★ |
||
| + | |[[File:Mob Peeved Perm Machine.png|100px]]<br />[[Peeved Perm Machine]]<br />★ |
||
| + | |[[File:Mob Spirit of Rock.png|100px]]<br />[[Spirit of Rock]]<br />★★★★ |
||
| + | |[[File:Use Decent Exploration Box.png]]<br />[[Decent Exploration Box]] x 1 |
||
| + | |- |
||
| + | |[[File:Mob Enraged Espresso Machine.png|100px]]<br />[[Enraged Espresso Machine#Star Force|[*] Enraged Espresso Machine]]<br />★★★ |
||
| + | |[[File:Mob Blue Notebook.png]]<br />[[Blue Notebook#Star Force|[*] Blue Notebook]]<br />★★ |
||
| + | |[[File:Mob Red Headphones.png|100px]]<br />[[Red Headphones#Star Force|[*] Red Headphones]]<br />★★ |
||
| + | |[[File:Mob Deadly Dressing Table.png|100px]]<br />[[Deadly Dressing Table#Star Force|[*] Deadly Dressing Table]]<br />★★ |
||
| + | |[[File:Mob Harried Hair Roller.png|100px]]<br />[[Harried Hair Roller#Star Force|[*] Harried Hair Roller]]<br />★★ |
||
| + | |[[File:Use Monsterbloom.png]]<br />[[Fancy Amplifier Monsterbloom]] x 1 |
||
| + | |} |
||
| + | {|class="wikitable mw-collapsible mw-collapsed" width="100%" style="background:#F0F8FF; text-align:center" data-expandtext="show" data-collapsetext="hide" |
||
| + | !colspan="1"|Overall Reward |
||
| + | |- |
||
| + | !width="{{#expr:100/1}}%"|[[File:Use Mysterious Meso Pouch.png]]<br />[[Mysterious Meso Pouch]] x 3 |
||
| + | |} |
||
| + | |||
| + | ===Medals=== |
||
| + | [[File:Eqp Victoria Monster Collector.png]]<br />'''[[Victoria Monster Collector]]''' |
||
| + | *'''Requirement:''' Collect 50 Victoria Island monsters |
||
| + | [[File:Eqp Victoria Monster Master.png]]<br />'''[[Victoria Monster Master]]''' |
||
| + | *'''Requirement:''' Collect 100 Victoria Island monsters |
||
==Near Victoria== |
==Near Victoria== |
||
| + | ===Near Victoria (I)=== |
||
| − | {{Monster Collection (Near Victoria)}} |
||
| + | {|class="wikitable mw-collapsible mw-collapsed" width="100%" style="background:#F0F8FF; text-align:center" data-expandtext="show" data-collapsetext="hide" |
||
| + | !colspan="6"|Near Victoria (I) |
||
| + | |- |
||
| + | !width="{{#expr:100/6}}%"|Monster |
||
| + | !width="{{#expr:100/6}}%"|Monster |
||
| + | !width="{{#expr:100/6}}%"|Monster |
||
| + | !width="{{#expr:100/6}}%"|Monster |
||
| + | !width="{{#expr:100/6}}%"|Monster |
||
| + | !width="{{#expr:100/6}}%"|Reward |
||
| + | |- |
||
| + | |[[File:Mob Tino.png]]<br />[[Tino]]<br />★ |
||
| + | |[[File:Mob Tiv.png]]<br />[[Tiv]]<br />★ |
||
| + | |[[File:Mob Timu.png]]<br />[[Timu]]<br />★ |
||
| + | |[[File:Mob Tiru.png]]<br />[[Tiru]]<br />★ |
||
| + | |[[File:Mob Tiguru.png]]<br />[[Tiguru]]<br />★ |
||
| + | |[[File:Use Trifling Exploration Box.png]]<br />[[Trifling Exploration Box]] x 1 |
||
| + | |- |
||
| + | |[[File:Mob Muru.png]]<br />[[Muru]]<br />★ |
||
| + | |[[File:Mob Murupa.png]]<br />[[Murupa]]<br />★ |
||
| + | |[[File:Mob Murupia.png]]<br />[[Murupia]]<br />★ |
||
| + | |[[File:Mob Murumuru.png]]<br />[[Murumuru]]<br />★ |
||
| + | |[[File:Mob Murukun.png]]<br />[[Murukun]]<br />★ |
||
| + | |[[File:Use Trifling Exploration Box.png]]<br />[[Trifling Exploration Box]] x 1 |
||
| + | |- |
||
| + | |[[File:Mob Mano.png]]<br />[[Mano]]<br />★★★ |
||
| + | |[[File:Mob Snail.png]]<br />[[Snail]]<br />★ |
||
| + | |[[File:Mob Blue Snail.png]]<br />[[Blue Snail]]<br />★ |
||
| + | |[[File:Mob Red Snail.png]]<br />[[Red Snail]]<br />★ |
||
| + | |[[File:Mob Shroom.png]]<br />[[Shroom]]<br />★ |
||
| + | |[[File:Use Trifling Exploration Box.png]]<br />[[Trifling Exploration Box]] x 1 |
||
| + | |- |
||
| + | |[[File:Mob Ammonite Grumpil.png]]<br />[[Ammonite Grumpil]]<br />★ |
||
| + | |[[File:Mob Fish Grumpil.png]]<br />[[Fish Grumpil]]<br />★ |
||
| + | |[[File:Mob Corrupter Barrels.png]]<br />[[Corrupter Barrels]]<br />★ |
||
| + | |[[File:Mob Polluter Barrel.png]]<br />[[Polluter Barrel]]<br />★ |
||
| + | | |
||
| + | |[[File:Use Trifling Exploration Box.png]]<br />[[Trifling Exploration Box]] x 1 |
||
| + | |- |
||
| + | |[[File:Mob Possibly-Evil Seal.png]]<br />Magic-Resistant Commanding [[Possibly-Evil Seal]]<br />★★★★ |
||
| + | |[[File:Mob Possibly-Evil Walrus.png]]<br />[[Possibly-Evil Walrus]]<br />★ |
||
| + | |[[File:Mob Warmer Bot.png|100px]]<br />[[Warmer Bot]]<br />★ |
||
| + | |[[File:Mob Shaver Bot.png|100px]]<br />[[Shaver Bot]]<br />★ |
||
| + | | |
||
| + | |[[File:Use Decent Exploration Box.png]]<br />[[Decent Exploration Box]] x 1 |
||
| + | |} |
||
| + | {|class="wikitable mw-collapsible mw-collapsed" width="100%" style="background:#F0F8FF; text-align:center" data-expandtext="show" data-collapsetext="hide" |
||
| + | !colspan="1"|Overall Reward |
||
| + | |- |
||
| + | !width="{{#expr:100/1}}%"|[[File:Setup Tino Cube Chair.png]]<br />[[Tino Cube Chair]] x 1 |
||
| + | |} |
||
| + | ===Tower of Oz=== |
||
| + | {|class="wikitable mw-collapsible mw-collapsed" width="100%" style="background:#F0F8FF; text-align:center" data-expandtext="show" data-collapsetext="hide" |
||
| + | !colspan="6"|Tower of Oz |
||
| + | |- |
||
| + | !width="{{#expr:100/6}}%"|Monster |
||
| + | !width="{{#expr:100/6}}%"|Monster |
||
| + | !width="{{#expr:100/6}}%"|Monster |
||
| + | !width="{{#expr:100/6}}%"|Monster |
||
| + | !width="{{#expr:100/6}}%"|Monster |
||
| + | !width="{{#expr:100/6}}%"|Reward |
||
| + | |- |
||
| + | |[[File:Mob Ancient Blue Slime.png|100px]]<br />[[Ancient Blue Slime]]<br />★ |
||
| + | |[[File:Mob Ancient Purple Slime.png|100px]]<br />[[Ancient Purple Slime]]<br />★ |
||
| + | |[[File:Mob Ancient Blue Turtle.png|100px]]<br />[[Ancient Blue Turtle]]<br />★ |
||
| + | |[[File:Mob Ancient Orange Turtle.png|100px]]<br />[[Ancient Orange Turtle]]<br />★ |
||
| + | |[[File:Mob Giant Spider.png|100px]]<br />[[Giant Spider]]<br />★★ |
||
| + | |[[File:Use Trifling Exploration Box.png]]<br />[[Trifling Exploration Box]] x 1 |
||
| + | |- |
||
| + | |[[File:Mob Blue Volcano Bug.png|100px]]<br />[[Blue Volcano Bug]]<br />★ |
||
| + | |[[File:Mob Brown Volcano Bug.png|100px]]<br />[[Brown Volcano Bug]]<br />★ |
||
| + | |[[File:Mob Flower Golem.png|100px]]<br />[[Flower Golem]]<br />★ |
||
| + | |[[File:Mob Black Flower Golem.png|100px]]<br />[[Black Flower Golem]]<br />★ |
||
| + | |[[File:Mob Tin Woodman.png|100px]]<br />[[Tin Woodman]]<br />★★★★ |
||
| + | |[[File:Use Adequate Exploration Box.png]]<br />[[Adequate Exploration Box]] x 1 |
||
| + | |- |
||
| + | |[[File:Mob Blue Flower Cow.png|100px]]<br />[[Blue Flower Cow]]<br />★ |
||
| + | |[[File:Mob Green Flower Cow.png|100px]]<br />[[Green Flower Cow]]<br />★ |
||
| + | |[[File:Mob White Thorny Bear.png|100px]]<br />[[White Thorny Bear]]<br />★ |
||
| + | |[[File:Mob Brown Thorny Bear.png|100px]]<br />[[Brown Thorny Bear]]<br />★ |
||
| + | |[[File:Mob Cowardly Lion.png|100px]]<br />[[Cowardly Lion]]<br />★★★★ |
||
| + | |[[File:Use Adequate Exploration Box.png]]<br />[[Adequate Exploration Box]] x 1 |
||
| + | |- |
||
| + | |[[File:Mob Orange Ancient Slime.png|100px]]<br />[[Orange Ancient Slime]]<br />★ |
||
| + | |[[File:Mob Blue Insectivore Slime.png|100px]]<br />[[Blue Insectivore Slime]]<br />★ |
||
| + | |[[File:Mob Yellow Insectivore Slime.png|100px]]<br />[[Yellow Insectivore Slime]]<br />★ |
||
| + | |[[File:Mob Blue Ancient Slime.png|100px]]<br />[[Blue Ancient Slime]]<br />★ |
||
| + | |[[File:Mob Scarecrow.png|100px]]<br />[[Scarecrow]]<br />★★★★ |
||
| + | |[[File:Use Decent Exploration Box.png]]<br />[[Decent Exploration Box]] x 1 |
||
| + | |- |
||
| + | |[[File:Mob Yellow Curly Cow.png|100px]]<br />[[Yellow Curly Cow]]<br />★ |
||
| + | |[[File:Mob Purple Curly Cow.png|100px]]<br />[[Purple Curly Cow]]<br />★ |
||
| + | |[[File:Mob Ancient Beetle.png]]<br />[[Ancient Beetle]]<br />★ |
||
| + | |[[File:Mob Orange Ancient Beetle.png]]<br />[[Orange Ancient Beetle]]<br />★ |
||
| + | |[[File:Mob Dorothy.png|100px]]<br />[[Dorothy]]<br />★★★★★ |
||
| + | |[[File:Use Substantial Exploration Box.png]]<br />[[Substantial Exploration Box]] x 1 |
||
| + | |} |
||
| + | {|class="wikitable mw-collapsible mw-collapsed" width="100%" style="background:#F0F8FF; text-align:center" data-expandtext="show" data-collapsetext="hide" |
||
| + | !colspan="1"|Overall Reward |
||
| + | |- |
||
| + | !width="{{#expr:100/1}}%"|[[File:Setup Dorothy Cube Chair.png]]<br />[[Dorothy Cube Chair]] x 1 |
||
| + | |} |
||
| + | |||
| + | ===Medals=== |
||
| + | [[File:Eqp Island Explorer.png]]<br />'''[[Island Explorer]]''' |
||
| + | *'''Requirement:''' Collect 50 Near Victoria monsters (currently cannot be obtained) |
||
==Edelstein== |
==Edelstein== |
||
| + | ===Edelstein (I)=== |
||
| − | {{Monster Collection (Edelstein)}} |
||
| + | {|class="wikitable mw-collapsible mw-collapsed" width="100%" style="background:#F0F8FF; text-align:center" data-expandtext="show" data-collapsetext="hide" |
||
| + | !colspan="6"|Edelstein (I) |
||
| + | |- |
||
| + | !width="{{#expr:100/6}}%"|Monster |
||
| + | !width="{{#expr:100/6}}%"|Monster |
||
| + | !width="{{#expr:100/6}}%"|Monster |
||
| + | !width="{{#expr:100/6}}%"|Monster |
||
| + | !width="{{#expr:100/6}}%"|Monster |
||
| + | !width="{{#expr:100/6}}%"|Reward |
||
| + | |- |
||
| + | |[[File:Mob Potted Sprout.png]]<br />[[Potted Sprout]]<br />★ |
||
| + | |[[File:Mob Potted Morning Glory.png]]<br />[[Potted Morning Glory]]<br />★ |
||
| + | |[[File:Mob Grape Juice Bottle.png]]<br />[[Grape Juice Bottle]]<br />★ |
||
| + | |[[File:Mob Patrol Robot.png]]<br />[[Patrol Robot]]<br />★ |
||
| + | |[[File:Mob Strange Sign.png]]<br />[[Strange Sign]]<br />★ |
||
| + | |[[File:Use Trifling Exploration Box.png]]<br />[[Trifling Exploration Box]] x 1 |
||
| + | |- |
||
| + | |[[File:Mob Serpent.png]]<br />[[Serpent]]<br />★ |
||
| + | |[[File:Mob Water Thief Monster.png]]<br />[[Water Thief Monster]]<br />★ |
||
| + | |[[File:Mob Dust Box.png]]<br />[[Dust Box]]<br />★ |
||
| + | |[[File:Mob Streetlight.png]]<br />[[Streetlight]]<br />★ |
||
| + | |[[File:Mob Patrol Robot S.png]]<br />[[Patrol Robot S]]<br />★ |
||
| + | |[[File:Use Trifling Exploration Box.png]]<br />[[Trifling Exploration Box]] x 1 |
||
| + | |- |
||
| + | |[[File:Mob Safety First.png]]<br />[[Safety First]]<br />★ |
||
| + | |[[File:Mob Baby Boulder Muncher.png]]<br />[[Baby Boulder Muncher]]<br />★ |
||
| + | |[[File:Mob Big Boulder Muncher.png]]<br />[[Big Boulder Muncher]]<br />★ |
||
| + | |[[File:Mob Guard Robot.png|100px]]<br />[[Guard Robot]]<br />★ |
||
| + | |[[File:Mob Guard Robot L.png|100px]]<br />[[Guard Robot L]]<br />★ |
||
| + | |[[File:Use Adequate Exploration Box.png]]<br />[[Adequate Exploration Box]] x 1 |
||
| + | |- |
||
| + | |[[File:Mob Big Spider.png]]<br />[[Big Spider]]<br />★ |
||
| + | |[[File:Mob Cart Bear.png]]<br />[[Cart Bear]]<br />★ |
||
| + | |[[File:Mob Racoco.png]]<br />[[Racoco]]<br />★ |
||
| + | |[[File:Mob Racaroni.png]]<br />[[Racaroni]]<br />★ |
||
| + | |[[File:Mob Raco.png]]<br />[[Raco]]<br />★ |
||
| + | |[[File:Use Adequate Exploration Box.png]]<br />[[Adequate Exploration Box]] x 1 |
||
| + | |- |
||
| + | |[[File:Mob Security System.png|100px]]<br />[[Security System]]<br />★ |
||
| + | |[[File:Mob Enhanced Security System.png|100px]]<br />Poisonous [[Enhanced Security System]]<br />★★★ |
||
| + | |[[File:Mob AF Android.png]]<br />[[AF Android]]<br />★ |
||
| + | |[[File:Mob Broken DF Android.png]]<br />[[Broken DF Android]]<br />★ |
||
| + | |[[File:Mob Ore Muncher.png|100px]]<br />[[Ore Muncher]]<br />★ |
||
| + | |[[File:Use Decent Exploration Box.png]]<br />[[Decent Exploration Box]] x 1 |
||
| + | |} |
||
| + | {|class="wikitable mw-collapsible mw-collapsed" width="100%" style="background:#F0F8FF; text-align:center" data-expandtext="show" data-collapsetext="hide" |
||
| + | !colspan="1"|Overall Reward |
||
| + | |- |
||
| + | !width="{{#expr:100/1}}%"|[[File:Setup Water Thief Monster Cube Chair.png]]<br />[[Water Thief Monster Cube Chair]] x 1 |
||
| + | |} |
||
| + | |||
| + | ===Scrapyard=== |
||
| + | {|class="wikitable mw-collapsible mw-collapsed" width="100%" style="background:#F0F8FF; text-align:center" data-expandtext="show" data-collapsetext="hide" |
||
| + | !colspan="6"|Scrapyard |
||
| + | |- |
||
| + | !width="{{#expr:100/6}}%"|Monster |
||
| + | !width="{{#expr:100/6}}%"|Monster |
||
| + | !width="{{#expr:100/6}}%"|Monster |
||
| + | !width="{{#expr:100/6}}%"|Monster |
||
| + | !width="{{#expr:100/6}}%"|Monster |
||
| + | !width="{{#expr:100/6}}%"|Reward |
||
| + | |- |
||
| + | |[[File:Mob Modded Scaredroid.png]]<br />[[Modded Scaredroid]]<br />★ |
||
| + | |[[File:Mob Modded Broken Android.png]]<br />Befuddling [[Modded Broken Android]]<br />★★★ |
||
| + | |[[File:Mob Modded Laseroid.png]]<br />[[Modded Laseroid]]<br />★ |
||
| + | |[[File:Mob Chaseroid Red.png|100px]]<br />[[Chaseroid Red]]<br />★ |
||
| + | |[[File:Mob Chaseroid Blue.png|100px]]<br />[[Chaseroid Blue]]<br />★ |
||
| + | |[[File:Use Trifling Exploration Box.png]]<br />[[Trifling Exploration Box]] x 1 |
||
| + | |- |
||
| + | |[[File:Mob Hunterizer Red.png]]<br />[[Hunterizer Red]]<br />★ |
||
| + | |[[File:Mob Hunterizer Blue.png]]<br />[[Hunterizer Blue]]<br />★ |
||
| + | |[[File:Mob Modded Buffroid.png|100px]]<br />[[Modded Buffroid]]<br />★ |
||
| + | |[[File:Mob Salvoroid Red.png|100px]]<br />[[Salvoroid Red]]<br />★ |
||
| + | |[[File:Mob Salvoroid Blue.png|100px]]<br />[[Salvoroid Blue]]<br />★ |
||
| + | |[[File:Use Adequate Exploration Box.png]]<br />[[Adequate Exploration Box]] x 1 |
||
| + | |- |
||
| + | |[[File:Mob Modded Deliverbot.png|100px]]<br />[[Modded Deliverbot]]<br />★ |
||
| + | |[[File:Mob Outer Guard EX.png|100px]]<br />[[Outer Guard EX]]<br />★ |
||
| + | |[[File:Mob Inner Guard EX.png|100px]]<br />[[Inner Guard EX]]<br />★ |
||
| + | |[[File:Mob Demolishizer (2).png|100px]]<br />[[Demolishizer]]<br />★★★★ |
||
| + | |[[File:Mob Repairoid.png]]<br />[[Repairoid]]<br />★ |
||
| + | |[[File:Use Adequate Exploration Box.png]]<br />[[Adequate Exploration Box]] x 1 |
||
| + | |- |
||
| + | |[[File:Mob Steel Xenoroid DX.png]]<br />[[Steel Xenoroid DX]]<br />★ |
||
| + | |[[File:Mob Scrap Xenoroid DX.png]]<br />[[Scrap Xenoroid DX]]<br />★ |
||
| + | |[[File:Mob Steel Xenoroid EX.png]]<br />Overwhelming [[Steel Xenoroid EX]]<br />★★★ |
||
| + | |[[File:Mob Steel Xenoroid EX.png]]<br />[[Steel Xenoroid EX]]<br />★ |
||
| + | |[[File:Mob Scrap Xenoroid EX.png]]<br />[[Scrap Xenoroid EX]]<br />★ |
||
| + | |[[File:Use Decent Exploration Box.png]]<br />[[Decent Exploration Box]] x 1 |
||
| + | |- |
||
| + | |[[File:Mob Lotus.png]]<br />[[Lotus/Monster|Lotus]]<br />★★★★★ |
||
| + | |[[File:Mob Alloy Xenoroid DX.png]]<br />Dry [[Alloy Xenoroid DX]]<br />★★★ |
||
| + | |[[File:Mob Alloy Xenoroid DX.png]]<br />[[Alloy Xenoroid DX]]<br />★ |
||
| + | |[[File:Mob Alloy Xenoroid EX.png]]<br />[[Alloy Xenoroid EX]]<br />★ |
||
| + | |[[File:Mob Modded Megaroid.png|100px]]<br />[[Modded Megaroid]]<br />★ |
||
| + | |[[File:Use Substantial Exploration Box.png]]<br />[[Substantial Exploration Box]] x 1 |
||
| + | |} |
||
| + | {|class="wikitable mw-collapsible mw-collapsed" width="100%" style="background:#F0F8FF; text-align:center" data-expandtext="show" data-collapsetext="hide" |
||
| + | !colspan="1"|Overall Reward |
||
| + | |- |
||
| + | !width="{{#expr:100/1}}%"|[[File:Use Pendant Slot Coupon.png]]<br />[[Pendant Slot Coupon (30 Days)]] x 1 |
||
| + | |} |
||
| + | |||
| + | ===Medals=== |
||
| + | [[File:Eqp Edelstein Monster Collector.png]]<br />'''[[Edelstein Monster Collector]]''' |
||
| + | *'''Requirement:''' Collect 50 Edelstein monsters |
||
==El Nath== |
==El Nath== |
||
| + | ===Orbis=== |
||
| − | {{Monster Collection (El Nath)}} |
||
| + | {|class="wikitable mw-collapsible mw-collapsed" width="100%" style="background:#F0F8FF; text-align:center" data-expandtext="show" data-collapsetext="hide" |
||
| + | !colspan="6"|Orbis |
||
| + | |- |
||
| + | !width="{{#expr:100/6}}%"|Monster |
||
| + | !width="{{#expr:100/6}}%"|Monster |
||
| + | !width="{{#expr:100/6}}%"|Monster |
||
| + | !width="{{#expr:100/6}}%"|Monster |
||
| + | !width="{{#expr:100/6}}%"|Monster |
||
| + | !width="{{#expr:100/6}}%"|Reward |
||
| + | |- |
||
| + | |[[File:Mob Jr. Sentinel.png]]<br />[[Jr. Sentinel]]<br />★ |
||
| + | |[[File:Mob Sentinel.png]]<br />[[Sentinel]]<br />★ |
||
| + | |[[File:Mob Ice Sentinel.png]]<br />[[Ice Sentinel]]<br />★ |
||
| + | |[[File:Mob Fire Sentinel.png]]<br />[[Fire Sentinel]]<br />★ |
||
| + | |[[File:Mob Crimson Balrog.png|100px]]<br />[[Crimson Balrog]]<br />★★★ |
||
| + | |[[File:Use Trifling Exploration Box.png]]<br />[[Trifling Exploration Box]] x 1 |
||
| + | |- |
||
| + | |[[File:Mob Jr. Cellion.png]]<br />[[Jr. Cellion]]<br />★ |
||
| + | |[[File:Mob Jr. Lioner.png]]<br />[[Jr. Lioner]]<br />★ |
||
| + | |[[File:Mob Jr. Grupin.png]]<br />[[Jr. Grupin]]<br />★ |
||
| + | |[[File:Mob Jr. Lucida.png]]<br />[[Jr. Lucida]]<br />★ |
||
| + | | |
||
| + | |[[File:Use Adequate Exploration Box.png]]<br />[[Adequate Exploration Box]] x 1 |
||
| + | |- |
||
| + | |[[File:Mob Cellion.png]]<br />[[Cellion]]<br />★ |
||
| + | |[[File:Mob Lioner.png]]<br />[[Lioner]]<br />★ |
||
| + | |[[File:Mob Grupin.png]]<br />[[Grupin]]<br />★ |
||
| + | |[[File:Mob Lucida.png]]<br />[[Lucida]]<br />★ |
||
| + | |[[File:Mob Eliza.png|100px]]<br />[[Eliza]]<br />★★★ |
||
| + | |[[File:Use Adequate Exploration Box.png]]<br />[[Adequate Exploration Box]] x 1 |
||
| + | |- |
||
| + | |[[File:Mob Lunar Pixie.png]]<br />[[Lunar Pixie]]<br />★ |
||
| + | |[[File:Mob Luster Pixie.png]]<br />Befuddling [[Luster Pixie]]<br />★★★ |
||
| + | |[[File:Mob Star Pixie.png]]<br />[[Star Pixie]]<br />★ |
||
| + | |[[File:Mob Ghost Pixie.png]]<br />[[Ghost Pixie]]<br />★ |
||
| + | |[[File:Mob Papa Pixie.png|100px]]<br />[[Papa Pixie]]<br />★★★★ |
||
| + | |[[File:Use Decent Exploration Box.png]]<br />[[Decent Exploration Box]] x 1 |
||
| + | |- |
||
| + | |[[File:Mob Dark Nependeath.png]]<br />[[Dark Nependeath]]<br />★ |
||
| + | |[[File:Mob Nependeath.png]]<br />[[Nependeath]]<br />★ |
||
| + | |[[File:Mob Golden Scorpie.png|100px]]<br />[[Golden Scorpie]]<br />★ |
||
| + | |[[File:Mob Golden Mammoth.png|100px]]<br />[[Golden Mammoth]]<br />★ |
||
| + | |[[File:Mob Xerxes.png|100px]]<br />[[Xerxes]]<br />★★★★ |
||
| + | |[[File:Use Substantial Exploration Box.png]]<br />[[Substantial Exploration Box]] x 1 |
||
| + | |} |
||
| + | {|class="wikitable mw-collapsible mw-collapsed" width="100%" style="background:#F0F8FF; text-align:center" data-expandtext="show" data-collapsetext="hide" |
||
| + | !colspan="1"|Overall Reward |
||
| + | |- |
||
| + | !width="{{#expr:100/1}}%"|[[File:Use Selective 4 Slot Coupon.png]]<br />[[Selective 4 Slot Coupon]] x 1 |
||
| + | |} |
||
| + | |||
| + | ===El Nath (I)=== |
||
| + | {|class="wikitable mw-collapsible mw-collapsed" width="100%" style="background:#F0F8FF; text-align:center" data-expandtext="show" data-collapsetext="hide" |
||
| + | !colspan="6"|El Nath (I) |
||
| + | |- |
||
| + | !width="{{#expr:100/6}}%"|Monster |
||
| + | !width="{{#expr:100/6}}%"|Monster |
||
| + | !width="{{#expr:100/6}}%"|Monster |
||
| + | !width="{{#expr:100/6}}%"|Monster |
||
| + | !width="{{#expr:100/6}}%"|Monster |
||
| + | !width="{{#expr:100/6}}%"|Reward |
||
| + | |- |
||
| + | |[[File:Mob Leatty.png]]<br />[[Leatty]]<br />★ |
||
| + | |[[File:Mob Dark Leatty.png]]<br />[[Dark Leatty]]<br />★ |
||
| + | |[[File:Mob Jr. Pepe.png]]<br />[[Jr. Pepe]]<br />★ |
||
| + | |[[File:Mob Jr. Yeti.png]]<br />[[Jr. Yeti]]<br />★ |
||
| + | |[[File:Mob Dark Jr. Yeti.png]]<br />[[Dark Jr. Yeti]]<br />★ |
||
| + | |[[File:Use Trifling Exploration Box.png]]<br />[[Trifling Exploration Box]] x 1 |
||
| + | |- |
||
| + | |[[File:Mob Dark Pepe.png]]<br />[[Dark Pepe]]<br />★ |
||
| + | |[[File:Mob Hector.png]]<br />[[Hector]]<br />★ |
||
| + | |[[File:Mob White Fang.png]]<br />Shadowy [[White Fang]]<br />★★★ |
||
| + | |[[File:Mob Snow Witch.png|100px]]<br />[[Snow Witch]]<br />★★★★ |
||
| + | | |
||
| + | |[[File:Use Monsterbloom.png]]<br />[[Ice Golem Monsterbloom]] x 1 |
||
| + | |- |
||
| + | |[[File:Mob Yeti.png]]<br />[[Yeti]]<br />★ |
||
| + | |[[File:Mob Dark Yeti.png]]<br />[[Dark Yeti]]<br />★ |
||
| + | |[[File:Mob Pepe.png]]<br />[[Separated Pepe]]<br />★ |
||
| + | |[[File:Mob Yeti and Pepe.png]]<br />[[Yeti and Pepe]]<br />★ |
||
| + | |[[File:Mob Dark Yeti and Pepe.png]]<br />[[Dark Yeti and Pepe]]<br />★ |
||
| + | |[[File:Use Adequate Exploration Box.png]]<br />[[Adequate Exploration Box]] x 1 |
||
| + | |- |
||
| + | |[[File:Mob Snowman.png|100px]]<br />[[Snowman]]<br />★★★ |
||
| + | |[[File:Mob Werewolf.png|100px]]<br />[[Werewolf (Monster)|Werewolf]]<br />★ |
||
| + | |[[File:Mob Lycanthrope.png|100px]]<br />[[Lycanthrope]]<br />★ |
||
| + | |[[File:Mob Riche.png]]<br />[[Riche]]<br />★★★ |
||
| + | | |
||
| + | |[[File:Use Decent Exploration Box.png]]<br />[[Decent Exploration Box]] x 1 |
||
| + | |- |
||
| + | |[[File:Mob Hoblin Hector.png]]<br />[[Hoblin Hector]]<br />★ |
||
| + | |[[File:Mob Elite Hoblin.png]]<br />[[Elite Hoblin]]<br />★ |
||
| + | |[[File:Mob Combat Hoblin.png|100px]]<br />[[Combat Hoblin]]<br />★ |
||
| + | |[[File:Mob Ferocious Hoblin.png|100px]]<br />[[Ferocious Hoblin]]<br />★ |
||
| + | |[[File:Mob Rex.png|100px]]<br />[[Rex]]<br />★★★★ |
||
| + | |[[File:Use Substantial Exploration Box.png]]<br />[[Substantial Exploration Box]] x 1 |
||
| + | |} |
||
| + | {|class="wikitable mw-collapsible mw-collapsed" width="100%" style="background:#F0F8FF; text-align:center" data-expandtext="show" data-collapsetext="hide" |
||
| + | !colspan="1"|Overall Reward |
||
| + | |- |
||
| + | !width="{{#expr:100/1}}%"|[[File:Etc Spell Trace.png]]<br />[[Spell Trace]] x 500 |
||
| + | |} |
||
| + | |||
| + | ===El Nath (II)=== |
||
| + | {|class="wikitable mw-collapsible mw-collapsed" width="100%" style="background:#F0F8FF; text-align:center" data-expandtext="show" data-collapsetext="hide" |
||
| + | !colspan="6"|El Nath (II) |
||
| + | |- |
||
| + | !width="{{#expr:100/6}}%"|Monster |
||
| + | !width="{{#expr:100/6}}%"|Monster |
||
| + | !width="{{#expr:100/6}}%"|Monster |
||
| + | !width="{{#expr:100/6}}%"|Monster |
||
| + | !width="{{#expr:100/6}}%"|Monster |
||
| + | !width="{{#expr:100/6}}%"|Reward |
||
| + | |- |
||
| + | |[[File:Mob Crocky the Gatekeeper.png|100px]]<br />[[Crocky the Gatekeeper]]<br />★ |
||
| + | |[[File:Mob Reindeer.png|100px]]<br />[[Reindeer]]<br />★ |
||
| + | |[[File:Mob Blood Reindeer.png|100px]]<br />[[Blood Reindeer]]<br />★ |
||
| + | |[[File:Mob Bearwolf.png|100px]]<br />[[Bearwolf]]<br />★ |
||
| + | |[[File:Mob Grey Vulture.png|100px]]<br />[[Grey Vulture]]<br />★ |
||
| + | |[[File:Use Trifling Exploration Box.png]]<br />[[Trifling Exploration Box]] x 1 |
||
| + | |- |
||
| + | |[[File:Mob Golden Bee.png]]<br />[[Golden Bee]]<br />★ |
||
| + | |[[File:Mob Frozen Rose.png|100px]]<br />[[Frozen Rose]]<br />★ |
||
| + | |[[File:Mob Garden Golem.png|100px]]<br />[[Garden Golem]]<br />★ |
||
| + | |[[File:Mob Castle Golem.png|100px]]<br />Seal Master [[Castle Golem]]<br />★★★ |
||
| + | |[[File:Mob King Castle Golem.png|100px]]<br />[[King Castle Golem]]<br />★ |
||
| + | |[[File:Use Adequate Exploration Box.png]]<br />[[Adequate Exploration Box]] x 1 |
||
| + | |- |
||
| + | |[[File:Mob Prison Guard Boar.png|100px]]<br />[[Prison Guard Boar]]<br />★ |
||
| + | |[[File:Mob Prison Guard Rhino.png|100px]]<br />[[Prison Guard Rhino]]<br />★ |
||
| + | |[[File:Mob Prison Guard Ani.png|100px]]<br />[[Prison Guard Ani]]<br />★★★★ |
||
| + | |[[File:Mob Keymaster Rousseau.png|100px]]<br />[[Keymaster Rousseau]]<br />★ |
||
| + | |[[File:Mob Von Leon.png|100px]]<br />[[Von Leon/Monster|Von Leon]]<br />★★★★★ |
||
| + | |[[File:Use Decent Exploration Box.png]]<br />[[Decent Exploration Box]] x 1 |
||
| + | |- |
||
| + | |[[File:Mob Flyeye.png]]<br />[[Flyeye]]<br />★ |
||
| + | |[[File:Mob Coolie Zombie.png]]<br />Gassy [[Coolie Zombie]]<br />★★★ |
||
| + | |[[File:Mob Miner Zombie.png]]<br />[[Miner Zombie#Star Force|Miner Zombie]]<br />★★ |
||
| + | |[[File:Mob Cerebes.png|100px]]<br />[[Cerebes#Star Force|[*]Cerebes]]<br />★★ |
||
| + | |[[File:Mob Bain.png]]<br />[[Bain#Star Force|[*]Bain]]<br />★★ |
||
| + | |[[File:Use Adequate Exploration Box.png]]<br />[[Adequate Exploration Box]] x 1 |
||
| + | |- |
||
| + | |[[File:Mob Punco.png|100px]]<br />[[Punco]]<br />★ |
||
| + | |[[File:Mob Opachu.png|100px]]<br />[[Opachu]]<br />★ |
||
| + | |[[File:Mob Cuzco.png|100px]]<br />[[Cuzco#Chaos|Chaos Cuzco]]<br />★ |
||
| + | |[[File:Mob Zakum.png|100px]]<br />[[Zakum]]<br />★★★★★ |
||
| + | |[[File:Mob Zakum.png|100px]]<br />[[Chaos Zakum]]<br />★★★★★ |
||
| + | |[[File:Use Decent Exploration Box.png]]<br />[[Decent Exploration Box]] x 1 |
||
| + | |} |
||
| + | {|class="wikitable mw-collapsible mw-collapsed" width="100%" style="background:#F0F8FF; text-align:center" data-expandtext="show" data-collapsetext="hide" |
||
| + | !colspan="1"|Overall Reward |
||
| + | |- |
||
| + | !width="{{#expr:100/1}}%"|[[File:Setup Yeti Cube Chair.png]]<br />[[Yeti Cube Chair]] x 1 |
||
| + | |} |
||
| + | |||
| + | ===Medals=== |
||
| + | [[File:Eqp El Nath Monster Collector.png]]<br />'''[[El Nath Monster Collector]]''' |
||
| + | *'''Requirement:''' Collect 50 El Nath monsters |
||
==Ludus Lake== |
==Ludus Lake== |
||
| + | ===Ludibrium (I)=== |
||
| − | {{Monster Collection (Ludus Lake)}} |
||
| + | {|class="wikitable mw-collapsible mw-collapsed" width="100%" style="background:#F0F8FF; text-align:center" data-expandtext="show" data-collapsetext="hide" |
||
| + | !colspan="6"|Ludibrium (I) |
||
| + | |- |
||
| + | !width="{{#expr:100/6}}%"|Monster |
||
| + | !width="{{#expr:100/6}}%"|Monster |
||
| + | !width="{{#expr:100/6}}%"|Monster |
||
| + | !width="{{#expr:100/6}}%"|Monster |
||
| + | !width="{{#expr:100/6}}%"|Monster |
||
| + | !width="{{#expr:100/6}}%"|Reward |
||
| + | |- |
||
| + | |[[File:Mob Drumming Bunny.png]]<br />[[Drumming Bunny]]<br />★ |
||
| + | |[[File:Mob Brown Teddy.png]]<br />[[Brown Teddy]]<br />★ |
||
| + | |[[File:Mob Pink Teddy.png]]<br />[[Pink Teddy]]<br />★ |
||
| + | |[[File:Mob Panda Teddy.png]]<br />[[Panda Teddy]]<br />★ |
||
| + | |[[File:Mob Roloduck.png]]<br />[[Roloduck]]<br />★ |
||
| + | |[[File:Use Trifling Exploration Box.png]]<br />[[Trifling Exploration Box]] x 1 |
||
| + | |- |
||
| + | |[[File:Mob Helly.png]]<br />[[Helly]]<br />★ |
||
| + | |[[File:Mob Propelly.png]]<br />[[Propelly]]<br />★ |
||
| + | |[[File:Mob Planey.png]]<br />[[Planey]]<br />★ |
||
| + | |[[File:Mob Chirppy.png]]<br />[[Chirppy]]<br />★ |
||
| + | |[[File:Mob Tweeter.png]]<br />[[Tweeter]]<br />★ |
||
| + | |[[File:Use Adequate Exploration Box.png]]<br />[[Adequate Exploration Box]] x 1 |
||
| + | |- |
||
| + | |[[File:Mob Bloctopus.png]]<br />[[Bloctopus]]<br />★ |
||
| + | |[[File:Mob King Bloctopus.png]]<br />[[King Bloctopus]]<br />★ |
||
| + | |[[File:Mob Rombot.png|100px]]<br />[[Rombot]]<br />★ |
||
| + | |[[File:Mob Block Golem.png|100px]]<br />Poisonous [[Block Golem]]<br />★★★ |
||
| + | |[[File:Mob King Block Golem.png|100px]]<br />[[King Block Golem]]<br />★ |
||
| + | |[[File:Use Adequate Exploration Box.png]]<br />[[Adequate Exploration Box]] x 1 |
||
| + | |- |
||
| + | |[[File:Mob Toy Trojan.png]]<br />[[Toy Trojan]]<br />★ |
||
| + | |[[File:Mob Robo.png]]<br />Unstoppable [[Robo]]<br />★★★ |
||
| + | |[[File:Mob Master Robo.png]]<br />[[Master Robo]]<br />★ |
||
| + | |[[File:Mob Timer.png|100px]]<br />[[Timer]]<br />★★ |
||
| + | | |
||
| + | |[[File:Use Adequate Exploration Box.png]]<br />[[Adequate Exploration Box]] x 1 |
||
| + | |- |
||
| + | |[[File:Mob Ratz.png]]<br />[[Ratz]]<br />★ |
||
| + | |[[File:Mob Black Ratz.png]]<br />[[Black Ratz]]<br />★ |
||
| + | |[[File:Mob Trixter.png]]<br />[[Trixter]]<br />★ |
||
| + | |[[File:Mob Dark Eye from Another Dimension.png]]<br />[[Dark Eye from Another Dimension]]<br />★★ |
||
| + | |[[File:Mob Alishar.png|100px]]<br />[[Alishar]]<br />★★★★ |
||
| + | |[[File:Use Decent Exploration Box.png]]<br />[[Decent Exploration Box]] x 1 |
||
| + | |} |
||
| + | {|class="wikitable mw-collapsible mw-collapsed" width="100%" style="background:#F0F8FF; text-align:center" data-expandtext="show" data-collapsetext="hide" |
||
| + | !colspan="1"|Overall Reward |
||
| + | |- |
||
| + | !width="{{#expr:100/1}}%"|[[File:Setup Robo Cube Chair.png]]<br />[[Robo Cube Chair]] x 1 |
||
| + | |} |
||
| + | |||
| + | ===Ludibrium (II)=== |
||
| + | {|class="wikitable mw-collapsible mw-collapsed" width="100%" style="background:#F0F8FF; text-align:center" data-expandtext="show" data-collapsetext="hide" |
||
| + | !colspan="6"|Ludibrium (II) |
||
| + | |- |
||
| + | !width="{{#expr:100/6}}%"|Monster |
||
| + | !width="{{#expr:100/6}}%"|Monster |
||
| + | !width="{{#expr:100/6}}%"|Monster |
||
| + | !width="{{#expr:100/6}}%"|Monster |
||
| + | !width="{{#expr:100/6}}%"|Monster |
||
| + | !width="{{#expr:100/6}}%"|Reward |
||
| + | |- |
||
| + | |[[File:Mob Tick.png]]<br />[[Tick]]<br />★ |
||
| + | |[[File:Mob Tick-Tock.png]]<br />[[Tick-Tock]]<br />★ |
||
| + | |[[File:Mob Chronos.png]]<br />[[Chronos]]<br />★ |
||
| + | |[[File:Mob Platoon Chronos.png]]<br />[[Platoon Chronos]]<br />★ |
||
| + | |[[File:Mob Master Chronos.png]]<br />[[Master Chronos]]<br />★ |
||
| + | |[[File:Use Trifling Exploration Box.png]]<br />[[Trifling Exploration Box]] x 1 |
||
| + | |- |
||
| + | |[[File:Mob Buffy.png]]<br />[[Buffy#Star Force|[*]Buffy]]<br />★★ |
||
| + | |[[File:Mob Lazy Buffy.png]]<br />[[Lazy Buffy#Star Force|[*]Lazy Buffy]]<br />★★ |
||
| + | |[[File:Mob Buffoon.png|100px]]<br />[[Buffoon#Star Force|[*]Buffoon]]<br />★★ |
||
| + | |[[File:Mob Deep Buffoon.png|100px]]<br />[[Deep Buffoon#Star Force|[*]Deep Buffoon]]<br />★★ |
||
| + | | |
||
| + | |[[File:Use Trifling Exploration Box.png]]<br />[[Trifling Exploration Box]] x 1 |
||
| + | |- |
||
| + | |[[File:Mob Soul Teddy.png]]<br />[[Soul Teddy#Star Force|[*]Soul Teddy]]<br />★★ |
||
| + | |[[File:Mob Master Soul Teddy.png|100px]]<br />[[Master Soul Teddy#Star Force|[*]Master Soul Teddy]]<br />★★ |
||
| + | |[[File:Mob Death Teddy.png|100px]]<br />[[Death Teddy#Star Force|[*]Death Teddy]]<br />★★ |
||
| + | |[[File:Mob Master Death Teddy.png|100px]]<br />[[Master Death Teddy#Star Force|[*]Master Death Teddy]]<br />★★ |
||
| + | | |
||
| + | |[[File:Use Adequate Exploration Box.png]]<br />[[Adequate Exploration Box]] x 1 |
||
| + | |- |
||
| + | |[[File:Mob Ghost Pirate.png|100px]]<br />[[Ghost Pirate#Star Force|[*]Ghost Pirate]]<br />★★ |
||
| + | |[[File:Mob Dual Ghost Pirate.png|100px]]<br />Fragile [[Dual Ghost Pirate#Star Force|[*]Dual Ghost Pirate]]<br />★★★ |
||
| + | |[[File:Mob Spirit Viking.png|100px]]<br />[[Spirit Viking#Star Force|[*]Spirit Viking]]<br />★★ |
||
| + | |[[File:Mob Gigantic Spirit Viking.png|100px]]<br />[[Gigantic Spirit Viking#Star Force|[*]Gigantic Spirit Viking]]<br />★★ |
||
| + | | |
||
| + | |[[File:Use Decent Exploration Box.png]]<br />[[Decent Exploration Box]] x 1 |
||
| + | |- |
||
| + | |[[File:Mob Phantom Watch.png|100px]]<br />[[Phantom Watch#Star Force|[*]Phantom Watch]]<br />★★ |
||
| + | |[[File:Mob Grim Phantom Watch.png|100px]]<br />[[Grim Phantom Watch#Star Force|[*]Grim Phantom Watch]]<br />★★ |
||
| + | |[[File:Mob Gatekeeper.png|100px]]<br />[[Gatekeeper#Star Force|[*]Gatekeeper]]<br />★★ |
||
| + | |[[File:Mob Thanatos.png|100px]]<br />[[Thanatos#Star Force|[*]Thanatos]]<br />★★ |
||
| + | |[[File:Mob Papulatus.png|100px]]<br />[[Papulatus]]<br />★★★★★ |
||
| + | |[[File:Use Decent Exploration Box.png]]<br />[[Decent Exploration Box]] x 1 |
||
| + | |} |
||
| + | {|class="wikitable mw-collapsible mw-collapsed" width="100%" style="background:#F0F8FF; text-align:center" data-expandtext="show" data-collapsetext="hide" |
||
| + | !colspan="1"|Overall Reward |
||
| + | |- |
||
| + | !width="{{#expr:100/1}}%"|[[File:Use 2x EXP Coupon.png]]<br />[[2x EXP Coupon]] x 3 |
||
| + | |} |
||
| + | |||
| + | ===Ellin Forest=== |
||
| + | {|class="wikitable mw-collapsible mw-collapsed" width="100%" style="background:#F0F8FF; text-align:center" data-expandtext="show" data-collapsetext="hide" |
||
| + | !colspan="6"|Ellin Forest |
||
| + | |- |
||
| + | !width="{{#expr:100/6}}%"|Monster |
||
| + | !width="{{#expr:100/6}}%"|Monster |
||
| + | !width="{{#expr:100/6}}%"|Monster |
||
| + | !width="{{#expr:100/6}}%"|Monster |
||
| + | !width="{{#expr:100/6}}%"|Monster |
||
| + | !width="{{#expr:100/6}}%"|Reward |
||
| + | |- |
||
| + | |[[File:Mob Mossy Snail.png]]<br />[[Mossy Snail]]<br />★ |
||
| + | |[[File:Mob Tree Rod.png]]<br />[[Tree Rod]]<br />★ |
||
| + | |[[File:Mob Mossy Mushroom.png]]<br />[[Mossy Mushroom]]<br />★ |
||
| + | |[[File:Mob Stone Bug.png|100px]]<br />[[Stone Bug]]<br />★ |
||
| + | | |
||
| + | |[[File:Use Trifling Exploration Box.png]]<br />[[Trifling Exploration Box]] x 1 |
||
| + | |- |
||
| + | |[[File:Mob Primitive Boar.png|100px]]<br />[[Primitive Boar]]<br />★ |
||
| + | |[[File:Mob Primitive Boar.png|100px]]<br />Evasive [[Violent Primitive Boar]]<br />★★★ |
||
| + | |[[File:Mob Chao.png|100px]]<br />[[Chao]]<br />★★★★ |
||
| + | | |
||
| + | | |
||
| + | |[[File:Use Adequate Exploration Box.png]]<br />[[Adequate Exploration Box]] x 1 |
||
| + | |- |
||
| + | |[[File:Mob Evil Poacher.png|100px]]<br />[[Evil Poacher]]<br />★ |
||
| + | |[[File:Mob Poacher's Hawk.png|100px]]<br />[[Poacher's Hawk]]<br />★ |
||
| + | |[[File:Mob Hidden Grave Robber.png|100px]]<br />[[Hidden Grave Robber]]<br />★ |
||
| + | |[[File:Mob Grave Robber's Hunting Dog.png|100px]]<br />[[Grave Robber's Hunting Dog]]<br />★ |
||
| + | | |
||
| + | |[[File:Use Adequate Exploration Box.png]]<br />[[Adequate Exploration Box]] x 1 |
||
| + | |- |
||
| + | |[[File:Mob Poisoned Lord Tree.png]]<br />[[Poisoned Lord Tree]]<br />★ |
||
| + | |[[File:Mob Poisoned Stone Bug.png|100px]]<br />[[Poisoned Stone Bug]]<br />★ |
||
| + | |[[File:Mob Poison Flower.png]]<br />Poison Flower<br />★ |
||
| + | |[[File:Mob Poisoned Spright.png]]<br />[[Poisoned Spright]]<br />★ |
||
| + | |[[File:Mob Poison Golem.png|100px]]<br />[[Poison Golem]]<br />★★★ |
||
| + | |[[File:Use Decent Exploration Box.png]]<br />[[Decent Exploration Box]] x 1 |
||
| + | |- |
||
| + | |[[File:Mob Neon Bat.png|100px]]<br />[[Neon Bat]]<br />★ |
||
| + | |[[File:Mob Peace Spirit.png]]<br />[[Peace Spirit]]<br />★ |
||
| + | |[[File:Mob Ancient Fairy.png]]<br />[[Ancient Fairy]]<br />★ |
||
| + | |[[File:Mob Shining Fairy.png]]<br />[[Shining Fairy]]<br />★ |
||
| + | |[[File:Mob Ephenia.png|100px]]<br />[[Ephenia/Monster|Ephenia]]<br />★★★★ |
||
| + | |[[File:Use Substantial Exploration Box.png]]<br />[[Substantial Exploration Box]] x 1 |
||
| + | |} |
||
| + | {|class="wikitable mw-collapsible mw-collapsed" width="100%" style="background:#F0F8FF; text-align:center" data-expandtext="show" data-collapsetext="hide" |
||
| + | !colspan="1"|Overall Reward |
||
| + | |- |
||
| + | !width="{{#expr:100/1}}%"|[[File:Cash Hair Color Coupon (VIP).png]]<br />[[Hair Color Coupon (VIP) Voucher]] x 1 |
||
| + | |} |
||
| + | |||
| + | ===Near Ludus Lake=== |
||
| + | {|class="wikitable mw-collapsible mw-collapsed" width="100%" style="background:#F0F8FF; text-align:center" data-expandtext="show" data-collapsetext="hide" |
||
| + | !colspan="6"|Near Ludus Lake |
||
| + | |- |
||
| + | !width="{{#expr:100/6}}%"|Monster |
||
| + | !width="{{#expr:100/6}}%"|Monster |
||
| + | !width="{{#expr:100/6}}%"|Monster |
||
| + | !width="{{#expr:100/6}}%"|Monster |
||
| + | !width="{{#expr:100/6}}%"|Monster |
||
| + | !width="{{#expr:100/6}}%"|Reward |
||
| + | |- |
||
| + | |[[File:Mob Three-Tailed Fox.png]]<br />[[Three-Tailed Fox]]<br />★ |
||
| + | |[[File:Mob Moon Bunny.png]]<br />[[Moon Bunny]]<br />★ |
||
| + | |[[File:Mob Hodori.png]]<br />[[Hodori]]<br />★ |
||
| + | |[[File:Mob Hogul.png]]<br />[[Hogul]]<br />★ |
||
| + | | |
||
| + | |[[File:Use Trifling Exploration Box.png]]<br />[[Trifling Exploration Box]] x 1 |
||
| + | |- |
||
| + | |[[File:Mob Blin.png]]<br />[[Blin]]<br />★ |
||
| + | |[[File:Mob Blue King Goblin.png|100px]]<br />[[Blue King Goblin]]<br />★ |
||
| + | |[[File:Mob Green King Goblin.png|100px]]<br />Befuddling [[Green King Goblin]]<br />★★★ |
||
| + | |[[File:Mob Yellow King Goblin.png|100px]]<br />[[Yellow King Goblin]]<br />★ |
||
| + | | |
||
| + | |[[File:Use Adequate Exploration Box.png]]<br />[[Adequate Exploration Box]] x 1 |
||
| + | |- |
||
| + | |[[File:Mob Creeper Scarlion.png]]<br />[[Creeper Scarlion]]<br />★ |
||
| + | |[[File:Mob Ratacula.png]]<br />[[Ratacula]]<br />★ |
||
| + | |[[File:Mob Ghost.png]]<br />[[Ghost]]<br />★ |
||
| + | |[[File:Mob Canterbear.png]]<br />[[Canterbear]]<br />★ |
||
| + | | |
||
| + | |[[File:Use Trifling Exploration Box.png]]<br />[[Trifling Exploration Box]] x 1 |
||
| + | |- |
||
| + | |[[File:Mob Clowning Scarlion.png|100px]]<br />[[Clowning Scarlion]]<br />★ |
||
| + | |[[File:Mob Colabear.png]]<br />[[Colabear]]<br />★ |
||
| + | |[[File:Mob Soaring Scarlion.png|100px]]<br />[[Soaring Scarlion]]<br />★ |
||
| + | |[[File:Mob Jellybus.png|100px]]<br />Dry [[Jellybus]]<br />★★★ |
||
| + | |[[File:Mob Bearic the White.png]]<br />[[Bearic the White]]<br />★ |
||
| + | |[[File:Use Adequate Exploration Box.png]]<br />[[Adequate Exploration Box]] x 1 |
||
| + | |- |
||
| + | |[[File:Mob Targa.png|100px]]<br />[[Targa]]<br />★★★★ |
||
| + | |[[File:Mob Angry Targa.png|100px]]<br />[[Targa#Angry|Angry Targa]]<br />★★★★ |
||
| + | |[[File:Mob Scarlion Boss.png|100px]]<br />[[Scarlion Boss#Normal|Scarboss]]<br />★★★★ |
||
| + | |[[File:Mob Angry Scarlion Boss.png|100px]]<br />[[Scarlion Boss#Furious|Furious Scarboss]]<br />★★★★ |
||
| + | | |
||
| + | |[[File:Use Decent Exploration Box.png]]<br />[[Decent Exploration Box]] x 1 |
||
| + | |} |
||
| + | {|class="wikitable mw-collapsible mw-collapsed" width="100%" style="background:#F0F8FF; text-align:center" data-expandtext="show" data-collapsetext="hide" |
||
| + | !colspan="1"|Overall Reward |
||
| + | |- |
||
| + | !width="{{#expr:100/1}}%"|[[File:Use Mysterious Meso Pouch.png]]<br />[[Mysterious Meso Pouch]] x 2 |
||
| + | |} |
||
| + | |||
| + | ===Medals=== |
||
| + | [[File:Eqp Ludibrium's Collector.png]]<br />'''[[Ludibrium's Collector]]''' |
||
| + | *'''Requirement:''' Collect 50 Ludus Lake monsters |
||
==Aqua Road== |
==Aqua Road== |
||
| + | ===Aqua Road (I)=== |
||
| − | {{Monster Collection (Aqua Road)}} |
||
| + | {|class="wikitable mw-collapsible mw-collapsed" width="100%" style="background:#F0F8FF; text-align:center" data-expandtext="show" data-collapsetext="hide" |
||
| + | !colspan="6"|Aqua Road (I) |
||
| + | |- |
||
| + | !width="{{#expr:100/6}}%"|Monster |
||
| + | !width="{{#expr:100/6}}%"|Monster |
||
| + | !width="{{#expr:100/6}}%"|Monster |
||
| + | !width="{{#expr:100/6}}%"|Monster |
||
| + | !width="{{#expr:100/6}}%"|Monster |
||
| + | !width="{{#expr:100/6}}%"|Reward |
||
| + | |- |
||
| + | |[[File:Mob Seacle.png]]<br />[[Seacle]]<br />★ |
||
| + | |[[File:Mob Cico.png]]<br />[[Cico]]<br />★ |
||
| + | |[[File:Mob Scuba Pepe.png]]<br />[[Scuba Pepe]]<br />★ |
||
| + | |[[File:Mob Jr. Seal.png]]<br />[[Jr. Seal]]<br />★ |
||
| + | |[[File:Mob Pinboom.png]]<br />[[Pinboom]]<br />★ |
||
| + | |[[File:Use Trifling Exploration Box.png]]<br />[[Trifling Exploration Box]] x 1 |
||
| + | |- |
||
| + | |[[File:Mob Bubble Fish.png]]<br />[[Bubble Fish]]<br />★ |
||
| + | |[[File:Mob Flower Fish.png]]<br />[[Flower Fish]]<br />★ |
||
| + | |[[File:Mob Mask Fish.png]]<br />[[Mask Fish]]<br />★ |
||
| + | |[[File:Mob Poopa.png]]<br />[[Poopa]]<br />★ |
||
| + | |[[File:Mob Poison Poopa.png]]<br />[[Poison Poopa]]<br />★ |
||
| + | |[[File:Use Adequate Exploration Box.png]]<br />[[Adequate Exploration Box]] x 1 |
||
| + | |- |
||
| + | |[[File:Mob Krappy.png]]<br />[[Krappy]]<br />★ |
||
| + | |[[File:Mob Krip.png]]<br />[[Krip]]<br />★ |
||
| + | |[[File:Mob Seruf.png|100px]]<br />[[Seruf]]<br />★★★ |
||
| + | |[[File:Mob Sparker.png]]<br />[[Sparker]]<br />★ |
||
| + | |[[File:Mob Freezer.png]]<br />[[Freezer]]<br />★ |
||
| + | |[[File:Use Adequate Exploration Box.png]]<br />[[Adequate Exploration Box]] x 1 |
||
| + | |- |
||
| + | |[[File:Mob Bombing Fish House.png|100px]]<br />[[Bombing Fish House]]<br />★ |
||
| + | |[[File:Mob Goby.png]]<br />[[Goby]]<br />★ |
||
| + | |[[File:Mob Bone Fish.png|100px]]<br />Sticky [[Bone Fish]]<br />★★★ |
||
| + | |[[File:Mob Squid.png|100px]]<br />[[Squid]]<br />★ |
||
| + | |[[File:Mob Risell Squid.png|100px]]<br />[[Risell Squid]]<br />★ |
||
| + | |[[File:Use Decent Exploration Box.png]]<br />[[Decent Exploration Box]] x 1 |
||
| + | |- |
||
| + | |[[File:Mob Shark.png|100px]]<br />[[Shark]]<br />★ |
||
| + | |[[File:Mob Cold Shark.png|100px]]<br />Healer [[Cold Shark]]<br />★★★ |
||
| + | |[[File:Mob Pianus.png|100px]]<br />[[Pianus]]<br />★★★★★ |
||
| + | |[[File:Mob Bloody Boom.png]]<br />[[Bloody Boom]]<br />★★ |
||
| + | | |
||
| + | |[[File:Use Substantial Exploration Box.png]]<br />[[Substantial Exploration Box]] x 1 |
||
| + | |} |
||
| + | {|class="wikitable mw-collapsible mw-collapsed" width="100%" style="background:#F0F8FF; text-align:center" data-expandtext="show" data-collapsetext="hide" |
||
| + | !colspan="1"|Overall Reward |
||
| + | |- |
||
| + | !width="{{#expr:100/1}}%"|[[File:Setup Scuba Pepe Cube Chair.png]]<br />[[Scuba Pepe Cube Chair]] x 1 |
||
| + | |} |
||
| + | |||
| + | ===Medals=== |
||
| + | [[File:Eqp Deep Sea Monster Collector.png]]<br />'''[[Deep Sea Monster Collector]]''' |
||
| + | *'''Requirement:''' Collect 50 Aqua Road monsters (currently cannot be obtained) |
||
==Nihal Desert== |
==Nihal Desert== |
||
| + | ===Nihal Desert (I)=== |
||
| − | {{Monster Collection (Nihal Desert)}} |
||
| + | {|class="wikitable mw-collapsible mw-collapsed" width="100%" style="background:#F0F8FF; text-align:center" data-expandtext="show" data-collapsetext="hide" |
||
| + | !colspan="6"|Nihal Desert (I) |
||
| + | |- |
||
| + | !width="{{#expr:100/6}}%"|Monster |
||
| + | !width="{{#expr:100/6}}%"|Monster |
||
| + | !width="{{#expr:100/6}}%"|Monster |
||
| + | !width="{{#expr:100/6}}%"|Monster |
||
| + | !width="{{#expr:100/6}}%"|Monster |
||
| + | !width="{{#expr:100/6}}%"|Reward |
||
| + | |- |
||
| + | |[[File:Mob Cactus.png]]<br />[[Cactus]]<br />★ |
||
| + | |[[File:Mob Royal Cactus.png]]<br />[[Royal Cactus]]<br />★ |
||
| + | |[[File:Mob Deo.png|100px]]<br />[[Deo]]<br />★★★★ |
||
| + | |[[File:Mob White Desert Rabbit.png]]<br />[[White Desert Rabbit]]<br />★ |
||
| + | |[[File:Mob Brown Desert Rabbit.png]]<br />[[Brown Desert Rabbit]]<br />★ |
||
| + | |[[File:Use Trifling Exploration Box.png]]<br />[[Trifling Exploration Box]] x 1 |
||
| + | |- |
||
| + | |[[File:Mob Bellamoa.png]]<br />[[Bellamoa]]<br />★ |
||
| + | |[[File:Mob Ear Plug Plead.png]]<br />[[Ear Plug Plead]]<br />★ |
||
| + | |[[File:Mob Scarf Plead.png]]<br />[[Scarf Plead]]<br />★ |
||
| + | |[[File:Mob Meerkat.png]]<br />[[Meerkat]]<br />★ |
||
| + | |[[File:Mob Kiyo.png]]<br />[[Kiyo]]<br />★ |
||
| + | |[[File:Use Adequate Exploration Box.png]]<br />[[Adequate Exploration Box]] x 1 |
||
| + | |- |
||
| + | |[[File:Mob Sand Rat.png|100px]]<br />[[Sand Rat]]<br />★ |
||
| + | |[[File:Mob Scorpion.png]]<br />Undead [[Scorpion]]<br />★★★ |
||
| + | |[[File:Mob Sand Dwarf.png]]<br />[[Sand Dwarf]]<br />★ |
||
| + | |[[File:Mob Dark Sand Dwarf.png|100px]]<br />[[Dark Sand Dwarf]]<br />★ |
||
| + | |[[File:Mob Desert Giant.png|100px]]<br />[[Desert Giant]]<br />★ |
||
| + | |[[File:Use Adequate Exploration Box.png]]<br />[[Adequate Exploration Box]] x 1 |
||
| + | |- |
||
| + | |[[File:Mob Horus.png|100px]]<br />[[Horus]]<br />★ |
||
| + | |[[File:Mob Advisor Mummy.png|100px]]<br />[[Advisor Mummy]]<br />★ |
||
| + | |[[File:Mob Pharaoh Yeti.png]]<br />[[Pharaoh Yeti]]<br />★★ |
||
| + | |[[File:Mob Pharaoh Snake.png]]<br />[[Pharaoh Snake]]<br />★ |
||
| + | |[[File:Mob Pharoah Mummy.png|100px]]<br />[[Pharoah Mummy]]<br />★ |
||
| + | |[[File:Use Decent Exploration Box.png]]<br />[[Decent Exploration Box]] x 1 |
||
| + | |- |
||
| + | |[[File:Mob Deadly Altar.png|100px]]<br />[[Deadly Altar]]<br />★ |
||
| + | |[[File:Mob Spearman Skeleknight.png|100px]]<br />[[Spearman Skeleknight]]<br />★ |
||
| + | |[[File:Mob Bloodfang.png|100px]]<br />[[Bloodfang]]<br />★ |
||
| + | |[[File:Mob Hilla (Gray Maiden).png|100px]]<br />[[Hilla/Monster#Hard|Silver-Haired Hilla]]<br />★★★★★ |
||
| + | |[[File:Mob Giant Darkheart.png|100px]]<br />[[Giant Darkheart]]<br />★★★★★ |
||
| + | |[[File:Use Substantial Exploration Box.png]]<br />[[Substantial Exploration Box]] x 1 |
||
| + | |} |
||
| + | {|class="wikitable mw-collapsible mw-collapsed" width="100%" style="background:#F0F8FF; text-align:center" data-expandtext="show" data-collapsetext="hide" |
||
| + | !colspan="1"|Overall Reward |
||
| + | |- |
||
| + | !width="{{#expr:100/1}}%"|[[File:Setup Desert Rabbit Cube Chair.png]]<br />[[Desert Rabbit Cube Chair]] x 1 |
||
| + | |} |
||
| + | |||
| + | ===Magatia=== |
||
| + | {|class="wikitable mw-collapsible mw-collapsed" width="100%" style="background:#F0F8FF; text-align:center" data-expandtext="show" data-collapsetext="hide" |
||
| + | !colspan="6"|Magatia |
||
| + | |- |
||
| + | !width="{{#expr:100/6}}%"|Monster |
||
| + | !width="{{#expr:100/6}}%"|Monster |
||
| + | !width="{{#expr:100/6}}%"|Monster |
||
| + | !width="{{#expr:100/6}}%"|Monster |
||
| + | !width="{{#expr:100/6}}%"|Monster |
||
| + | !width="{{#expr:100/6}}%"|Reward |
||
| + | |- |
||
| + | |[[File:Mob Cube Slime.png]]<br />[[Cube Slime]]<br />★ |
||
| + | |[[File:Mob Rumo.png]]<br />[[Rumo]]<br />★ |
||
| + | |[[File:Mob Triple Rumo.png]]<br />Healer [[Triple Rumo]]<br />★★★ |
||
| + | |[[File:Mob Rurumo.png]]<br />[[Rurumo]]<br />★★★★ |
||
| + | | |
||
| + | |[[File:Use Trifling Exploration Box.png]]<br />[[Trifling Exploration Box]] x 1 |
||
| + | |- |
||
| + | |[[File:Mob Iron Mutae.png]]<br />[[Iron Mutae]]<br />★ |
||
| + | |[[File:Mob Reinforced Iron Mutae.png]]<br />[[Reinforced Iron Mutae]]<br />★ |
||
| + | |[[File:Mob Mithril Mutae.png]]<br />[[Mithril Mutae]]<br />★ |
||
| + | |[[File:Mob Reinforced Mithril Mutae.png]]<br />[[Reinforced Mithril Mutae]]<br />★ |
||
| + | | |
||
| + | |[[File:Use Trifling Exploration Box.png]]<br />[[Trifling Exploration Box]] x 1 |
||
| + | |- |
||
| + | |[[File:Mob Homun.png]]<br />[[Homun]]<br />★ |
||
| + | |[[File:Mob Homunculus.png]]<br />[[Homunculus]]<br />★ |
||
| + | |[[File:Mob Homunscullo.png|100px]]<br />Gassy [[Homunscullo]]<br />★★★ |
||
| + | | |
||
| + | | |
||
| + | |[[File:Use Adequate Exploration Box.png]]<br />[[Adequate Exploration Box]] x 1 |
||
| + | |- |
||
| + | |[[File:Mob Roid.png]]<br />[[Roid]]<br />★ |
||
| + | |[[File:Mob Neo Huroid.png]]<br />Seal Master [[Neo Huroid]]<br />★★★ |
||
| + | |[[File:Mob Security Camera.png|100px]]<br />[[Security Camera]]<br />★★★ |
||
| + | |[[File:Mob Deet and Roi.png|100px]]<br />[[Deet and Roi]]<br />★★★ |
||
| + | |[[File:Mob D. Roy.png|100px]]<br />[[D. Roy]]<br />★ |
||
| + | |[[File:Use Adequate Exploration Box.png]]<br />[[Adequate Exploration Box]] x 1 |
||
| + | |- |
||
| + | |[[File:Mob Chimera.png|100px]]<br />[[Chimera]]<br />★★★ |
||
| + | |[[File:Mob Saitie.png]]<br />[[Saitie]]<br />★ |
||
| + | |[[File:Mob Homun.png]]<br />[[Homun#Quest|Homun of Closed Laboratory]]<br />★ |
||
| + | |[[File:Mob Frankenroid.png|100px]]<br />[[Frankenroid]]<br />★★★★ |
||
| + | |[[File:Mob Angry Frankenroid.png|100px]]<br />[[Angry Frankenroid]]<br />★★★★ |
||
| + | |[[File:Use Decent Exploration Box.png]]<br />[[Decent Exploration Box]] x 1 |
||
| + | |} |
||
| + | {|class="wikitable mw-collapsible mw-collapsed" width="100%" style="background:#F0F8FF; text-align:center" data-expandtext="show" data-collapsetext="hide" |
||
| + | !colspan="1"|Overall Reward |
||
| + | |- |
||
| + | !width="{{#expr:100/1}}%"|[[File:Use Mysterious Meso Pouch.png]]<br />[[Mysterious Meso Pouch]] x 1 |
||
| + | |} |
||
| + | ===Medals=== |
||
| + | [[File:Eqp Nihal's Collector.png]]<br />'''[[Nihal's Collector]]''' |
||
| + | *'''Requirement:''' Collect 50 Nihal Desert monsters (currently cannot be obtained) |
||
==Mu Lung Garden== |
==Mu Lung Garden== |
||
| − | + | ===Mu Lung Garden (I)=== |
|
| + | {|class="wikitable mw-collapsible mw-collapsed" width="100%" style="background:#F0F8FF; text-align:center" data-expandtext="show" data-collapsetext="hide" |
||
| + | !colspan="6"|Mu Lung Garden (I) |
||
| + | |- |
||
| + | !width="{{#expr:100/6}}%"|Monster |
||
| + | !width="{{#expr:100/6}}%"|Monster |
||
| + | !width="{{#expr:100/6}}%"|Monster |
||
| + | !width="{{#expr:100/6}}%"|Monster |
||
| + | !width="{{#expr:100/6}}%"|Monster |
||
| + | !width="{{#expr:100/6}}%"|Reward |
||
| + | |- |
||
| + | |[[File:Mob Chipmunk.png]]<br />[[Chipmunk]]<br />★ |
||
| + | |[[File:Mob Red Porky.png]]<br />[[Red Porky]]<br />★ |
||
| + | |[[File:Mob Black Porky.png]]<br />[[Black Porky]]<br />★ |
||
| + | | |
||
| + | | |
||
| + | |[[File:Use Trifling Exploration Box.png]]<br />[[Trifling Exploration Box]] x 1 |
||
| + | |- |
||
| + | |[[File:Mob Cute Reindeer.png]]<br />[[Cute Reindeer]]<br />★ |
||
| + | |[[File:Mob Peach Monkey.png]]<br />[[Peach Monkey]]<br />★ |
||
| + | |[[File:Mob The Book Ghost.png]]<br />[[The Book Ghost]]<br />★ |
||
| + | |[[File:Mob Sage Cat.png]]<br />[[Sage Cat]]<br />★★★ |
||
| + | |[[File:Mob King Sage Cat.png|100px]]<br />[[King Sage Cat]]<br />★★★★ |
||
| + | |[[File:Use Adequate Exploration Box.png]]<br />[[Adequate Exploration Box]] x 1 |
||
| + | |- |
||
| + | |[[File:Mob Blue Flower Serpent.png]]<br />[[Blue Flower Serpent]]<br />★ |
||
| + | |[[File:Mob Red Flower Serpent.png]]<br />Evasive [[Red Flower Serpent]]<br />★★★ |
||
| + | |[[File:Mob Giant Centipede.png|100px]]<br />[[Giant Centipede]]<br />★★★★ |
||
| + | | |
||
| + | | |
||
| + | |[[File:Use Adequate Exploration Box.png]]<br />[[Adequate Exploration Box]] x 1 |
||
| + | |- |
||
| + | |[[File:Mob Jar.png]]<br />[[Jar]]<br />★ |
||
| + | |[[File:Mob Ginseng Jar.png]]<br />[[Ginseng Jar]]<br />★ |
||
| + | |[[File:Mob Bellflower Root.png]]<br />[[Bellflower Root]]<br />★ |
||
| + | |[[File:Mob Sr. Bellflower Root.png]]<br />[[Sr. Bellflower Root]]<br />★ |
||
| + | |[[File:Mob Gigantic Bellflower Root.png]]<br />[[Gigantic Bellflower Root]]<br />★★★ |
||
| + | |[[File:Use Adequate Exploration Box.png]]<br />[[Adequate Exploration Box]] x 1 |
||
| + | |- |
||
| + | |[[File:Mob Grizzly.png]]<br />[[Grizzly]]<br />★ |
||
| + | |[[File:Mob Panda.png]]<br />[[Panda]]<br />★ |
||
| + | |[[File:Mob Tae Roon.png|100px]]<br />[[Tae Roon]]<br />★★★ |
||
| + | |[[File:Mob Mu Gong.png]]<br />[[Mu Gong]]<br />★★★★★ |
||
| + | | |
||
| + | |[[File:Use Substantial Exploration Box.png]]<br />[[Substantial Exploration Box]] x 1 |
||
| + | |} |
||
| + | {|class="wikitable mw-collapsible mw-collapsed" width="100%" style="background:#F0F8FF; text-align:center" data-expandtext="show" data-collapsetext="hide" |
||
| + | !colspan="1"|Overall Reward |
||
| + | |- |
||
| + | !width="{{#expr:100/1}}%"|[[File:Setup Grizzly Cube Chair.png]]<br />[[Grizzly Cube Chair]] x 1 |
||
| + | |} |
||
| + | |||
| + | ===Mu Lung Garden (II)=== |
||
| + | {|class="wikitable mw-collapsible mw-collapsed" width="100%" style="background:#F0F8FF; text-align:center" data-expandtext="show" data-collapsetext="hide" |
||
| + | !colspan="6"|Mu Lung Garden (II) |
||
| + | |- |
||
| + | !width="{{#expr:100/6}}%"|Monster |
||
| + | !width="{{#expr:100/6}}%"|Monster |
||
| + | !width="{{#expr:100/6}}%"|Monster |
||
| + | !width="{{#expr:100/6}}%"|Monster |
||
| + | !width="{{#expr:100/6}}%"|Monster |
||
| + | !width="{{#expr:100/6}}%"|Reward |
||
| + | |- |
||
| + | |[[File:Mob Wild Monkey.png]]<br />[[Wild Monkey]]<br />★ |
||
| + | |[[File:Mob Mama Monkey.png]]<br />[[Mama Monkey]]<br />★ |
||
| + | |[[File:Mob Teeny White Monkey.png]]<br />[[Teeny White Monkey]]<br />★ |
||
| + | |[[File:Mob Mean Mama Monkey.png|100px]]<br />[[Mean Mama Monkey]]<br />★ |
||
| + | | |
||
| + | |[[File:Use Trifling Exploration Box.png]]<br />[[Trifling Exploration Box]] x 1 |
||
| + | |- |
||
| + | |[[File:Mob Blue Goblin.png]]<br />[[Blue Goblin]]<br />★ |
||
| + | |[[File:Mob Red Goblin.png|100px]]<br />Petrifying [[Red Goblin]]<br />★★★ |
||
| + | |[[File:Mob Stone Goblin.png]]<br />[[Stone Goblin]]<br />★ |
||
| + | | |
||
| + | | |
||
| + | |[[File:Use Trifling Exploration Box.png]]<br />[[Trifling Exploration Box]] x 1 |
||
| + | |- |
||
| + | |[[File:Mob Ravana.png|100px]]<br />[[Ravana]]<br />★★★★ |
||
| + | |[[File:Mob Strong Stone Goblin.png]]<br />[[Strong Stone Goblin]]<br />★ |
||
| + | |[[File:Mob Ganapati.png|100px]]<br />[[Ganapati]]<br />★ |
||
| + | | |
||
| + | | |
||
| + | |[[File:Use Adequate Exploration Box.png]]<br />[[Adequate Exploration Box]] x 1 |
||
| + | |- |
||
| + | |[[File:Mob Straw Target Dummy.png]]<br />[[Straw Target Dummy]]<br />★ |
||
| + | |[[File:Mob Wooden Target Dummy.png]]<br />[[Wooden Target Dummy]]<br />★ |
||
| + | |[[File:Mob Master Dummy.png]]<br />[[Master Dummy]]<br />★★★ |
||
| + | |[[File:Mob Bamboo Warrior.png|100px]]<br />[[Bamboo Warrior]]<br />★★★★ |
||
| + | | |
||
| + | |[[File:Use Adequate Exploration Box.png]]<br />[[Adequate Exploration Box]] x 1 |
||
| + | |- |
||
| + | |[[File:Mob Lord Pirate.png|100px]]<br />[[Lord Pirate/Monster|Lord Pirate]]<br />★★★★ |
||
| + | |[[File:Mob Mr. Alli.png|100px]]<br />[[Mr. Alli]]<br />★ |
||
| + | |[[File:Mob Kru.png|100px]]<br />[[Kru]]<br />★ |
||
| + | |[[File:Mob Captain.png|100px]]<br />[[Captain]]<br />★ |
||
| + | | |
||
| + | |[[File:Use Decent Exploration Box.png]]<br />[[Decent Exploration Box]] x 1 |
||
| + | |} |
||
| + | {|class="wikitable mw-collapsible mw-collapsed" width="100%" style="background:#F0F8FF; text-align:center" data-expandtext="show" data-collapsetext="hide" |
||
| + | !colspan="1"|Overall Reward |
||
| + | |- |
||
| + | !width="{{#expr:100/1}}%"|[[File:Use All Cure Potion.png]]<br />[[All Cure Potion]] x 100 |
||
| + | |} |
||
| + | ===Medals=== |
||
| + | [[File:Eqp Mu Lung Garden Monster Collector.png]]<br />'''[[Mu Lung Garden Monster Collector]]''' |
||
| + | *'''Requirement:''' Collect 50 Mu Lung monsters (currently cannot be obtained) |
||
==Minar Forest== |
==Minar Forest== |
||
| + | ===Minar Forest (I)=== |
||
| − | {{Monster Collection (Minar Forest)}} |
||
| + | {|class="wikitable mw-collapsible mw-collapsed" width="100%" style="background:#F0F8FF; text-align:center" data-expandtext="show" data-collapsetext="hide" |
||
| + | !colspan="6"|Minar Forest (I) |
||
| + | |- |
||
| + | !width="{{#expr:100/6}}%"|Monster |
||
| + | !width="{{#expr:100/6}}%"|Monster |
||
| + | !width="{{#expr:100/6}}%"|Monster |
||
| + | !width="{{#expr:100/6}}%"|Monster |
||
| + | !width="{{#expr:100/6}}%"|Monster |
||
| + | !width="{{#expr:100/6}}%"|Reward |
||
| + | |- |
||
| + | |[[File:Mob Beetle.png]]<br />[[Beetle]]<br />★ |
||
| + | |[[File:Mob Dual Beetle.png]]<br />[[Dual Beetle]]<br />★ |
||
| + | |[[File:Mob Rash.png]]<br />[[Rash]]<br />★ |
||
| + | |[[File:Mob Dark Rash.png]]<br />[[Dark Rash]]<br />★ |
||
| + | | |
||
| + | |[[File:Use Trifling Exploration Box.png]]<br />[[Trifling Exploration Box]] x 1 |
||
| + | |- |
||
| + | |[[File:Mob Hankie.png]]<br />[[Hankie]]<br />★ |
||
| + | |[[File:Mob Hobi.png]]<br />[[Hobi]]<br />★ |
||
| + | |[[File:Mob Green Hobi.png]]<br />[[Green Hobi]]<br />★ |
||
| + | |[[File:Mob Master Hoblin.png|100px]]<br />[[Master Hoblin]]<br />★★★★ |
||
| + | | |
||
| + | |[[File:Use Adequate Exploration Box.png]]<br />[[Adequate Exploration Box]] x 1 |
||
| + | |- |
||
| + | |[[File:Mob Harp.png]]<br />[[Harp]]<br />★ |
||
| + | |[[File:Mob Blood Harp.png]]<br />[[Blood Harp#Star Force|Blood Harp]]<br />★★ |
||
| + | |[[File:Mob Master Harp.png|100px]]<br />[[Master Harp]]<br />★★★★ |
||
| + | |[[File:Mob Griffey.png|100px]]<br />[[Griffey]]<br />★★★★ |
||
| + | | |
||
| + | |[[File:Use Adequate Exploration Box.png]]<br />[[Adequate Exploration Box]] x 1 |
||
| + | |- |
||
| + | |[[File:Mob Black Kentaurus.png|100px]]<br />[[Black Kentaurus]]<br />★ |
||
| + | |[[File:Mob Black Kentaurus.png|100px]]<br />[[Black Kentaurus#Star Force|[*]Black Kentaurus]]<br />★★ |
||
| + | |[[File:Mob Red Kentaurus.png|100px]]<br />[[Red Kentaurus#Star Force|[*]Red Kentaurus]]<br />★★ |
||
| + | |[[File:Mob Blue Kentaurus.png|100px]]<br />[[Blue Kentaurus#Star Force|[*]Blue Kentaurus]]<br />★★ |
||
| + | |[[File:Mob Kentaurus King.png|100px]]<br />[[Kentaurus King]]<br />★★★★ |
||
| + | |[[File:Use Adequate Exploration Box.png]]<br />[[Adequate Exploration Box]] x 1 |
||
| + | |- |
||
| + | |[[File:Mob Birk.png]]<br />[[Birk]]<br />★ |
||
| + | |[[File:Mob Dual Birk.png]]<br />[[Dual Birk#Star Force|Dual Birk]]<br />★★ |
||
| + | |[[File:Mob Master Birk.png|100px]]<br />[[Master Birk]]<br />★★★★ |
||
| + | |[[File:Mob Manon.png|100px]]<br />[[Manon]]<br />★★★★ |
||
| + | | |
||
| + | |[[File:Use Adequate Exploration Box.png]]<br />[[Adequate Exploration Box]] x 1 |
||
| + | |} |
||
| + | {|class="wikitable mw-collapsible mw-collapsed" width="100%" style="background:#F0F8FF; text-align:center" data-expandtext="show" data-collapsetext="hide" |
||
| + | !colspan="1"|Overall Reward |
||
| + | |- |
||
| + | !width="{{#expr:100/1}}%"|[[File:Use Special Medal of Honor.png]]<br />[[Special Medal of Honor]] x 1 |
||
| + | |} |
||
| + | ===Minar Forest (II)=== |
||
| + | {|class="wikitable mw-collapsible mw-collapsed" width="100%" style="background:#F0F8FF; text-align:center" data-expandtext="show" data-collapsetext="hide" |
||
| + | !colspan="6"|Minar Forest (II) |
||
| + | |- |
||
| + | !width="{{#expr:100/6}}%"|Monster |
||
| + | !width="{{#expr:100/6}}%"|Monster |
||
| + | !width="{{#expr:100/6}}%"|Monster |
||
| + | !width="{{#expr:100/6}}%"|Monster |
||
| + | !width="{{#expr:100/6}}%"|Monster |
||
| + | !width="{{#expr:100/6}}%"|Reward |
||
| + | |- |
||
| + | |[[File:Mob Blood Harp.png]]<br />[[Blood Harp]]<br />★ |
||
| + | |[[File:Mob Red Kentaurus.png|100px]]<br />[[Red Kentaurus]]<br />★ |
||
| + | |[[File:Mob Blue Kentaurus.png|100px]]<br />[[Blue Kentaurus]]<br />★ |
||
| + | |[[File:Mob Dual Birk.png]]<br />[[Dual Birk]]<br />★ |
||
| + | | |
||
| + | |[[File:Use Trifling Exploration Box.png]]<br />[[Trifling Exploration Box]] x 1 |
||
| + | |- |
||
| + | |[[File:Mob Dark Wyvern.png|100px]]<br />[[Dark Wyvern]]<br />★ |
||
| + | |[[File:Mob Skelegon.png|100px]]<br />[[Skelegon]]<br />★ |
||
| + | |[[File:Mob Skelosaurus.png]]<br />[[Skelosaurus]]<br />★ |
||
| + | | |
||
| + | | |
||
| + | |[[File:Use Trifling Exploration Box.png]]<br />[[Trifling Exploration Box]] x 1 |
||
| + | |- |
||
| + | |[[File:Mob Mantis.png|100px]]<br />[[Mantis]]<br />★ |
||
| + | |[[File:Mob Blood Mantis.png|100px]]<br />[[Blood Mantis]]<br />★ |
||
| + | |[[File:Mob Poison Mantis.png|100px]]<br />[[Poison Mantis]]<br />★ |
||
| + | | |
||
| + | | |
||
| + | |[[File:Use Trifling Exploration Box.png]]<br />[[Trifling Exploration Box]] x 1 |
||
| + | |- |
||
| + | |[[File:Mob Flora.png|100px]]<br />[[Flora]]<br />★ |
||
| + | |[[File:Mob Dark Flora.png|100px]]<br />[[Dark Flora]]<br />★ |
||
| + | |[[File:Mob Hornet.png|100px]]<br />[[Hornet]]<br />★ |
||
| + | |[[File:Mob Poison Hornet.png|100px]]<br />Poisonous [[Poison Hornet]]<br />★★★ |
||
| + | |[[File:Mob General Hornet.png|100px]]<br />[[General Hornet]]<br />★ |
||
| + | |[[File:Use Adequate Exploration Box.png]]<br />[[Adequate Exploration Box]] x 1 |
||
| + | |- |
||
| + | |[[File:Mob Polluted Tree Spirit.png|100px]]<br />[[Polluted Tree Spirit]]<br />★ |
||
| + | |[[File:Mob Corrupted Tree Spirit.png|100px]]<br />[[Corrupted Tree Spirit]]<br />★ |
||
| + | |[[File:Mob Polluted Rock Spirit.png]]<br />[[Polluted Rock Spirit]]<br />★ |
||
| + | |[[File:Mob Corrupted Rock Spirit.png]]<br />Befuddling [[Corrupted Rock Spirit]]<br />★★★ |
||
| + | |[[File:Mob Tarantulus.png|100px]]<br />[[Tarantulus]]<br />★★★★ |
||
| + | |[[File:Use Decent Exploration Box.png]]<br />[[Decent Exploration Box]] x 1 |
||
| + | |} |
||
| + | {|class="wikitable mw-collapsible mw-collapsed" width="100%" style="background:#F0F8FF; text-align:center" data-expandtext="show" data-collapsetext="hide" |
||
| + | !colspan="1"|Overall Reward |
||
| + | |- |
||
| + | !width="{{#expr:100/1}}%"|[[File:Use Mysterious Meso Pouch.png]]<br />[[Mysterious Meso Pouch]] x 3 |
||
| + | |} |
||
| + | ===Dragon Forest=== |
||
| + | {|class="wikitable mw-collapsible mw-collapsed" width="100%" style="background:#F0F8FF; text-align:center" data-expandtext="show" data-collapsetext="hide" |
||
| + | !colspan="6"|Dragon Forest |
||
| + | |- |
||
| + | !width="{{#expr:100/6}}%"|Monster |
||
| + | !width="{{#expr:100/6}}%"|Monster |
||
| + | !width="{{#expr:100/6}}%"|Monster |
||
| + | !width="{{#expr:100/6}}%"|Monster |
||
| + | !width="{{#expr:100/6}}%"|Monster |
||
| + | !width="{{#expr:100/6}}%"|Reward |
||
| + | |- |
||
| + | |[[File:Mob Blue Dragon Turtle.png|100px]]<br />[[Blue Dragon Turtle]]<br />★ |
||
| + | |[[File:Mob Red Dragon Turtle.png|100px]]<br />[[Red Dragon Turtle]]<br />★ |
||
| + | |[[File:Mob Rexton.png|100px]]<br />[[Rexton]]<br />★ |
||
| + | |[[File:Mob Brexton.png|100px]]<br />[[Brexton]]<br />★ |
||
| + | | |
||
| + | |[[File:Use Trifling Exploration Box.png]]<br />[[Trifling Exploration Box]] x 1 |
||
| + | |- |
||
| + | |[[File:Mob Jr. Newtie.png]]<br />[[Jr. Newtie]]<br />★ |
||
| + | |[[File:Mob Nest Golem.png|100px]]<br />[[Nest Golem]]<br />★ |
||
| + | |[[File:Mob Green Cornian.png|100px]]<br />[[Green Cornian]]<br />★ |
||
| + | |[[File:Mob Dark Cornian.png|100px]]<br />[[Dark Cornian]]<br />★ |
||
| + | | |
||
| + | |[[File:Use Adequate Exploration Box.png]]<br />[[Adequate Exploration Box]] x 1 |
||
| + | |- |
||
| + | |[[File:Mob Red Wyvern.png|100px]]<br />[[Red Wyvern]]<br />★ |
||
| + | |[[File:Mob Blue Wyvern.png|100px]]<br />[[Blue Wyvern]]<br />★ |
||
| + | |[[File:Mob Dark Wyvern.png|100px]]<br />Dry [[Dark Wyvern#Star Force|[*]Dark Wyvern]]<br />★★★ |
||
| + | |[[File:Mob Leviathan.png|100px]]<br />[[Leviathan]]<br />★★★★ |
||
| + | | |
||
| + | |[[File:Use Decent Exploration Box.png]]<br />[[Decent Exploration Box]] x 1 |
||
| + | |- |
||
| + | |[[File:Mob Soaring Hawk.png]]<br />[[Soaring Hawk]]<br />★ |
||
| + | |[[File:Mob Soaring Eagle.png]]<br />[[Soaring Eagle]]<br />★ |
||
| + | |[[File:Mob Griffey.png|100px]]<br />[[Griffey#Dragon Rider|Soaring Griffey]]<br />★ |
||
| + | |[[File:Mob Dragonoir.png|100px]]<br />[[Dragonoir]]<br />★★★★ |
||
| + | |[[File:Mob Dragon Rider.png|100px]]<br />[[Dragon Rider/Monster|Dragon Rider]]<br />★★★★ |
||
| + | |[[File:Use Decent Exploration Box.png]]<br />[[Decent Exploration Box]] x 1 |
||
| + | |- |
||
| + | |[[File:Full Mob Horntail.png|100px]]<br />[[Horntail]]<br />★★★★★ |
||
| + | |[[File:Full Mob Horntail.png|100px]]<br />[[Chaos Horntail]]<br />★★★★★ |
||
| + | |[[File:Mob Skelegon.png|100px]]<br />[[Skelegon#Star Force|[*]Skelegon]]<br />★★ |
||
| + | |[[File:Mob Skelosaurus.png]]<br />[[Skelosaurus#Star Force|[*]Skelosaurus]]<br />★★ |
||
| + | | |
||
| + | |[[File:Use Substantial Exploration Box.png]]<br />[[Substantial Exploration Box]] x 1 |
||
| + | |} |
||
| + | {|class="wikitable mw-collapsible mw-collapsed" width="100%" style="background:#F0F8FF; text-align:center" data-expandtext="show" data-collapsetext="hide" |
||
| + | !colspan="1"|Overall Reward |
||
| + | |- |
||
| + | !width="{{#expr:100/1}}%"|[[File:Setup Birk Cube Chair.png]]<br />[[Birk Cube Chair]] x 1 |
||
| + | |} |
||
| + | ===Kritias=== |
||
| + | {|class="wikitable mw-collapsible mw-collapsed" width="100%" style="background:#F0F8FF; text-align:center" data-expandtext="show" data-collapsetext="hide" |
||
| + | !colspan="6"|Kritias |
||
| + | |- |
||
| + | !width="{{#expr:100/6}}%"|Monster |
||
| + | !width="{{#expr:100/6}}%"|Monster |
||
| + | !width="{{#expr:100/6}}%"|Monster |
||
| + | !width="{{#expr:100/6}}%"|Monster |
||
| + | !width="{{#expr:100/6}}%"|Monster |
||
| + | !width="{{#expr:100/6}}%"|Reward |
||
| + | |- |
||
| + | |[[File:Mob Frozen Solitude.png]]<br />[[Frozen Solitude]]<br />★ |
||
| + | |[[File:Mob Burning Solitude.png]]<br />[[Burning Solitude]]<br />★ |
||
| + | |[[File:Mob Permeating Solitude.png|100px]]<br />[[Permeating Solitude]]<br />★ |
||
| + | | |
||
| + | | |
||
| + | |[[File:Use Trifling Exploration Box.png]]<br />[[Trifling Exploration Box]] x 1 |
||
| + | |- |
||
| + | |[[File:Mob Frozen Terror.png|100px]]<br />[[Frozen Terror]]<br />★ |
||
| + | |[[File:Mob Burning Terror.png|100px]]<br />[[Burning Terror]]<br />★ |
||
| + | |[[File:Mob Permeating Terror.png|100px]]<br />[[Permeating Terror]]<br />★ |
||
| + | | |
||
| + | | |
||
| + | |[[File:Use Trifling Exploration Box.png]]<br />[[Trifling Exploration Box]] x 1 |
||
| + | |- |
||
| + | |[[File:Mob Frozen Rage.png|100px]]<br />[[Frozen Rage]]<br />★ |
||
| + | |[[File:Mob Burning Rage.png|100px]]<br />[[Burning Rage]]<br />★ |
||
| + | |[[File:Mob Permeating Rage.png|100px]]<br />[[Permeating Rage]]<br />★ |
||
| + | | |
||
| + | | |
||
| + | |[[File:Use Adequate Exploration Box.png]]<br />[[Adequate Exploration Box]] x 1 |
||
| + | |- |
||
| + | |[[File:Mob Frozen Anxiety.png|100px]]<br />[[Frozen Anxiety]]<br />★ |
||
| + | |[[File:Mob Burning Anxiety.png|100px]]<br />[[Burning Anxiety]]<br />★ |
||
| + | |[[File:Mob Permeating Anxiety.png|100px]]<br />[[Permeating Anxiety]]<br />★ |
||
| + | |[[File:Mob Corrupted Basic Magician.png]]<br />[[Corrupted Basic Magician]]<br />★ |
||
| + | | |
||
| + | |[[File:Use Adequate Exploration Box.png]]<br />[[Adequate Exploration Box]] x 1 |
||
| + | |- |
||
| + | |[[File:Mob Frozen Vanity.png]]<br />[[Frozen Vanity]]<br />★ |
||
| + | |[[File:Mob Burning Vanity.png]]<br />[[Burning Vanity]]<br />★ |
||
| + | |[[File:Mob Permeating Vanity.png|100px]]<br />[[Permeating Vanity]]<br />★ |
||
| + | |[[File:Mob Corrupted Intermediate Magician.png]]<br />[[Corrupted Intermediate Magician]]<br />★ |
||
| + | |[[File:Mob Corrupted Advanced Magician.png]]<br />[[Corrupted Advanced Magician]]<br />★ |
||
| + | |[[File:Use Adequate Exploration Box.png]]<br />[[Adequate Exploration Box]] x 1 |
||
| + | |} |
||
| + | {|class="wikitable mw-collapsible mw-collapsed" width="100%" style="background:#F0F8FF; text-align:center" data-expandtext="show" data-collapsetext="hide" |
||
| + | !colspan="1"|Overall Reward |
||
| + | |- |
||
| + | !width="{{#expr:100/1}}%"|[[File:Use 2x EXP Coupon.png]]<br />[[2x EXP Coupon]] x 3 |
||
| + | |} |
||
| + | ===Medals=== |
||
| + | [[File:Eqp Minar Forest Monster Collector.png]]<br />'''[[Minar Forest Monster Collector]]''' |
||
| + | *'''Requirement:''' Collect 50 Minar Forest monsters |
||
==Temple of Time== |
==Temple of Time== |
||
| + | ===Gate of the Past=== |
||
| − | {{Monster Collection (Temple of Time)}} |
||
| + | {|class="wikitable mw-collapsible mw-collapsed" width="100%" style="background:#F0F8FF; text-align:center" data-expandtext="show" data-collapsetext="hide" |
||
| + | !colspan="6"|Gate of the Past |
||
| + | |- |
||
| + | !width="{{#expr:100/6}}%"|Monster |
||
| + | !width="{{#expr:100/6}}%"|Monster |
||
| + | !width="{{#expr:100/6}}%"|Monster |
||
| + | !width="{{#expr:100/6}}%"|Monster |
||
| + | !width="{{#expr:100/6}}%"|Monster |
||
| + | !width="{{#expr:100/6}}%"|Reward |
||
| + | |- |
||
| + | |[[File:Mob Memory Monk.png]]<br />[[Memory Monk]]<br />★ |
||
| + | |[[File:Mob Memory Monk Trainee.png|100px]]<br />[[Memory Monk Trainee]]<br />★ |
||
| + | |[[File:Mob Memory Guardian.png|100px]]<br />[[Memory Guardian]]<br />★ |
||
| + | |[[File:Mob Chief Memory Guardian.png|100px]]<br />[[Chief Memory Guardian]]<br />★ |
||
| + | |[[File:Mob Eye of Time.png]]<br />[[Eye of Time#Star Force|[*] Eye of Time]]<br />★★ |
||
| + | |[[File:Use Trifling Exploration Box.png]]<br />[[Trifling Exploration Box]] x 1 |
||
| + | |- |
||
| + | |[[File:Mob Qualm Monk.png]]<br />[[Qualm Monk]]<br />★ |
||
| + | |[[File:Mob Qualm Monk Trainee.png|100px]]<br />[[Qualm Monk Trainee]]<br />★ |
||
| + | |[[File:Mob Qualm Guardian.png|100px]]<br />[[Qualm Guardian]]<br />★ |
||
| + | |[[File:Mob Chief Qualm Guardian.png|100px]]<br />Overwhelming [[Chief Qualm Guardian]]<br />★★★ |
||
| + | |[[File:Mob Dodo.png|100px]]<br />[[Dodo]]<br />★★★★ |
||
| + | |[[File:Use Adequate Exploration Box.png]]<br />[[Adequate Exploration Box]] x 1 |
||
| + | |- |
||
| + | |[[File:Mob Oblivion Monk.png]]<br />[[Oblivion Monk]]<br />★ |
||
| + | |[[File:Mob Oblivion Monk Trainee.png|100px]]<br />[[Oblivion Monk Trainee]]<br />★ |
||
| + | |[[File:Mob Oblivion Guardian.png|100px]]<br />[[Oblivion Guardian]]<br />★ |
||
| + | |[[File:Mob Chief Oblivion Guardian.png|100px]]<br />Beefy [[Chief Oblivion Guardian]]<br />★★★ |
||
| + | |[[File:Mob Lilynouch.png|100px]]<br />[[Lilynouch]]<br />★★★★ |
||
| + | |[[File:Use Adequate Exploration Box.png]]<br />[[Adequate Exploration Box]] x 1 |
||
| + | |- |
||
| + | |[[File:Mob Arkarium.png|100px]]<br />[[Arkarium/Monster|Arkarium]]<br />★★★★★ |
||
| + | |[[File:Mob Corrupted Chief Memory Guardian.png|100px]]<br />[[Corrupted Chief Memory Guardian]]<br />★★ |
||
| + | |[[File:Mob Corrupted Time Monk Trainee.png|100px]]<br />[[Corrupted Time Monk Trainee]]<br />★★ |
||
| + | |[[File:Mob Netherworld Monk.png]]<br />[[Netherworld Monk]]<br />★★ |
||
| + | | |
||
| + | |[[File:Use Decent Exploration Box.png]]<br />[[Decent Exploration Box]] x 1 |
||
| + | |- |
||
| + | |[[File:Mob Pink Bean.png]]<br />[[Pink Bean]]<br />★★★★★ |
||
| + | |[[File:Mob Pink Bean.png]]<br />[[Chaos Pink Bean]]<br />★★★★★ |
||
| + | |[[File:Mob Lyka.png|100px]]<br />[[Lyka]]<br />★★★★ |
||
| + | |[[File:Mob Solomon the Wise.png|100px]]<br />[[Solomon the Wise]]<br />★★★★ |
||
| + | |[[File:Mob Munin.png|100px]]<br />[[Munin]]<br />★★★★ |
||
| + | |[[File:Use Substantial Exploration Box.png]]<br />[[Substantial Exploration Box]] x 1 |
||
| + | |} |
||
| + | {|class="wikitable mw-collapsible mw-collapsed" width="100%" style="background:#F0F8FF; text-align:center" data-expandtext="show" data-collapsetext="hide" |
||
| + | !colspan="1"|Overall Reward |
||
| + | |- |
||
| + | !width="{{#expr:100/1}}%"|[[File:Use 1000 Reward Points Token.png]]<br />[[1000 Reward Points]] x 1 |
||
| + | |} |
||
| + | |||
| + | ===Gate to the Future=== |
||
| + | {|class="wikitable mw-collapsible mw-collapsed" width="100%" style="background:#F0F8FF; text-align:center" data-expandtext="show" data-collapsetext="hide" |
||
| + | !colspan="6"|Gate to the Future |
||
| + | |- |
||
| + | !width="{{#expr:100/6}}%"|Monster |
||
| + | !width="{{#expr:100/6}}%"|Monster |
||
| + | !width="{{#expr:100/6}}%"|Monster |
||
| + | !width="{{#expr:100/6}}%"|Monster |
||
| + | !width="{{#expr:100/6}}%"|Monster |
||
| + | !width="{{#expr:100/6}}%"|Reward |
||
| + | |- |
||
| + | |[[File:Mob Mutant Snail.png|100px]]<br />[[Mutant Snail]]<br />★ |
||
| + | |[[File:Mob Mutant Orange Mushroom.png]]<br />[[Mutant Orange Mushroom]]<br />★ |
||
| + | |[[File:Mob Mutant Slime.png|100px]]<br />[[Mutant Slime]]<br />★ |
||
| + | |[[File:Mob Mutant Ribbon Pig.png|100px]]<br />Undead [[Mutant Ribbon Pig]]<br />★★★ |
||
| + | | |
||
| + | |[[File:Use Trifling Exploration Box.png]]<br />[[Trifling Exploration Box]] x 1 |
||
| + | |- |
||
| + | |[[File:Mob Swollen Stump.png|100px]]<br />[[Swollen Stump]]<br />★ |
||
| + | |[[File:Mob Swollen Dark Stump.png|100px]]<br />[[Swollen Dark Stump]]<br />★ |
||
| + | |[[File:Mob Swollen Axe Stump.png|100px]]<br />Dry [[Swollen Axe Stump]]<br />★★★ |
||
| + | |[[File:Mob Ghostwood Stumpy.png|100px]]<br />[[Ghostwood Stumpy]]<br />★★★★ |
||
| + | | |
||
| + | |[[File:Use Trifling Exploration Box.png]]<br />[[Trifling Exploration Box]] x 1 |
||
| + | |- |
||
| + | |[[File:Mob Pillaging Wild Boar.png|100px]]<br />[[Pillaging Wild Boar]]<br />★ |
||
| + | |[[File:Mob Iron Boar Raider.png|100px]]<br />[[Iron Boar Raider]]<br />★ |
||
| + | |[[File:Mob Pillaging Fire Boars.png|100px]]<br />[[Pillaging Fire Boars]]<br />★ |
||
| + | |[[File:Mob Sinister Wooden Mask.png|100px]]<br />[[Sinister Wooden Mask]]<br />★ |
||
| + | |[[File:Mob Sinister Rocky Mask.png|100px]]<br />[[Sinister Rocky Mask]]<br />★ |
||
| + | |[[File:Use Adequate Exploration Box.png]]<br />[[Adequate Exploration Box]] x 1 |
||
| + | |- |
||
| + | |[[File:Mob Sinister Steel Mask.png|100px]]<br />[[Sinister Steel Mask]]<br />★ |
||
| + | |[[File:Mob Ancient Golem.png|100px]]<br />[[Ancient Golem]]<br />★ |
||
| + | |[[File:Mob Ancient Dark Golem.png|100px]]<br />[[Ancient Dark Golem]]<br />★ |
||
| + | |[[File:Mob Ancient Mixed Golem.png|100px]]<br />Seal Master [[Ancient Mixed Golem]]<br />★★★ |
||
| + | | |
||
| + | |[[File:Use Adequate Exploration Box.png]]<br />[[Adequate Exploration Box]] x 1 |
||
| + | |- |
||
| + | |[[File:Mob Mutant Tino.png]]<br />[[Mutant Tino]]<br />★ |
||
| + | |[[File:Mob Mutant Tiru.png]]<br />[[Mutant Tiru]]<br />★ |
||
| + | |[[File:Mob Mutant Tiguru.png|100px]]<br />[[Mutant Tiguru]]<br />★ |
||
| + | | |
||
| + | | |
||
| + | |[[File:Use Trifling Exploration Box.png]]<br />[[Trifling Exploration Box]] x 1 |
||
| + | |} |
||
| + | {|class="wikitable mw-collapsible mw-collapsed" width="100%" style="background:#F0F8FF; text-align:center" data-expandtext="show" data-collapsetext="hide" |
||
| + | !colspan="1"|Overall Reward |
||
| + | |- |
||
| + | !width="{{#expr:100/1}}%"|[[File:Cash Hair Color Coupon (VIP).png]]<br />[[Hair Color Coupon (VIP) Voucher]] x 1 |
||
| + | |} |
||
| + | |||
| + | ===Temple of Time (I)=== |
||
| + | {|class="wikitable mw-collapsible mw-collapsed" width="100%" style="background:#F0F8FF; text-align:center" data-expandtext="show" data-collapsetext="hide" |
||
| + | !colspan="6"|Temple of Time (I) |
||
| + | |- |
||
| + | !width="{{#expr:100/6}}%"|Monster |
||
| + | !width="{{#expr:100/6}}%"|Monster |
||
| + | !width="{{#expr:100/6}}%"|Monster |
||
| + | !width="{{#expr:100/6}}%"|Monster |
||
| + | !width="{{#expr:100/6}}%"|Monster |
||
| + | !width="{{#expr:100/6}}%"|Reward |
||
| + | |- |
||
| + | |[[File:Mob Dawn.png]]<br />[[Dawn]]<br />★ |
||
| + | |[[File:Mob Blaze.png]]<br />[[Blaze]]<br />★ |
||
| + | |[[File:Mob Wind.png]]<br />[[Wind]]<br />★ |
||
| + | |[[File:Mob Night.png]]<br />[[Night]]<br />★ |
||
| + | |[[File:Mob Thunder.png]]<br />[[Thunder (Monster)|Thunder]]<br />★ |
||
| + | |[[File:Use Adequate Exploration Box.png]]<br />[[Adequate Exploration Box]] x 1 |
||
| + | |- |
||
| + | |[[File:Mob Official Knight A.png]]<br />[[Official Knight A]]<br />★ |
||
| + | |[[File:Mob Official Knight B.png]]<br />[[Official Knight B]]<br />★ |
||
| + | |[[File:Mob Official Knight C.png]]<br />[[Official Knight C#Star Force|[*] Official Knight C]]<br />★★ |
||
| + | |[[File:Mob Official Knight D.png]]<br />[[Official Knight D#Star Force|[*] Official Knight D]]<br />★★ |
||
| + | |[[File:Mob Official Knight E.png]]<br />[[Official Knight E]]<br />★ |
||
| + | |[[File:Use Adequate Exploration Box.png]]<br />[[Adequate Exploration Box]] x 1 |
||
| + | |- |
||
| + | |[[File:Mob Advanced Knight A.png]]<br />[[Advanced Knight A]]<br />★ |
||
| + | |[[File:Mob Advanced Knight B.png]]<br />[[Advanced Knight B]]<br />★ |
||
| + | |[[File:Mob Advanced Knight C.png]]<br />[[Advanced Knight C]]<br />★ |
||
| + | |[[File:Mob Advanced Knight D.png]]<br />[[Advanced Knight D]]<br />★ |
||
| + | |[[File:Mob Advanced Knight E.png]]<br />[[Advanced Knight E]]<br />★ |
||
| + | |[[File:Use Adequate Exploration Box.png]]<br />[[Adequate Exploration Box]] x 1 |
||
| + | |- |
||
| + | |[[File:Mob Mihile.png]]<br />[[Mihile/Monster|Mihile]]<br />★★★★★ |
||
| + | |[[File:Mob Oz.png]]<br />[[Oz/Monster|Oz]]<br />★★★★★ |
||
| + | |[[File:Mob Irena.png]]<br />[[Irena/Monster|Irena]]<br />★★★★★ |
||
| + | |[[File:Mob Eckhart.png]]<br />[[Eckhart/Monster|Eckhart]]<br />★★★★★ |
||
| + | |[[File:Mob Hawkeye.png]]<br />[[Hawkeye/Monster|Hawkeye]]<br />★★★★★ |
||
| + | |[[File:Use Decent Exploration Box.png]]<br />[[Decent Exploration Box]] x 1 |
||
| + | |- |
||
| + | |[[File:Mob Cygnus.png|100px]]<br />[[Cygnus/Monster|Cygnus]]<br />★★★★★ |
||
| + | |[[File:Mob Shinsoo.png|100px]]<br />[[Shinsoo/Monster|Shinsoo]]<br />★★★★★ |
||
| + | |[[File:Mob Ifrit.png|100px]]<br />[[Ifrit/Monster|Ifrit]]<br />★★★★★ |
||
| + | | |
||
| + | | |
||
| + | |[[File:Use Substantial Exploration Box.png]]<br />[[Substantial Exploration Box]] x 1 |
||
| + | |} |
||
| + | {|class="wikitable mw-collapsible mw-collapsed" width="100%" style="background:#F0F8FF; text-align:center" data-expandtext="show" data-collapsetext="hide" |
||
| + | !colspan="1"|Overall Reward |
||
| + | |- |
||
| + | !width="{{#expr:100/1}}%"|[[File:Setup Pink Bean Cube Chair.png]]<br />[[Pink Bean Cube Chair]] x 1 |
||
| + | |} |
||
| + | |||
| + | ===Medals=== |
||
| + | [[File:Eqp Temple's Collector.png]]<br />'''[[Temple's Collector]]''' |
||
| + | *'''Requirement:''' Collect 50 Temple of Time monsters |
||
==Grandis== |
==Grandis== |
||
| + | ===Grandis (I)=== |
||
| − | {{Monster Collection (Grandis)}} |
||
| + | {|class="wikitable mw-collapsible mw-collapsed" width="100%" style="background:#F0F8FF; text-align:center" data-expandtext="show" data-collapsetext="hide" |
||
| + | !colspan="6"|Grandis (I) |
||
| + | |- |
||
| + | !width="{{#expr:100/6}}%"|Monster |
||
| + | !width="{{#expr:100/6}}%"|Monster |
||
| + | !width="{{#expr:100/6}}%"|Monster |
||
| + | !width="{{#expr:100/6}}%"|Monster |
||
| + | !width="{{#expr:100/6}}%"|Monster |
||
| + | !width="{{#expr:100/6}}%"|Reward |
||
| + | |- |
||
| + | |[[File:Mob Caterpillar.png]]<br />[[Caterpillar]]<br />★ |
||
| + | |[[File:Mob Lady Bug.png]]<br />[[Lady Bug]]<br />★ |
||
| + | |[[File:Mob Sparrow.png]]<br />[[Sparrow]]<br />★ |
||
| + | |[[File:Mob Balloon Mouse.png]]<br />[[Balloon Mouse]]<br />★ |
||
| + | |[[File:Mob Red Poison Frog.png]]<br />[[Red Poison Frog]]<br />★ |
||
| + | |[[File:Use Trifling Exploration Box.png]]<br />[[Trifling Exploration Box]] x 1 |
||
| + | |- |
||
| + | |[[File:Mob Green Poison Frog.png]]<br />[[Green Poison Frog]]<br />★ |
||
| + | |[[File:Mob Delinquent Chick.png]]<br />[[Delinquent Chick]]<br />★ |
||
| + | |[[File:Mob Punk Chick.png]]<br />[[Punk Chick]]<br />★ |
||
| + | |[[File:Mob Mane Fur Hyena.png|100px]]<br />[[Mane Fur Hyena]]<br />★ |
||
| + | |[[File:Mob Fang Hyena.png|100px]]<br />[[Fang Hyena]]<br />★ |
||
| + | |[[File:Use Trifling Exploration Box.png]]<br />[[Trifling Exploration Box]] x 1 |
||
| + | |- |
||
| + | |[[File:Mob Sleepy Grobbler.png]]<br />[[Sleepy Grobbler]]<br />★ |
||
| + | |[[File:Mob Alert Grobbler.png]]<br />[[Alert Grobbler]]<br />★ |
||
| + | |[[File:Mob Grumpy Grobbler.png]]<br />[[Grumpy Grobbler]]<br />★ |
||
| + | |[[File:Mob Limestone Tokka.png]]<br />[[Limestone Tokka]]<br />★ |
||
| + | |[[File:Mob Amethyst Tokka.png]]<br />[[Amethyst Tokka]]<br />★ |
||
| + | |[[File:Use Trifling Exploration Box.png]]<br />[[Trifling Exploration Box]] x 1 |
||
| + | |- |
||
| + | |[[File:Mob Laloong.png]]<br />[[Laloong]]<br />★ |
||
| + | |[[File:Mob Kaloong.png]]<br />[[Kaloong]]<br />★ |
||
| + | |[[File:Mob Nefarious Monk Initiate.png]]<br />[[Nefarious Monk Initiate]]<br />★ |
||
| + | |[[File:Mob Nefarious Monk Apprentice.png]]<br />[[Nefarious Monk Apprentice]]<br />★ |
||
| + | |[[File:Mob Nefarious Monk Master.png]]<br />[[Nefarious Monk Master]]<br />★ |
||
| + | |[[File:Use Trifling Exploration Box.png]]<br />[[Trifling Exploration Box]] x 1 |
||
| + | |- |
||
| + | |[[File:Mob Heretic Monk Initiate.png]]<br />[[Heretic Monk Initiate]]<br />★ |
||
| + | |[[File:Mob Heretic Monk Apprentice.png]]<br />[[Heretic Monk Apprentice]]<br />★ |
||
| + | |[[File:Mob Heretic Leader.png]]<br />[[Heretic Leader]]<br />★ |
||
| + | |[[File:Mob Onyx Stonegar.png]]<br />[[Onyx Stonegar]]<br />★ |
||
| + | |[[File:Mob Gravi Stonegar.png]]<br />[[Gravi Stonegar]]<br />★ |
||
| + | |[[File:Use Adequate Exploration Box.png]]<br />[[Adequate Exploration Box]] x 1 |
||
| + | |} |
||
| + | {|class="wikitable mw-collapsible mw-collapsed" width="100%" style="background:#F0F8FF; text-align:center" data-expandtext="show" data-collapsetext="hide" |
||
| + | !colspan="1"|Overall Reward |
||
| + | |- |
||
| + | !width="{{#expr:100/1}}%"|[[File:Use Selective 4 Slot Coupon.png]]<br />[[Selective 4 Slot Coupon]] x 1 |
||
| + | |} |
||
| + | |||
| + | ===Grandis (II)=== |
||
| + | {|class="wikitable mw-collapsible mw-collapsed" width="100%" style="background:#F0F8FF; text-align:center" data-expandtext="show" data-collapsetext="hide" |
||
| + | !colspan="6"|Grandis (II) |
||
| + | |- |
||
| + | !width="{{#expr:100/6}}%"|Monster |
||
| + | !width="{{#expr:100/6}}%"|Monster |
||
| + | !width="{{#expr:100/6}}%"|Monster |
||
| + | !width="{{#expr:100/6}}%"|Monster |
||
| + | !width="{{#expr:100/6}}%"|Monster |
||
| + | !width="{{#expr:100/6}}%"|Reward |
||
| + | |- |
||
| + | |[[File:Mob Blue Speeyor.png]]<br />[[Blue Speeyor]]<br />★ |
||
| + | |[[File:Mob Red Speeyor.png]]<br />[[Red Speeyor]]<br />★ |
||
| + | |[[File:Mob Yellow Speeyor.png]]<br />[[Yellow Speeyor]]<br />★ |
||
| + | | |
||
| + | | |
||
| + | |[[File:Use Trifling Exploration Box.png]]<br />[[Trifling Exploration Box]] x 1 |
||
| + | |- |
||
| + | |[[File:Mob Dinogoth.png|100px]]<br />[[Dinogoth]]<br />★ |
||
| + | |[[File:Mob Dinoram.png|100px]]<br />[[Dinoram]]<br />★ |
||
| + | |[[File:Mob Dinodon.png|100px]]<br />[[Dinodon]]<br />★ |
||
| + | |[[File:Mob Specter Battle Hound.png]]<br />[[Specter Battle Hound]]<br />★ |
||
| + | |[[File:Mob Specter Tamer.png]]<br />[[Specter Tamer]]<br />★ |
||
| + | |[[File:Use Adequate Exploration Box.png]]<br />[[Adequate Exploration Box]] x 1 |
||
| + | |- |
||
| + | |[[File:Mob Specter Miner.png]]<br />[[Specter Miner]]<br />★ |
||
| + | |[[File:Mob Specter Shieldbearer.png]]<br />[[Specter Shieldbearer]]<br />★ |
||
| + | |[[File:Mob Guerrilla Specter.png|100px]]<br />[[Guerrilla Specter]]<br />★ |
||
| + | |[[File:Mob Power Specter.png|100px]]<br />[[Power Specter]]<br />★ |
||
| + | |[[File:Mob Specter Engineer.png|100px]]<br />[[Specter Engineer]]<br />★ |
||
| + | |[[File:Use Adequate Exploration Box.png]]<br />[[Adequate Exploration Box]] x 1 |
||
| + | |- |
||
| + | |[[File:Mob Warrior Specter.png|100px]]<br />[[Warrior Specter]]<br />★ |
||
| + | |[[File:Mob Magician Specter.png|100px]]<br />[[Magician Specter]]<br />★ |
||
| + | |[[File:Mob Reaper Specter.png|100px]]<br />Petrifying [[Reaper Specter]]<br />★★★ |
||
| + | |[[File:Mob Purple Reagent Rock.png|100px]]<br />[[Purple Reagent Rock]]<br />★ |
||
| + | |[[File:Mob Red Reagent Rock.png|100px]]<br />[[Red Reagent Rock]]<br />★ |
||
| + | |[[File:Use Decent Exploration Box.png]]<br />[[Decent Exploration Box]] x 1 |
||
| + | |- |
||
| + | |[[File:Mob Magnus.png|100px]]<br />[[Magnus/Monster|Magnus]]<br />★★★★★ |
||
| + | |[[File:Mob Velderoth.png|100px]]<br />[[Velderoth/Monster|Velderoth]]<br />★★★★★ |
||
| + | |[[File:Mob Treglow.png|100px]]<br />[[Treglow]]<br />★★★★★ |
||
| + | |[[File:Mob Victor.png|100px]]<br />[[Victor (Heliseum)|Victor]]<br />★★★★★ |
||
| + | |[[File:Mob Red Totem Staff.png]]<br />[[Red Totem Staff]]<br />★ |
||
| + | |[[File:Use Substantial Exploration Box.png]]<br />[[Substantial Exploration Box]] x 1 |
||
| + | |} |
||
| + | {|class="wikitable mw-collapsible mw-collapsed" width="100%" style="background:#F0F8FF; text-align:center" data-expandtext="show" data-collapsetext="hide" |
||
| + | !colspan="1"|Overall Reward |
||
| + | |- |
||
| + | !width="{{#expr:100/1}}%"|[[File:Setup Specter Cube Chair.png]]<br />[[Specter Cube Chair]] x 1 |
||
| + | |} |
||
| + | ===Grandis (III)=== |
||
| + | {|class="wikitable mw-collapsible mw-collapsed" width="100%" style="background:#F0F8FF; text-align:center" data-expandtext="show" data-collapsetext="hide" |
||
| + | !colspan="6"|Grandis (III) |
||
| + | |- |
||
| + | !width="{{#expr:100/6}}%"|Monster |
||
| + | !width="{{#expr:100/6}}%"|Monster |
||
| + | !width="{{#expr:100/6}}%"|Monster |
||
| + | !width="{{#expr:100/6}}%"|Monster |
||
| + | !width="{{#expr:100/6}}%"|Monster |
||
| + | !width="{{#expr:100/6}}%"|Reward |
||
| + | |- |
||
| + | |[[File:Mob Green Grossular.png]]<br />[[Green Grossular]]<br />★ |
||
| + | |[[File:Mob Purple Amethyst.png|100px]]<br />[[Purple Amethyst]]<br />★ |
||
| + | |[[File:Mob Fire Pyrope.png]]<br />[[Fire Pyrope]]<br />★ |
||
| + | |[[File:Mob Dark Obsidian.png|100px]]<br />[[Dark Obsidian]]<br />★ |
||
| + | |[[File:Mob Blue Larimar.png|100px]]<br />[[Blue Larimar]]<br />★ |
||
| + | |[[File:Use Trifling Exploration Box.png]]<br />[[Trifling Exploration Box]] x 1 |
||
| + | |- |
||
| + | |[[File:Mob Shining Gold.png|100px]]<br />[[Shining Gold]]<br />★ |
||
| + | |[[File:Mob Shining Vinegold.png|100px]]<br />[[Shining Vinegold]]<br />★ |
||
| + | |[[File:Mob Moving Practice Robot.png]]<br />[[Moving Practice Robot]]<br />★ |
||
| + | |[[File:Mob Tainted Practice Robot.png]]<br />[[Tainted Practice Robot]]<br />★ |
||
| + | | |
||
| + | |[[File:Use Trifling Exploration Box.png]]<br />[[Trifling Exploration Box]] x 1 |
||
| + | |- |
||
| + | |[[File:Mob Hedgehog.png]]<br />[[Hedgehog]]<br />★ |
||
| + | |[[File:Mob Mutant Hedgehog.png]]<br />[[Mutant Hedgehog]]<br />★ |
||
| + | |[[File:Mob Nutria.png]]<br />[[Nutria]]<br />★ |
||
| + | |[[File:Mob Mutant Nutria.png]]<br />[[Mutant Nutria]]<br />★ |
||
| + | | |
||
| + | |[[File:Use Trifling Exploration Box.png]]<br />[[Trifling Exploration Box]] x 1 |
||
| + | |- |
||
| + | |[[File:Mob Ooze Waste.png|100px]]<br />[[Ooze Waste]]<br />★ |
||
| + | |[[File:Mob Flame Waste.png]]<br />[[Flame Waste]]<br />★ |
||
| + | |[[File:Mob Scrap Iron Waste.png]]<br />[[Scrap Iron Waste]]<br />★ |
||
| + | |[[File:Mob Specter Stray Dog.png|100px]]<br />[[Specter Stray Dog]]<br />★ |
||
| + | |[[File:Mob Mutant Specter Stray Dog.png|100px]]<br />[[Mutant Specter Stray Dog]]<br />★ |
||
| + | |[[File:Use Trifling Exploration Box.png]]<br />[[Trifling Exploration Box]] x 1 |
||
| + | |- |
||
| + | |[[File:Mob Market Hoodlum.png|100px]]<br />[[Market Hoodlum]]<br />★ |
||
| + | |[[File:Mob Dumpy Hoodlum.png|100px]]<br />[[Dumpy Hoodlum]]<br />★ |
||
| + | |[[File:Mob Hazard's Vile Crony.png|100px]]<br />[[Hazard's Rotten Crony]]<br />★ |
||
| + | |[[File:Mob Hazard's Rotten Crony.png]]<br />[[Hazard's Rotten Crony]]<br />★ |
||
| + | |[[File:Mob Hazard's Mean Crony.png|100px]]<br />[[Hazard's Mean Crony]]<br />★ |
||
| + | |[[File:Use Adequate Exploration Box.png]]<br />[[Adequate Exploration Box]] x 1 |
||
| + | |} |
||
| + | {|class="wikitable mw-collapsible mw-collapsed" width="100%" style="background:#F0F8FF; text-align:center" data-expandtext="show" data-collapsetext="hide" |
||
| + | !colspan="1"|Overall Reward |
||
| + | |- |
||
| + | !width="{{#expr:100/1}}%"|[[File:Use Mysterious Meso Pouch.png]]<br />[[Mysterious Meso Pouch]] x 1 |
||
| + | |} |
||
| + | ===Grandis (IV)=== |
||
| + | {|class="wikitable mw-collapsible mw-collapsed" width="100%" style="background:#F0F8FF; text-align:center" data-expandtext="show" data-collapsetext="hide" |
||
| + | !colspan="6"|Grandis (IV) |
||
| + | |- |
||
| + | !width="{{#expr:100/6}}%"|Monster |
||
| + | !width="{{#expr:100/6}}%"|Monster |
||
| + | !width="{{#expr:100/6}}%"|Monster |
||
| + | !width="{{#expr:100/6}}%"|Monster |
||
| + | !width="{{#expr:100/6}}%"|Monster |
||
| + | !width="{{#expr:100/6}}%"|Reward |
||
| + | |- |
||
| + | |[[File:Mob Desert Mush.png|100px]]<br />[[Desert Mush]]<br />★ |
||
| + | |[[File:Mob Ferocious Desert Mush.png|100px]]<br />[[Ferocious Desert Mush]]<br />★ |
||
| + | |[[File:Mob Sand Tortoise.png]]<br />[[Sand Tortoise]]<br />★ |
||
| + | |[[File:Mob Crystal Sand Tortoise.png|100px]]<br />[[Crystal Sand Tortoise]]<br />★ |
||
| + | |[[File:Mob Crystal Hermit Crab.png|100px]]<br />[[Crystal Hermit Crab]]<br />★ |
||
| + | |[[File:Use Trifling Exploration Box.png]]<br />[[Trifling Exploration Box]] x 1 |
||
| + | |- |
||
| + | |[[File:Mob Bomber Hermit Crab.png|100px]]<br />[[Bomber Hermit Crab]]<br />★ |
||
| + | |[[File:Mob Gale Fox.png|100px]]<br />[[Gale Fox]]<br />★ |
||
| + | |[[File:Mob Ferocious Gale Fox.png|100px]]<br />[[Ferocious Gale Fox]]<br />★ |
||
| + | | |
||
| + | | |
||
| + | |[[File:Use Trifling Exploration Box.png]]<br />[[Trifling Exploration Box]] x 1 |
||
| + | |- |
||
| + | |[[File:Mob Sand Helm.png|100px]]<br />[[Sand Helm]]<br />★ |
||
| + | |[[File:Mob Sand Armor.png|100px]]<br />[[Sand Armor]]<br />★ |
||
| + | |[[File:Mob Illusion Soldier A.png]]<br />[[Illusion Soldier A]]<br />★ |
||
| + | |[[File:Mob Illusion Soldier B.png]]<br />[[Illusion Soldier B]]<br />★ |
||
| + | | |
||
| + | |[[File:Use Trifling Exploration Box.png]]<br />[[Trifling Exploration Box]] x 1 |
||
| + | |- |
||
| + | |[[File:Mob Flutterbuzz.png|100px]]<br />[[Flutterbuzz]]<br />★ |
||
| + | |[[File:Mob Pom Puff Bush.png|100px]]<br />[[Pom Puff Bush]]<br />★ |
||
| + | |[[File:Mob Spiney Puff Bush.png]]<br />[[Spiney Puff Bush]]<br />★ |
||
| + | |[[File:Mob Nettled Squirrel.png|100px]]<br />[[Nettled Squirrel]]<br />★ |
||
| + | |[[File:Mob Vicious Squirrel.png|100px]]<br />Gassy [[Vicious Squirrel]]<br />★★★ |
||
| + | |[[File:Use Adequate Exploration Box.png]]<br />[[Adequate Exploration Box]] x 1 |
||
| + | |- |
||
| + | |[[File:Mob Snowy Stjartmes.png]]<br />[[Snowy Stjartmes]]<br />★ |
||
| + | |[[File:Mob Stormy Stjartmes.png]]<br />[[Stormy Stjartmes]]<br />★ |
||
| + | |[[File:Mob Cloud Guardian.png|100px]]<br />[[Cloud Guardian]]<br />★ |
||
| + | |[[File:Mob Wind Guardian.png|100px]]<br />[[Wind Guardian]]<br />★ |
||
| + | |[[File:Mob Sky Guardian.png|100px]]<br />[[Sky Guardian]]<br />★ |
||
| + | |[[File:Use Decent Exploration Box.png]]<br />[[Decent Exploration Box]] x 1 |
||
| + | |} |
||
| + | {|class="wikitable mw-collapsible mw-collapsed" width="100%" style="background:#F0F8FF; text-align:center" data-expandtext="show" data-collapsetext="hide" |
||
| + | !colspan="1"|Overall Reward |
||
| + | |- |
||
| + | !width="{{#expr:100/1}}%"|[[File:Setup Sky Guardian Spirit Cube Chair.png]]<br />[[Sky Guardian Spirit Cube Chair]] x 1 |
||
| + | |} |
||
| + | |||
| + | ===Medals=== |
||
| + | [[File:Eqp Otherworld's Collector.png]]<br />'''[[Otherworld's Collector]]''' |
||
| + | *'''Requirement:''' Collect 50 Grandis monsters |
||
==Arcane River== |
==Arcane River== |
||
| + | ===Arcane River (I)=== |
||
| − | {{Monster Collection (Arcane River)}} |
||
| + | {|class="wikitable mw-collapsible mw-collapsed" width="100%" style="background:#F0F8FF; text-align:center" data-expandtext="show" data-collapsetext="hide" |
||
| + | !colspan="6"|Arcane River (I) |
||
| + | |- |
||
| + | !width="{{#expr:100/6}}%"|Monster |
||
| + | !width="{{#expr:100/6}}%"|Monster |
||
| + | !width="{{#expr:100/6}}%"|Monster |
||
| + | !width="{{#expr:100/6}}%"|Monster |
||
| + | !width="{{#expr:100/6}}%"|Monster |
||
| + | !width="{{#expr:100/6}}%"|Reward |
||
| + | |- |
||
| + | |[[File:Mob Happy Erda.png]]<br />[[Happy Erda]]<br />★★ |
||
| + | |[[File:Mob Raging Erda.png|100px]]<br />[[Raging Erda]]<br />★★ |
||
| + | |[[File:Mob Sad Erda.png|100px]]<br />[[Sad Erda]]<br />★★ |
||
| + | |[[File:Mob Joyful Erda.png]]<br />[[Joyful Erda]]<br />★★ |
||
| + | | |
||
| + | |[[File:Use Adequate Exploration Box.png]]<br />[[Adequate Exploration Box]] x 1 |
||
| + | |- |
||
| + | |[[File:Mob Stone Erda.png|100px]]<br />[[Stone Erda]]<br />★★ |
||
| + | |[[File:Mob Blazing Erda.png|100px]]<br />[[Blazing Erda]]<br />★★ |
||
| + | |[[File:Mob Soulful Erda.png|100px]]<br />[[Soulful Erda]]<br />★★ |
||
| + | | |
||
| + | | |
||
| + | |[[File:Use Adequate Exploration Box.png]]<br />[[Adequate Exploration Box]] x 1 |
||
| + | |- |
||
| + | |[[File:Mob Tranquil Erda.png|100px]]<br />Shadowy [[Tranquil Erda]]<br />★★★ |
||
| + | |[[File:Mob Lantern Erda.png]]<br />[[Lantern Erda]]<br />★★ |
||
| + | |[[File:Mob Arma's Follower.png]]<br />[[Arma's Follower]]<br />★★ |
||
| + | |[[File:Mob Arma.png|100px]]<br />[[Arma]]<br />★★★★ |
||
| + | | |
||
| + | |[[File:Use Decent Exploration Box.png]]<br />[[Decent Exploration Box]] x 1 |
||
| + | |- |
||
| + | |[[File:Mob Pinedeer.png]]<br />[[Pinedeer]]<br />★★ |
||
| + | |[[File:Mob Bighorn Pinedeer.png]]<br />[[Bighorn Pinedeer]]<br />★★ |
||
| + | |[[File:Mob Ewenana.png|100px]]<br />[[Ewenana]]<br />★★ |
||
| + | |[[File:Mob Ramanana.png|100px]]<br />[[Ramanana]]<br />★★ |
||
| + | | |
||
| + | |[[File:Use Adequate Exploration Box.png]]<br />[[Adequate Exploration Box]] x 1 |
||
| + | |- |
||
| + | |[[File:Mob Flyon.png|100px]]<br />[[Flyon]]<br />★★ |
||
| + | |[[File:Mob Angry Flyon.png|100px]]<br />[[Angry Flyon]]<br />★★ |
||
| + | |[[File:Mob Unripe Wolfruit.png|100px]]<br />[[Unripe Wolfruit]]<br />★★ |
||
| + | |[[File:Mob Ripe Wolfruit.png|100px]]<br />Poisonous [[Ripe Wolfruit]]<br />★★★ |
||
| + | |[[File:Mob Slurpy Tree.png|100px]]<br />[[Slurpy Tree]]<br />★★★★ |
||
| + | |[[File:Use Decent Exploration Box.png]]<br />[[Decent Exploration Box]] x 1 |
||
| + | |} |
||
| + | {|class="wikitable mw-collapsible mw-collapsed" width="100%" style="background:#F0F8FF; text-align:center" data-expandtext="show" data-collapsetext="hide" |
||
| + | !colspan="1"|Overall Reward |
||
| + | |- |
||
| + | !width="{{#expr:100/1}}%"|[[File:Setup Ripe Wolfruit Cube Chair.png]]<br />[[Ripe Wolfruit Cube Chair]] x 1 |
||
| + | |} |
||
| + | ===Arcane River (II)=== |
||
| + | {|class="wikitable mw-collapsible mw-collapsed" width="100%" style="background:#F0F8FF; text-align:center" data-expandtext="show" data-collapsetext="hide" |
||
| + | !colspan="6"|Arcane River (II) |
||
| + | |- |
||
| + | !width="{{#expr:100/6}}%"|Monster |
||
| + | !width="{{#expr:100/6}}%"|Monster |
||
| + | !width="{{#expr:100/6}}%"|Monster |
||
| + | !width="{{#expr:100/6}}%"|Monster |
||
| + | !width="{{#expr:100/6}}%"|Monster |
||
| + | !width="{{#expr:100/6}}%"|Reward |
||
| + | |- |
||
| + | |[[File:Mob Green Catfish.png|100px]]<br />[[Green Catfish]]<br />★★ |
||
| + | |[[File:Mob Blue Catfish.png|100px]]<br />[[Blue Catfish]]<br />★★ |
||
| + | |[[File:Mob Rhyturtle.png|100px]]<br />[[Rhyturtle]]<br />★★ |
||
| + | |[[File:Mob Boss Rhyturtle.png|100px]]<br />[[Boss Rhyturtle]]<br />★★ |
||
| + | | |
||
| + | |[[File:Use Adequate Exploration Box.png]]<br />[[Adequate Exploration Box]] x 1 |
||
| + | |- |
||
| + | |[[File:Mob Crilia.png|100px]]<br />[[Crilia]]<br />★★ |
||
| + | |[[File:Mob Patriarch Crilia.png|100px]]<br />Fragile [[Patriarch Crilia]]<br />★★★ |
||
| + | |[[File:Mob Birdshark.png|100px]]<br />[[Birdshark]]<br />★★ |
||
| + | |[[File:Mob Patriarch Birdshark.png|100px]]<br />[[Patriarch Birdshark]]<br />★★ |
||
| + | | |
||
| + | |[[File:Use Decent Exploration Box.png]]<br />[[Decent Exploration Box]] x 1 |
||
| + | |- |
||
| + | |[[File:Mob Dreamkeeper.png|100px]]<br />[[Dreamkeeper]]<br />★★ |
||
| + | |[[File:Mob Paper Bag Alley Citizen.png]]<br />[[Paper Bag Alley Citizen]]<br />★★ |
||
| + | |[[File:Mob Wood Board Alley Citizen.png|100px]]<br />[[Wood Board Alley Citizen]]<br />★★ |
||
| + | |[[File:Mob Gallina.png|100px]]<br />[[Gallina]]<br />★★ |
||
| + | |[[File:Mob Gallus.png|100px]]<br />[[Gallus]]<br />★★ |
||
| + | |[[File:Use Adequate Exploration Box.png]]<br />[[Adequate Exploration Box]] x 1 |
||
| + | |- |
||
| + | |[[File:Mob Angry Victory Plate.png|100px]]<br />[[Angry Victory Plate]]<br />★★ |
||
| + | |[[File:Mob Crooked Victory Plate.png|100px]]<br />[[Crooked Victory Plate]]<br />★★ |
||
| + | |[[File:Mob Red Dancing Shoes.png|100px]]<br />Unstoppable [[Red Dancing Shoes]]<br />★★★ |
||
| + | |[[File:Mob Angry Masquerade Citizen.png|100px]]<br />[[Angry Masquerade Citizen]]<br />★★ |
||
| + | |[[File:Mob Insane Masquerade Citizen.png|100px]]<br />[[Insane Masquerade Citizen]]<br />★★ |
||
| + | |[[File:Use Decent Exploration Box.png]]<br />[[Decent Exploration Box]] x 1 |
||
| + | |- |
||
| + | |[[File:Mob Lucid.png|100px]]<br />[[Lucid/Monster|Lucid]]<br />★★★★★ |
||
| + | |[[File:Mob Nightmare Golem.png|100px]]<br />[[Nightmare Golem]]<br />★★ |
||
| + | |[[File:Mob Nightmare Mushroom.png|100px]]<br />[[Nightmare Mushroom]]<br />★★ |
||
| + | |[[File:Mob Blue-eyed Gargoyle.png|100px]]<br />[[Blue-eyed Gargoyle]]<br />★★ |
||
| + | |[[File:Mob Red-eyed Gargoyle.png|100px]]<br />[[Red-eyed Gargoyle]]<br />★★ |
||
| + | |[[File:Use Substantial Exploration Box.png]]<br />[[Substantial Exploration Box]] x 1 |
||
| + | |} |
||
| + | {|class="wikitable mw-collapsible mw-collapsed" width="100%" style="background:#F0F8FF; text-align:center" data-expandtext="show" data-collapsetext="hide" |
||
| + | !colspan="1"|Overall Reward |
||
| + | |- |
||
| + | !width="{{#expr:100/1}}%"|[[File:Use Mysterious Meso Pouch.png]]<br />[[Mysterious Meso Pouch]] x 5 |
||
| + | |} |
||
| + | ===Arcane River (III)=== |
||
| + | {|class="wikitable mw-collapsible mw-collapsed" width="100%" style="background:#F0F8FF; text-align:center" data-expandtext="show" data-collapsetext="hide" |
||
| + | !colspan="6"|Arcane River (III) |
||
| + | |- |
||
| + | !width="{{#expr:100/6}}%"|Monster |
||
| + | !width="{{#expr:100/6}}%"|Monster |
||
| + | !width="{{#expr:100/6}}%"|Monster |
||
| + | !width="{{#expr:100/6}}%"|Monster |
||
| + | !width="{{#expr:100/6}}%"|Monster |
||
| + | !width="{{#expr:100/6}}%"|Reward |
||
| + | |- |
||
| + | |[[File:Mob Water Spirit.png|100px]]<br />[[Water Spirit]]<br />★★ |
||
| + | |[[File:Mob Sun Spirit.png|100px]]<br />[[Sun Spirit]]<br />★★ |
||
| + | |[[File:Mob Earth Spirit.png|100px]]<br />[[Earth Spirit]]<br />★★ |
||
| + | |[[File:Mob Spirit Debris.png|100px]]<br />[[Spirit Debris]]<br />★★ |
||
| + | | |
||
| + | |[[File:Use Adequate Exploration Box.png]]<br />[[Adequate Exploration Box]] x 1 |
||
| + | |- |
||
| + | |[[File:Mob Snow Cloud Spirit.png|100px]]<br />[[Snow Cloud Spirit]]<br />★★ |
||
| + | |[[File:Mob Thunder Cloud Spirit.png|100px]]<br />Shadowy [[Thunder Cloud Spirit]]<br />★★★ |
||
| + | |[[File:Mob Toxic Spirit.png|100px]]<br />[[Toxic Spirit]]<br />★★ |
||
| + | |[[File:Mob Volatile Spirit.png|100px]]<br />[[Volatile Spirit]]<br />★★ |
||
| + | | |
||
| + | |[[File:Use Decent Exploration Box.png]]<br />[[Decent Exploration Box]] x 1 |
||
| + | |- |
||
| + | |[[File:Mob Corrupt Spirit of Harmony.png|100px]]<br />[[Corrupt Spirit of Harmony]]<br />★★★★ |
||
| + | |[[File:Mob Discordant Spirit.png|100px]]<br />[[Discordant Spirit]]<br />★★ |
||
| + | |[[File:Mob Befuddled Spirit.png|100px]]<br />[[Befuddled Spirit]]<br />★★ |
||
| + | |[[File:Mob Anguished Spirit.png|100px]]<br />[[Anguished Spirit]]<br />★★ |
||
| + | |[[File:Mob Mournful Spirit.png|100px]]<br />[[Mournful Spirit]]<br />★★ |
||
| + | |[[File:Use Decent Exploration Box.png]]<br />[[Decent Exploration Box]] x 1 |
||
| + | |- |
||
| + | |[[File:Mob Xenoroid Echo Type A.png]]<br />[[Xenoroid Echo Type A]]<br />★★ |
||
| + | |[[File:Mob Xenoroid Echo Type B.png|100px]]<br />[[Xenoroid Echo Type B]]<br />★★ |
||
| + | |[[File:Mob Blue Shadow.png]]<br />[[Blue Shadow]]<br />★★ |
||
| + | |[[File:Mob Red Shadow.png|100px]]<br />[[Red Shadow (Monster)|Red Shadow]]<br />★★ |
||
| + | |[[File:Mob Experiment Gone Wrong.png|100px]]<br />[[Experiment Gone Wrong]]<br />★★ |
||
| + | |[[File:Use Adequate Exploration Box.png]]<br />[[Adequate Exploration Box]] x 1 |
||
| + | |- |
||
| + | |[[File:Mob Big Experiment Gone Wrong.png|100px]]<br />[[Big Experiment Gone Wrong]]<br />★★ |
||
| + | |[[File:Mob Thralled Guard.png|100px]]<br />[[Thralled Guard]]<br />★★ |
||
| + | |[[File:Mob Thralled Warhammer Knight.png|100px]]<br />Seal Master [[Thralled Warhammer Knight]]<br />★★★ |
||
| + | |[[File:Mob Thralled Wizard.png|100px]]<br />[[Thralled Wizard]]<br />★★ |
||
| + | |[[File:Mob Thralled Archer.png|100px]]<br />[[Thralled Archer]]<br />★★ |
||
| + | |[[File:Use Decent Exploration Box.png]]<br />[[Decent Exploration Box]] x 1 |
||
| + | |} |
||
| + | {|class="wikitable mw-collapsible mw-collapsed" width="100%" style="background:#F0F8FF; text-align:center" data-expandtext="show" data-collapsetext="hide" |
||
| + | !colspan="1"|Overall Reward |
||
| + | |- |
||
| + | !width="{{#expr:100/1}}%"|[[File:Setup Nameless Cat Cube Chair.png]]<br />[[Nameless Cat Cube Chair]] x 1 |
||
| + | |} |
||
| + | ===Arcane River (IV)=== |
||
| + | {|class="wikitable mw-collapsible mw-collapsed" width="100%" style="background:#F0F8FF; text-align:center" data-expandtext="show" data-collapsetext="hide" |
||
| + | !colspan="6"|Arcane River (IV) |
||
| + | |- |
||
| + | !width="{{#expr:100/6}}%"|Monster |
||
| + | !width="{{#expr:100/6}}%"|Monster |
||
| + | !width="{{#expr:100/6}}%"|Monster |
||
| + | !width="{{#expr:100/6}}%"|Monster |
||
| + | !width="{{#expr:100/6}}%"|Monster |
||
| + | !width="{{#expr:100/6}}%"|Reward |
||
| + | |- |
||
| + | |[[File:Mob Ahtuin.png|100px]]<br />[[Ahtuin]]<br />★★ |
||
| + | |[[File:Mob Atus.png|100px]]<br />[[Atus]]<br />★★ |
||
| + | |[[File:Mob Bellalion.png|100px]]<br />[[Bellalion]]<br />★★ |
||
| + | |[[File:Mob Bellalis.png|100px]]<br />[[Bellalis]]<br />★★ |
||
| + | |[[File:Mob Aranya.png|100px]]<br />[[Aranya]]<br />★★ |
||
| + | |[[File:Use Adequate Exploration Box.png]]<br />[[Adequate Exploration Box]] x 1 |
||
| + | |- |
||
| + | |[[File:Mob Aranea.png|100px]]<br />[[Aranea]]<br />★★ |
||
| + | |[[File:Mob Keeper of Light.png|100px]]<br />[[Keeper of Light]]<br />★★ |
||
| + | |[[File:Mob Keeper of Darkness.png|100px]]<br />[[Keeper of Darkness]]<br />★★ |
||
| + | |[[File:Mob Light Executor.png|100px]]<br />[[Light Executor]]<br />★★ |
||
| + | |[[File:Mob Dark Executor.png|100px]]<br />Overwhelming [[Dark Executor]]<br />★★★ |
||
| + | |[[File:Use Decent Exploration Box.png]]<br />[[Decent Exploration Box]] x 1 |
||
| + | |- |
||
| + | |[[File:Mob Soot Beast.png|100px]]<br />[[Soot Beast]]<br />★ |
||
| + | |[[File:Mob Soot Talon.png|100px]]<br />[[Soot Talon]]<br />★★ |
||
| + | |[[File:Mob Soot Slug.png|100px]]<br />[[Soot Slug]]<br />★★ |
||
| + | |[[File:Mob Soot Core.png|100px]]<br />[[Soot Core]]<br />★★ |
||
| + | |[[File:Mob Will.png|100px]]<br />[[Will/Monster|Will]]<br />★★★★★ |
||
| + | |[[File:Use Decent Exploration Box.png]]<br />[[Decent Exploration Box]] x 1 |
||
| + | |- |
||
| + | |[[File:Mob Crushing Glare.png|100px]]<br />[[Crushing Glare]]<br />★★ |
||
| + | |[[File:Mob Burst Glare.png|100px]]<br />[[Burst Glare]]<br />★★ |
||
| + | |[[File:Mob Entangled Fragment.png|100px]]<br />[[Entangled Fragment]]<br />★★ |
||
| + | |[[File:Mob Faith Fragment.png|100px]]<br />[[Faith Fragment]]<br />★★ |
||
| + | |[[File:Mob Giant Monster Gloom.png|100px]]<br />[[Giant Monster Gloom]]<br />★★★★★ |
||
| + | |[[File:Use Decent Exploration Box.png]]<br />[[Decent Exploration Box]] x 1 |
||
| + | |- |
||
| + | |[[File:Mob Dark Miscreation.png|100px]]<br />[[Dark Miscreation]]<br />★★ |
||
| + | |[[File:Mob Dark Construct.png|100px]]<br />[[Dark Construct]]<br />★★ |
||
| + | |[[File:Mob Giant Golem.png|100px]]<br />[[Giant Golem]]<br />★★ |
||
| + | |[[File:Mob Despairing Wing.png|100px]]<br />[[Despairing Wing]]<br />★★ |
||
| + | |[[File:Mob Despairing Blade.png|100px]]<br />[[Despairing Blade]]<br />★★ |
||
| + | |[[File:Use Adequate Exploration Box.png]]<br />[[Adequate Exploration Box]] x 1 |
||
| + | |} |
||
| + | {|class="wikitable mw-collapsible mw-collapsed" width="100%" style="background:#F0F8FF; text-align:center" data-expandtext="show" data-collapsetext="hide" |
||
| + | !colspan="1"|Overall Reward |
||
| + | |- |
||
| + | !width="{{#expr:100/1}}%"|[[File:Use Mysterious Meso Pouch.png]]<br />[[Mysterious Meso Pouch]] x 7 |
||
| + | |} |
||
| + | ===Arcane River (V)=== |
||
| + | {|class="wikitable mw-collapsible mw-collapsed" width="100%" style="background:#F0F8FF; text-align:center" data-expandtext="show" data-collapsetext="hide" |
||
| + | !colspan="6"|Arcane River (V) |
||
| + | |- |
||
| + | !width="{{#expr:100/6}}%"|Monster |
||
| + | !width="{{#expr:100/6}}%"|Monster |
||
| + | !width="{{#expr:100/6}}%"|Monster |
||
| + | !width="{{#expr:100/6}}%"|Monster |
||
| + | !width="{{#expr:100/6}}%"|Monster |
||
| + | !width="{{#expr:100/6}}%"|Reward |
||
| + | |- |
||
| + | |[[File:Mob Silent Knight.png|100px]]<br />[[Silent Knight]]<br />★★ |
||
| + | |[[File:Mob Silent Scout.png|100px]]<br />[[Silent Scout]]<br />★★ |
||
| + | |[[File:Mob Silent Rogue.png|100px]]<br />[[Silent Rogue]]<br />★★ |
||
| + | |[[File:Mob Greed Echo.png|100px]]<br />[[Greed Echo]]<br />★★ |
||
| + | |[[File:Mob Verus Hilla.png|100px]]<br />[[Hilla/Monster (Reborn)|Verus Hilla]]<br />★★★★★ |
||
| + | |[[File:Use Adequate Exploration Box.png]]<br />[[Decent Exploration Box]] x 1 |
||
| + | |- |
||
| + | |[[File:Mob Silent Watchman.png|100px]]<br />[[Silent Watchman]]<br />★★ |
||
| + | |[[File:Mob Silent Assassin.png|100px]]<br />[[Silent Assassin]]<br />★★ |
||
| + | |[[File:Mob Despairing Soul.png|100px]]<br />[[Despairing Soul]]<br />★★ |
||
| + | |[[File:Mob Despairing Prisoner.png|100px]]<br />[[Despairing Prisoner]]<br />★★ |
||
| + | |[[File:Mob Blackheart Negative.png|100px]]<br />[[Blackheart Negative]]<br />★★ |
||
| + | |[[File:Use Adequate Exploration Box.png]]<br />[[Adequate Exploration Box]] x 1 |
||
| + | |- |
||
| + | |[[File:Mob Ancestion.png|100px]]<br />[[Ancestion]]<br />★★ |
||
| + | |[[File:Mob Transcendion.png|100px]]<br />[[Transcendion]]<br />★★ |
||
| + | |[[File:Mob Ascendion.png|100px]]<br />[[Ascendion]]<br />★★ |
||
| + | | |
||
| + | | |
||
| + | |[[File:Use Adequate Exploration Box.png]]<br />[[Adequate Exploration Box]] x 1 |
||
| + | |- |
||
| + | |[[File:Mob Foreberion.png|100px]]<br />[[Foreberion]]<br />★★ |
||
| + | |[[File:Mob Embrion.png|100px]]<br />[[Embrion]]<br />★★ |
||
| + | |[[File:Mob Corrupted Warrior.png|100px]]<br />[[Corrupted Warrior]]<br />★★ |
||
| + | |[[File:Mob Guard Captain Darknell.png|100px]]<br />[[Guard Captain Darknell/Monster|Guard Captain Darknell]]<br />★★★★★ |
||
| + | | |
||
| + | |[[File:Use Decent Exploration Box.png]]<br />[[Decent Exploration Box]] x 1 |
||
| + | |- |
||
| + | |[[File:Mob Black Mage.png|100px]]<br />[[Black Mage/Monster|Black Mage]]<br />★★★★★ |
||
| + | | |
||
| + | | |
||
| + | | |
||
| + | | |
||
| + | |[[File:Use Substantial Exploration Box.png]]<br />[[Substantial Exploration Box]] x 1 |
||
| + | |} |
||
| + | {|class="wikitable mw-collapsible mw-collapsed" width="100%" style="background:#F0F8FF; text-align:center" data-expandtext="show" data-collapsetext="hide" |
||
| + | !colspan="1"|Overall Reward |
||
| + | |- |
||
| + | !width="{{#expr:100/1}}%"|[[File:Setup Verus Hilla Cube Chair.png]]<br />[[Verus Hilla Cube Chair]] x 1 |
||
| + | |} |
||
| + | |||
| + | ===Medals=== |
||
| + | [[File:Eqp Arcane River Collector.png]]<br />'''[[Arcane River Collector]]''' |
||
| + | *'''Requirement:''' Collect 50 Arcane River monsters |
||
[[Category:Elements]] |
[[Category:Elements]] |
||
Revision as of 21:01, 29 August 2020
Monster Collection is a new form of collecting introduced recently in MapleStory. The objective is to kill monsters and add them to your collection, and then send the collections out on an Exploration to get bonus rewards. The collection is organized into different sections, as well as various sub-sections, based on the area where the monster can be found. There are rewards for completing a single row and page of collection, in addition to Exploration. Monster Collection and Exploration is accessible and shared amongst all characters in the same world.
To add monsters to Monster Collection, players hunt the specific monster until it is added, or use the extremely rare Monsterbloom item to randomly register a monster (there are a few Monsterblooms that register a specific monster, obtainable by completing certain rows in the Collection). Any iteration of this monster can count toward the collection as long as it has the exact same name (e.g. hunting Snowman in the Cooking with Tangyoon Party Quest will count for Snowman in El Nath). Note that lower level monsters have a higher chance of being added than higher level monsters, and certain monsters require an Elite monster version to be counted.
When all monsters in one row are collected, you can obtain a box that contains various items such as Reward Points, Spell Traces, and Chaos Scroll of Goodness 50%. When a row of monsters is completed, the player can send the collection out on an Expedition under the Exploration tab, where players can send a row of collections out on an expedition for some set time to obtain rewards such as Reward Points, Trait Items, Spell Traces, Occult Cubes, and Potential Scrolls.
Victoria Island
Victoria Island (I)
| Victoria Island (I) | |||||
|---|---|---|---|---|---|
| Monster | Monster | Monster | Monster | Monster | Reward |
 Orange Mushroom ★ |
 Mushmom ★★ |
 Blue Mushroom ★ |
 Crying Blue Mushroom ★ |
 Blue Mushmom ★★ |
Trifling Exploration Box x 1 |
 Green Mushroom ★ |
 Horny Mushroom ★ |
 Zombie Mushroom ★ |
 Annoyed Zombie Mushroom ★ |
 Zombie Mushmom ★★★ |
Adequate Exploration Box x 1 |
Ribbon Pig ★ |
 Blue Ribbon Pig ★ |
 Strange Pig ★ |
Evasive Wild Boar ★★★ |
Adequate Exploration Box x 1 | |
Iron Hog ★ |
 Iron Boar ★ |
 Beefy Fire Boar ★★★ |
 Portly Pig ★ |
 Mr. Chomps ★★★★ |
Decent Exploration Box x 1 |
Fairy ★ |
 Royal Fairy ★ |
Slime ★ |
Bubbling ★ |
Trifling Exploration Box x 1 | |
| Overall Reward |
|---|
Mysterious Meso Pouch x 1 |
Victoria Island (II)
| Victoria Island (II) | |||||
|---|---|---|---|---|---|
| Monster | Monster | Monster | Monster | Monster | Reward |
 Evil Eye ★ |
 Curse Eye ★ |
 Cold Eye ★ |
 Surgeon Eye ★ |
Adequate Exploration Box x 1 | |
 Stump ★ |
 Dark Stump ★ |
 Axe Stump ★ |
 Dark Axe Stump ★ |
Trifling Exploration Box x 1 | |
 Ghost Stump ★ |
 Smirking Ghost Stump ★ |
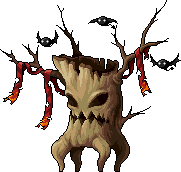 Stumpy ★★★★ |
 Sticky Wooden Mask ★★★ |
 Rocky Mask ★ |
Adequate Exploration Box x 1 |
 Firefly Slime ★ |
 Fairy Slime ★ |
 Mystic Wisp ★ |
 Water Sprite ★ |
 Forest Sprite ★★ |
Trifling Exploration Box x 1 |
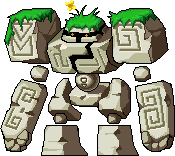 Stone Golem ★ |
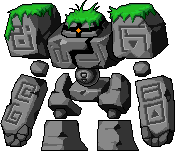 Dark Stone Golem ★ |
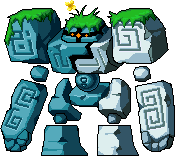 Icy Mixed Golem ★ |
 Flaming Mixed Golem ★ |
 Ice Golem SPECIAL |
Decent Exploration Box x 1 |
| Overall Reward |
|---|
| File:Use Selective 4 Slot Coupon.png Selective 4 Slot Coupon x 1 |
Victoria Island (III)
| Victoria Island (III) | |||||
|---|---|---|---|---|---|
| Monster | Monster | Monster | Monster | Monster | Reward |
 Grumpy Tome ★ |
 Healer Raging Tome ★★★ |
 Oniony ★ |
 Turnipy ★ |
 Mole King ★★★★ |
Adequate Exploration Box x 1 |
Stirge ★ |
Jr. Wraith ★ |
 Wraith ★ |
 Shade ★ |
Adequate Exploration Box x 1 | |
 Palm Tree Slime ★ |
 Coconut Slime ★ |
Emerald Clam Slime ★ |
Beefy Violet Clam Slime ★★★ |
Adequate Exploration Box x 1 | |
 Seagull Slime ★ |
 Red Tube Slime ★ |
 Blue Tube Slime ★ |
 Shrimp Slime ★ |
 Flying Fish Slime ★ |
Trifling Exploration Box x 1 |
 Captain Darkgoo ★★★★ |
 Petrifying Starfish Octopus Slime ★★★ |
 Seashell Octopus Slime ★ |
Decent Exploration Box x 1 | ||
| Overall Reward |
|---|
Orange Mushroom Cube Chair x 1 |
Victoria Island (IV)
| Victoria Island (IV) | |||||
|---|---|---|---|---|---|
| Monster | Monster | Monster | Monster | Monster | Reward |
Jr. Necki ★ |
Ligator ★ |
Croco ★ |
 Muddy Sprout Monster ★ |
 Dyle ★★★ |
Adequate Exploration Box x 1 |
 Skeledog ★ |
 Skeleton Soldier ★ |
 Skeleton Officer ★ |
 Skeleton Commander ★ |
 Lord Skeleton ★★★★ |
Adequate Exploration Box x 1 |
 Beefy Mushroom Chandelier ★★★ |
 Mushroom Knight Armor ★ |
 Exhausted Viking ★ |
 Tired Viking ★ |
Trifling Exploration Box x 1 | |
 Prime Minister SPECIAL |
 Warm Viking ★ |
 Generous Viking ★ |
 Petrifying Solemn Viking ★★★ |
Decent Exploration Box x 3 | |
 Black Viking ★★★★ |
 Serious Viking ★ |
 Master Squid ★ |
Viking Squad ★ |
Prime Minister Monsterbloom x 1 | |
| Overall Reward |
|---|
| File:Use Fusion Anvil Coupon.png Fusion Anvil Coupon x 1 |
Sleepywood (I)
| Sleepywood (I) | |||||
|---|---|---|---|---|---|
| Monster | Monster | Monster | Monster | Monster | Reward |
 Copper Drake ★ |
 Drake ★ |
 Red Drake ★ |
 Ice Drake ★ |
 Dark Drake ★ |
Trifling Exploration Box x 1 |
 Wild Kargo ★ |
 Tauromacis ★ |
 Petrifying Taurospear ★★★ |
 Jr. Balrog ★★★ |
 Balrog ★★★★ |
Adequate Exploration Box x 1 |
 Blazing Imp ★ |
 Pointy Imp ★ |
Elite Blazing Imp ★ |
Elite Pointy Imp ★ |
Adequate Exploration Box x 1 | |
 Pierre ★★★★★ |
 Von Bon ★★★★★ |
 Crimson Queen ★★★★★ |
 Vellum/Monster#Vellum ★★★★★ |
Decent Exploration Box x 1 | |
Chaos Pierre ★★★★★ |
Chaos Von Bon ★★★★★ |
Chaos Crimson Queen ★★★★★ |
Chaos Vellum ★★★★★ |
Substantial Exploration Box x 1 | |
| Overall Reward |
|---|
Character Slot Expansion Coupon x 1 |
Sleepywood (II)
| Sleepywood (II) | |||||
|---|---|---|---|---|---|
| Monster | Monster | Monster | Monster | Monster | Reward |
 Typhon ★ |
 Leprechaun ★ |
 Elderwraith ★ |
Crimson Stirge ★ |
Trifling Exploration Box x 1 | |
 Elite Stormbreaker ★ |
 Elite Firebrand ★ |
 Elite Windraider ★ |
 Elite Nightshadow ★ |
Adequate Exploration Box x 1 | |
 Master Red Nirg ★★★★ |
 Elite Scarlet Phoenix ★ |
 Elite Azure Ocelot ★ |
 Corrupted Imp ★ |
Adequate Exploration Box x 1 | |
 Dark Demon Swordsman ★ |
 Dark Demon Swordmaster ★ |
 Dark Demon Axeman ★ |
 Unstoppable Dark Demon Axemaster ★★★ |
 Dark Demon Shieldbearer ★ |
Decent Exploration Box x 1 |
 Damien ★★★★★ |
 Dark Demon Eagle Rider ★★ |
 Dark Demon Shieldmaster ★ |
 Dark Demon Wolfrider ★ |
 Dark Demon Wolfmaster ★ |
Substantial Exploration Box x 1 |
| Overall Reward |
|---|
Crimson Stirge Cube Chair x 1 |
Kerning Tower
| Kerning Tower | |||||
|---|---|---|---|---|---|
| Monster | Monster | Monster | Monster | Monster | Reward |
Greatest Oldies Album ★ |
Latest Hits Album ★ |
Cheap Amplifier SPECIAL |
 Fancy Amplifier SPECIAL |
 Next-gen Speaker ★ |
Decent Exploration Box x 1 |
 Blue Raspberry Jelly Juice ★ |
 Grape Jelly Juice ★ |
 Evasive Enraged Espresso Machine ★★★ |
Adequate Exploration Box x 1 | ||
 Green Notebook ★ |
 Blue Notebook ★ |
 Yellow Headphones ★ |
 Red Headphones ★ |
Cheap Amplifier Monsterbloom x 1 | |
 Killer Cosmetics ★ |
 Deadly Dressing Table ★ |
 Harried Hair Roller ★ |
 Peeved Perm Machine ★ |
 Spirit of Rock ★★★★ |
Decent Exploration Box x 1 |
[*] Enraged Espresso Machine ★★★ |
[*] Blue Notebook ★★ |
[*] Red Headphones ★★ |
[*] Deadly Dressing Table ★★ |
[*] Harried Hair Roller ★★ |
Fancy Amplifier Monsterbloom x 1 |
| Overall Reward |
|---|
Mysterious Meso Pouch x 3 |
Medals
- Requirement: Collect 50 Victoria Island monsters
- Requirement: Collect 100 Victoria Island monsters
Near Victoria
Near Victoria (I)
| Near Victoria (I) | |||||
|---|---|---|---|---|---|
| Monster | Monster | Monster | Monster | Monster | Reward |
Tino ★ |
Tiv ★ |
Timu ★ |
 Tiru ★ |
 Tiguru ★ |
Trifling Exploration Box x 1 |
Muru ★ |
Murupa ★ |
 Murupia ★ |
 Murumuru ★ |
 Murukun ★ |
Trifling Exploration Box x 1 |
 Mano ★★★ |
Snail ★ |
Blue Snail ★ |
Red Snail ★ |
File:Mob Shroom.png Shroom ★ |
Trifling Exploration Box x 1 |
 Ammonite Grumpil ★ |
 Fish Grumpil ★ |
File:Mob Corrupter Barrels.png Corrupter Barrels ★ |
 Polluter Barrel ★ |
Trifling Exploration Box x 1 | |
 Magic-Resistant Commanding Possibly-Evil Seal ★★★★ |
 Possibly-Evil Walrus ★ |
 Warmer Bot ★ |
 Shaver Bot ★ |
Decent Exploration Box x 1 | |
| Overall Reward |
|---|
Tino Cube Chair x 1 |
Tower of Oz
| Tower of Oz | |||||
|---|---|---|---|---|---|
| Monster | Monster | Monster | Monster | Monster | Reward |
 Ancient Blue Slime ★ |
 Ancient Purple Slime ★ |
 Ancient Blue Turtle ★ |
 Ancient Orange Turtle ★ |
 Giant Spider ★★ |
Trifling Exploration Box x 1 |
 Blue Volcano Bug ★ |
 Brown Volcano Bug ★ |
 Flower Golem ★ |
 Black Flower Golem ★ |
 Tin Woodman ★★★★ |
Adequate Exploration Box x 1 |
 Blue Flower Cow ★ |
 Green Flower Cow ★ |
 White Thorny Bear ★ |
 Brown Thorny Bear ★ |
 Cowardly Lion ★★★★ |
Adequate Exploration Box x 1 |
 Orange Ancient Slime ★ |
 Blue Insectivore Slime ★ |
 Yellow Insectivore Slime ★ |
 Blue Ancient Slime ★ |
 Scarecrow ★★★★ |
Decent Exploration Box x 1 |
 Yellow Curly Cow ★ |
 Purple Curly Cow ★ |
 Ancient Beetle ★ |
 Orange Ancient Beetle ★ |
 Dorothy ★★★★★ |
Substantial Exploration Box x 1 |
| Overall Reward |
|---|
Dorothy Cube Chair x 1 |
Medals
- Requirement: Collect 50 Near Victoria monsters (currently cannot be obtained)
Edelstein
Edelstein (I)
| Edelstein (I) | |||||
|---|---|---|---|---|---|
| Monster | Monster | Monster | Monster | Monster | Reward |
Potted Sprout ★ |
Potted Morning Glory ★ |
Grape Juice Bottle ★ |
 Patrol Robot ★ |
 Strange Sign ★ |
Trifling Exploration Box x 1 |
 Serpent ★ |
 Water Thief Monster ★ |
 Dust Box ★ |
 Streetlight ★ |
 Patrol Robot S ★ |
Trifling Exploration Box x 1 |
 Safety First ★ |
 Baby Boulder Muncher ★ |
 Big Boulder Muncher ★ |
 Guard Robot ★ |
 Guard Robot L ★ |
Adequate Exploration Box x 1 |
 Big Spider ★ |
 Cart Bear ★ |
 Racoco ★ |
 Racaroni ★ |
 Raco ★ |
Adequate Exploration Box x 1 |
 Security System ★ |
 Poisonous Enhanced Security System ★★★ |
 AF Android ★ |
 Broken DF Android ★ |
 Ore Muncher ★ |
Decent Exploration Box x 1 |
| Overall Reward |
|---|
Water Thief Monster Cube Chair x 1 |
Scrapyard
| Scrapyard | |||||
|---|---|---|---|---|---|
| Monster | Monster | Monster | Monster | Monster | Reward |
 Modded Scaredroid ★ |
 Befuddling Modded Broken Android ★★★ |
 Modded Laseroid ★ |
 Chaseroid Red ★ |
 Chaseroid Blue ★ |
Trifling Exploration Box x 1 |
 Hunterizer Red ★ |
 Hunterizer Blue ★ |
 Modded Buffroid ★ |
 Salvoroid Red ★ |
 Salvoroid Blue ★ |
Adequate Exploration Box x 1 |
 Modded Deliverbot ★ |
 Outer Guard EX ★ |
 Inner Guard EX ★ |
 Demolishizer ★★★★ |
 Repairoid ★ |
Adequate Exploration Box x 1 |
 Steel Xenoroid DX ★ |
 Scrap Xenoroid DX ★ |
 Overwhelming Steel Xenoroid EX ★★★ |
Steel Xenoroid EX ★ |
 Scrap Xenoroid EX ★ |
Decent Exploration Box x 1 |
 Lotus ★★★★★ |
 Dry Alloy Xenoroid DX ★★★ |
Alloy Xenoroid DX ★ |
 Alloy Xenoroid EX ★ |
 Modded Megaroid ★ |
Substantial Exploration Box x 1 |
| Overall Reward |
|---|
Pendant Slot Coupon (30 Days) x 1 |
Medals
- Requirement: Collect 50 Edelstein monsters
El Nath
Orbis
| Orbis | |||||
|---|---|---|---|---|---|
| Monster | Monster | Monster | Monster | Monster | Reward |
Jr. Sentinel ★ |
Sentinel ★ |
Ice Sentinel ★ |
Fire Sentinel ★ |
 Crimson Balrog ★★★ |
Trifling Exploration Box x 1 |
Jr. Cellion ★ |
Jr. Lioner ★ |
Jr. Grupin ★ |
Jr. Lucida ★ |
Adequate Exploration Box x 1 | |
 Cellion ★ |
 Lioner ★ |
 Grupin ★ |
 Lucida ★ |
 Eliza ★★★ |
Adequate Exploration Box x 1 |
 Lunar Pixie ★ |
 Befuddling Luster Pixie ★★★ |
 Star Pixie ★ |
 Ghost Pixie ★ |
 Papa Pixie ★★★★ |
Decent Exploration Box x 1 |
Dark Nependeath ★ |
Nependeath ★ |
 Golden Scorpie ★ |
 Golden Mammoth ★ |
 Xerxes ★★★★ |
Substantial Exploration Box x 1 |
| Overall Reward |
|---|
| File:Use Selective 4 Slot Coupon.png Selective 4 Slot Coupon x 1 |
El Nath (I)
| El Nath (I) | |||||
|---|---|---|---|---|---|
| Monster | Monster | Monster | Monster | Monster | Reward |
Leatty ★ |
Dark Leatty ★ |
Jr. Pepe ★ |
Jr. Yeti ★ |
Dark Jr. Yeti ★ |
Trifling Exploration Box x 1 |
 Dark Pepe ★ |
 Hector ★ |
 Shadowy White Fang ★★★ |
 Snow Witch ★★★★ |
Ice Golem Monsterbloom x 1 | |
 Yeti ★ |
 Dark Yeti ★ |
 Separated Pepe ★ |
 Yeti and Pepe ★ |
 Dark Yeti and Pepe ★ |
Adequate Exploration Box x 1 |
 Snowman ★★★ |
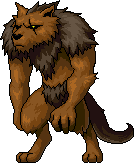 Werewolf ★ |
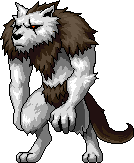 Lycanthrope ★ |
File:Mob Riche.png Riche ★★★ |
Decent Exploration Box x 1 | |
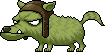 Hoblin Hector ★ |
 Elite Hoblin ★ |
 Combat Hoblin ★ |
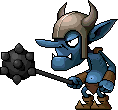 Ferocious Hoblin ★ |
 Rex ★★★★ |
Substantial Exploration Box x 1 |
| Overall Reward |
|---|
Spell Trace x 500 |
El Nath (II)
| El Nath (II) | |||||
|---|---|---|---|---|---|
| Monster | Monster | Monster | Monster | Monster | Reward |
 Crocky the Gatekeeper ★ |
 Reindeer ★ |
 Blood Reindeer ★ |
 Bearwolf ★ |
 Grey Vulture ★ |
Trifling Exploration Box x 1 |
 Golden Bee ★ |
 Frozen Rose ★ |
 Garden Golem ★ |
 Seal Master Castle Golem ★★★ |
 King Castle Golem ★ |
Adequate Exploration Box x 1 |
 Prison Guard Boar ★ |
 Prison Guard Rhino ★ |
 Prison Guard Ani ★★★★ |
 Keymaster Rousseau ★ |
 Von Leon ★★★★★ |
Decent Exploration Box x 1 |
Flyeye ★ |
 Gassy Coolie Zombie ★★★ |
 Miner Zombie ★★ |
 [*]Cerebes ★★ |
 [*]Bain ★★ |
Adequate Exploration Box x 1 |
 Punco ★ |
 Opachu ★ |
 Chaos Cuzco ★ |
 Zakum ★★★★★ |
Chaos Zakum ★★★★★ |
Decent Exploration Box x 1 |
| Overall Reward |
|---|
Yeti Cube Chair x 1 |
Medals
- Requirement: Collect 50 El Nath monsters
Ludus Lake
Ludibrium (I)
| Ludibrium (I) | |||||
|---|---|---|---|---|---|
| Monster | Monster | Monster | Monster | Monster | Reward |
Drumming Bunny ★ |
Brown Teddy ★ |
 Pink Teddy ★ |
Panda Teddy ★ |
Roloduck ★ |
Trifling Exploration Box x 1 |
Helly ★ |
Propelly ★ |
Planey ★ |
Chirppy ★ |
Tweeter ★ |
Adequate Exploration Box x 1 |
Bloctopus ★ |
King Bloctopus ★ |
 Rombot ★ |
 Poisonous Block Golem ★★★ |
 King Block Golem ★ |
Adequate Exploration Box x 1 |
 Toy Trojan ★ |
 Unstoppable Robo ★★★ |
 Master Robo ★ |
 Timer ★★ |
Adequate Exploration Box x 1 | |
Ratz ★ |
Black Ratz ★ |
 Trixter ★ |
 Dark Eye from Another Dimension ★★ |
 Alishar ★★★★ |
Decent Exploration Box x 1 |
| Overall Reward |
|---|
Robo Cube Chair x 1 |
Ludibrium (II)
| Ludibrium (II) | |||||
|---|---|---|---|---|---|
| Monster | Monster | Monster | Monster | Monster | Reward |
Tick ★ |
 Tick-Tock ★ |
 Chronos ★ |
 Platoon Chronos ★ |
 Master Chronos ★ |
Trifling Exploration Box x 1 |
 [*]Buffy ★★ |
 [*]Lazy Buffy ★★ |
 [*]Buffoon ★★ |
 [*]Deep Buffoon ★★ |
Trifling Exploration Box x 1 | |
 [*]Soul Teddy ★★ |
 [*]Master Soul Teddy ★★ |
 [*]Death Teddy ★★ |
 [*]Master Death Teddy ★★ |
Adequate Exploration Box x 1 | |
 [*]Ghost Pirate ★★ |
 Fragile [*]Dual Ghost Pirate ★★★ |
 [*]Spirit Viking ★★ |
 [*]Gigantic Spirit Viking ★★ |
Decent Exploration Box x 1 | |
 [*]Phantom Watch ★★ |
 [*]Grim Phantom Watch ★★ |
 [*]Gatekeeper ★★ |
 [*]Thanatos ★★ |
 Papulatus ★★★★★ |
Decent Exploration Box x 1 |
| Overall Reward |
|---|
2x EXP Coupon x 3 |
Ellin Forest
| Ellin Forest | |||||
|---|---|---|---|---|---|
| Monster | Monster | Monster | Monster | Monster | Reward |
 Mossy Snail ★ |
 Tree Rod ★ |
 Mossy Mushroom ★ |
 Stone Bug ★ |
Trifling Exploration Box x 1 | |
 Primitive Boar ★ |
Evasive Violent Primitive Boar ★★★ |
 Chao ★★★★ |
Adequate Exploration Box x 1 | ||
 Evil Poacher ★ |
 Poacher's Hawk ★ |
 Hidden Grave Robber ★ |
 Grave Robber's Hunting Dog ★ |
Adequate Exploration Box x 1 | |
| File:Mob Poisoned Lord Tree.png Poisoned Lord Tree ★ |
 Poisoned Stone Bug ★ |
Poison Flower ★ |
 Poisoned Spright ★ |
 Poison Golem ★★★ |
Decent Exploration Box x 1 |
 Neon Bat ★ |
Peace Spirit ★ |
 Ancient Fairy ★ |
 Shining Fairy ★ |
 Ephenia ★★★★ |
Substantial Exploration Box x 1 |
| Overall Reward |
|---|
Hair Color Coupon (VIP) Voucher x 1 |
Near Ludus Lake
| Near Ludus Lake | |||||
|---|---|---|---|---|---|
| Monster | Monster | Monster | Monster | Monster | Reward |
| File:Mob Three-Tailed Fox.png Three-Tailed Fox ★ |
Moon Bunny ★ |
 Hodori ★ |
 Hogul ★ |
Trifling Exploration Box x 1 | |
Blin ★ |
 Blue King Goblin ★ |
 Befuddling Green King Goblin ★★★ |
 Yellow King Goblin ★ |
Adequate Exploration Box x 1 | |
 Creeper Scarlion ★ |
 Ratacula ★ |
 Ghost ★ |
 Canterbear ★ |
Trifling Exploration Box x 1 | |
 Clowning Scarlion ★ |
 Colabear ★ |
 Soaring Scarlion ★ |
 Dry Jellybus ★★★ |
 Bearic the White ★ |
Adequate Exploration Box x 1 |
 Targa ★★★★ |
 Angry Targa ★★★★ |
 Scarboss ★★★★ |
 Furious Scarboss ★★★★ |
Decent Exploration Box x 1 | |
| Overall Reward |
|---|
Mysterious Meso Pouch x 2 |
Medals
- Requirement: Collect 50 Ludus Lake monsters
Aqua Road
Aqua Road (I)
| Aqua Road (I) | |||||
|---|---|---|---|---|---|
| Monster | Monster | Monster | Monster | Monster | Reward |
Seacle ★ |
Cico ★ |
Scuba Pepe ★ |
Jr. Seal ★ |
Pinboom ★ |
Trifling Exploration Box x 1 |
 Bubble Fish ★ |
 Flower Fish ★ |
 Mask Fish ★ |
Poopa ★ |
Poison Poopa ★ |
Adequate Exploration Box x 1 |
Krappy ★ |
 Krip ★ |
 Seruf ★★★ |
 Sparker ★ |
 Freezer ★ |
Adequate Exploration Box x 1 |
 Bombing Fish House ★ |
Goby ★ |
 Sticky Bone Fish ★★★ |
 Squid ★ |
 Risell Squid ★ |
Decent Exploration Box x 1 |
 Shark ★ |
 Healer Cold Shark ★★★ |
 Pianus ★★★★★ |
 Bloody Boom ★★ |
Substantial Exploration Box x 1 | |
| Overall Reward |
|---|
Scuba Pepe Cube Chair x 1 |
Medals
- Requirement: Collect 50 Aqua Road monsters (currently cannot be obtained)
Nihal Desert
Nihal Desert (I)
| Nihal Desert (I) | |||||
|---|---|---|---|---|---|
| Monster | Monster | Monster | Monster | Monster | Reward |
 Cactus ★ |
 Royal Cactus ★ |
 Deo ★★★★ |
File:Mob White Desert Rabbit.png White Desert Rabbit ★ |
File:Mob Brown Desert Rabbit.png Brown Desert Rabbit ★ |
Trifling Exploration Box x 1 |
 Bellamoa ★ |
 Ear Plug Plead ★ |
 Scarf Plead ★ |
Meerkat ★ |
 Kiyo ★ |
Adequate Exploration Box x 1 |
Sand Rat ★ |
 Undead Scorpion ★★★ |
 Sand Dwarf ★ |
 Dark Sand Dwarf ★ |
 Desert Giant ★ |
Adequate Exploration Box x 1 |
 Horus ★ |
 Advisor Mummy ★ |
 Pharaoh Yeti ★★ |
 Pharaoh Snake ★ |
 Pharoah Mummy ★ |
Decent Exploration Box x 1 |
 Deadly Altar ★ |
 Spearman Skeleknight ★ |
 Bloodfang ★ |
 Silver-Haired Hilla ★★★★★ |
File:Mob Giant Darkheart.png Giant Darkheart ★★★★★ |
Substantial Exploration Box x 1 |
| Overall Reward |
|---|
| File:Setup Desert Rabbit Cube Chair.png Desert Rabbit Cube Chair x 1 |
Magatia
| Magatia | |||||
|---|---|---|---|---|---|
| Monster | Monster | Monster | Monster | Monster | Reward |
Cube Slime ★ |
Rumo ★ |
 Healer Triple Rumo ★★★ |
 Rurumo ★★★★ |
Trifling Exploration Box x 1 | |
Iron Mutae ★ |
 Reinforced Iron Mutae ★ |
 Mithril Mutae ★ |
 Reinforced Mithril Mutae ★ |
Trifling Exploration Box x 1 | |
 Homun ★ |
 Homunculus ★ |
 Gassy Homunscullo ★★★ |
Adequate Exploration Box x 1 | ||
Roid ★ |
 Seal Master Neo Huroid ★★★ |
 Security Camera ★★★ |
 Deet and Roi ★★★ |
 D. Roy ★ |
Adequate Exploration Box x 1 |
 Chimera ★★★ |
 Saitie ★ |
Homun of Closed Laboratory ★ |
 Frankenroid ★★★★ |
 Angry Frankenroid ★★★★ |
Decent Exploration Box x 1 |
| Overall Reward |
|---|
Mysterious Meso Pouch x 1 |
Medals
- Requirement: Collect 50 Nihal Desert monsters (currently cannot be obtained)
Mu Lung Garden
Mu Lung Garden (I)
| Mu Lung Garden (I) | |||||
|---|---|---|---|---|---|
| Monster | Monster | Monster | Monster | Monster | Reward |
 Chipmunk ★ |
 Red Porky ★ |
 Black Porky ★ |
Trifling Exploration Box x 1 | ||
 Cute Reindeer ★ |
 Peach Monkey ★ |
 The Book Ghost ★ |
 Sage Cat ★★★ |
 King Sage Cat ★★★★ |
Adequate Exploration Box x 1 |
 Blue Flower Serpent ★ |
Evasive Red Flower Serpent ★★★ |
 Giant Centipede ★★★★ |
Adequate Exploration Box x 1 | ||
 Jar ★ |
 Ginseng Jar ★ |
 Bellflower Root ★ |
 Sr. Bellflower Root ★ |
 Gigantic Bellflower Root ★★★ |
Adequate Exploration Box x 1 |
 Grizzly ★ |
 Panda ★ |
 Tae Roon ★★★ |
 Mu Gong ★★★★★ |
Substantial Exploration Box x 1 | |
| Overall Reward |
|---|
Grizzly Cube Chair x 1 |
Mu Lung Garden (II)
| Mu Lung Garden (II) | |||||
|---|---|---|---|---|---|
| Monster | Monster | Monster | Monster | Monster | Reward |
 Wild Monkey ★ |
 Mama Monkey ★ |
Teeny White Monkey ★ |
 Mean Mama Monkey ★ |
Trifling Exploration Box x 1 | |
 Blue Goblin ★ |
 Petrifying Red Goblin ★★★ |
 Stone Goblin ★ |
Trifling Exploration Box x 1 | ||
 Ravana ★★★★ |
 Strong Stone Goblin ★ |
 Ganapati ★ |
Adequate Exploration Box x 1 | ||
 Straw Target Dummy ★ |
 Wooden Target Dummy ★ |
 Master Dummy ★★★ |
 Bamboo Warrior ★★★★ |
Adequate Exploration Box x 1 | |
 Lord Pirate ★★★★ |
 Mr. Alli ★ |
 Kru ★ |
 Captain ★ |
Decent Exploration Box x 1 | |
| Overall Reward |
|---|
All Cure Potion x 100 |
Medals
![]()
Mu Lung Garden Monster Collector
- Requirement: Collect 50 Mu Lung monsters (currently cannot be obtained)
Minar Forest
Minar Forest (I)
| Minar Forest (I) | |||||
|---|---|---|---|---|---|
| Monster | Monster | Monster | Monster | Monster | Reward |
 Beetle ★ |
 Dual Beetle ★ |
 Rash ★ |
 Dark Rash ★ |
Trifling Exploration Box x 1 | |
 Hankie ★ |
File:Mob Hobi.png Hobi ★ |
File:Mob Green Hobi.png Green Hobi ★ |
 Master Hoblin ★★★★ |
Adequate Exploration Box x 1 | |
 Harp ★ |
 Blood Harp ★★ |
 Master Harp ★★★★ |
 Griffey ★★★★ |
Adequate Exploration Box x 1 | |
 Black Kentaurus ★ |
[*]Black Kentaurus ★★ |
 [*]Red Kentaurus ★★ |
 [*]Blue Kentaurus ★★ |
 Kentaurus King ★★★★ |
Adequate Exploration Box x 1 |
 Birk ★ |
 Dual Birk ★★ |
 Master Birk ★★★★ |
 Manon ★★★★ |
Adequate Exploration Box x 1 | |
| Overall Reward |
|---|
Special Medal of Honor x 1 |
Minar Forest (II)
| Minar Forest (II) | |||||
|---|---|---|---|---|---|
| Monster | Monster | Monster | Monster | Monster | Reward |
Blood Harp ★ |
Red Kentaurus ★ |
Blue Kentaurus ★ |
Dual Birk ★ |
Trifling Exploration Box x 1 | |
 Dark Wyvern ★ |
 Skelegon ★ |
 Skelosaurus ★ |
Trifling Exploration Box x 1 | ||
 Mantis ★ |
 Blood Mantis ★ |
 Poison Mantis ★ |
Trifling Exploration Box x 1 | ||
 Flora ★ |
 Dark Flora ★ |
 Hornet ★ |
 Poisonous Poison Hornet ★★★ |
 General Hornet ★ |
Adequate Exploration Box x 1 |
 Polluted Tree Spirit ★ |
 Corrupted Tree Spirit ★ |
 Polluted Rock Spirit ★ |
 Befuddling Corrupted Rock Spirit ★★★ |
 Tarantulus ★★★★ |
Decent Exploration Box x 1 |
| Overall Reward |
|---|
Mysterious Meso Pouch x 3 |
Dragon Forest
| Dragon Forest | |||||
|---|---|---|---|---|---|
| Monster | Monster | Monster | Monster | Monster | Reward |
 Blue Dragon Turtle ★ |
 Red Dragon Turtle ★ |
 Rexton ★ |
 Brexton ★ |
Trifling Exploration Box x 1 | |
 Jr. Newtie ★ |
 Nest Golem ★ |
 Green Cornian ★ |
 Dark Cornian ★ |
Adequate Exploration Box x 1 | |
 Red Wyvern ★ |
 Blue Wyvern ★ |
Dry [*]Dark Wyvern ★★★ |
 Leviathan ★★★★ |
Decent Exploration Box x 1 | |
 Soaring Hawk ★ |
 Soaring Eagle ★ |
Soaring Griffey ★ |
 Dragonoir ★★★★ |
 Dragon Rider ★★★★ |
Decent Exploration Box x 1 |
 Horntail ★★★★★ |
Chaos Horntail ★★★★★ |
[*]Skelegon ★★ |
[*]Skelosaurus ★★ |
Substantial Exploration Box x 1 | |
| Overall Reward |
|---|
Birk Cube Chair x 1 |
Kritias
| Kritias | |||||
|---|---|---|---|---|---|
| Monster | Monster | Monster | Monster | Monster | Reward |
 Frozen Solitude ★ |
 Burning Solitude ★ |
 Permeating Solitude ★ |
Trifling Exploration Box x 1 | ||
 Frozen Terror ★ |
 Burning Terror ★ |
 Permeating Terror ★ |
Trifling Exploration Box x 1 | ||
 Frozen Rage ★ |
 Burning Rage ★ |
 Permeating Rage ★ |
Adequate Exploration Box x 1 | ||
 Frozen Anxiety ★ |
 Burning Anxiety ★ |
 Permeating Anxiety ★ |
 Corrupted Basic Magician ★ |
Adequate Exploration Box x 1 | |
 Frozen Vanity ★ |
 Burning Vanity ★ |
 Permeating Vanity ★ |
 Corrupted Intermediate Magician ★ |
 Corrupted Advanced Magician ★ |
Adequate Exploration Box x 1 |
| Overall Reward |
|---|
2x EXP Coupon x 3 |
Medals
![]()
Minar Forest Monster Collector
- Requirement: Collect 50 Minar Forest monsters
Temple of Time
Gate of the Past
| Gate of the Past | |||||
|---|---|---|---|---|---|
| Monster | Monster | Monster | Monster | Monster | Reward |
 Memory Monk ★ |
 Memory Monk Trainee ★ |
 Memory Guardian ★ |
 Chief Memory Guardian ★ |
 [*] Eye of Time ★★ |
Trifling Exploration Box x 1 |
 Qualm Monk ★ |
 Qualm Monk Trainee ★ |
 Qualm Guardian ★ |
 Overwhelming Chief Qualm Guardian ★★★ |
 Dodo ★★★★ |
Adequate Exploration Box x 1 |
 Oblivion Monk ★ |
 Oblivion Monk Trainee ★ |
 Oblivion Guardian ★ |
 Beefy Chief Oblivion Guardian ★★★ |
 Lilynouch ★★★★ |
Adequate Exploration Box x 1 |
 Arkarium ★★★★★ |
 Corrupted Chief Memory Guardian ★★ |
 Corrupted Time Monk Trainee ★★ |
 Netherworld Monk ★★ |
Decent Exploration Box x 1 | |
 Pink Bean ★★★★★ |
Chaos Pink Bean ★★★★★ |
 Lyka ★★★★ |
 Solomon the Wise ★★★★ |
 Munin ★★★★ |
Substantial Exploration Box x 1 |
| Overall Reward |
|---|
1000 Reward Points x 1 |
Gate to the Future
| Gate to the Future | |||||
|---|---|---|---|---|---|
| Monster | Monster | Monster | Monster | Monster | Reward |
 Mutant Snail ★ |
 Mutant Orange Mushroom ★ |
 Mutant Slime ★ |
 Undead Mutant Ribbon Pig ★★★ |
Trifling Exploration Box x 1 | |
 Swollen Stump ★ |
 Swollen Dark Stump ★ |
 Dry Swollen Axe Stump ★★★ |
 Ghostwood Stumpy ★★★★ |
Trifling Exploration Box x 1 | |
 Pillaging Wild Boar ★ |
File:Mob Iron Boar Raider.png Iron Boar Raider ★ |
File:Mob Pillaging Fire Boars.png Pillaging Fire Boars ★ |
 Sinister Wooden Mask ★ |
 Sinister Rocky Mask ★ |
Adequate Exploration Box x 1 |
 Sinister Steel Mask ★ |
 Ancient Golem ★ |
 Ancient Dark Golem ★ |
 Seal Master Ancient Mixed Golem ★★★ |
Adequate Exploration Box x 1 | |
 Mutant Tino ★ |
 Mutant Tiru ★ |
 Mutant Tiguru ★ |
Trifling Exploration Box x 1 | ||
| Overall Reward |
|---|
Hair Color Coupon (VIP) Voucher x 1 |
Temple of Time (I)
| Temple of Time (I) | |||||
|---|---|---|---|---|---|
| Monster | Monster | Monster | Monster | Monster | Reward |
 Dawn ★ |
 Blaze ★ |
 Wind ★ |
 Night ★ |
 Thunder ★ |
Adequate Exploration Box x 1 |
Official Knight A ★ |
 Official Knight B ★ |
[*] Official Knight C ★★ |
[*] Official Knight D ★★ |
 Official Knight E ★ |
Adequate Exploration Box x 1 |
Advanced Knight A ★ |
 Advanced Knight B ★ |
 Advanced Knight C ★ |
Advanced Knight D ★ |
 Advanced Knight E ★ |
Adequate Exploration Box x 1 |
 Mihile ★★★★★ |
 Oz ★★★★★ |
 Irena ★★★★★ |
 Eckhart ★★★★★ |
 Hawkeye ★★★★★ |
Decent Exploration Box x 1 |
 Cygnus ★★★★★ |
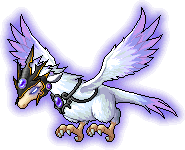 Shinsoo ★★★★★ |
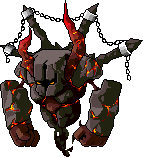 Ifrit ★★★★★ |
Substantial Exploration Box x 1 | ||
| Overall Reward |
|---|
Pink Bean Cube Chair x 1 |
Medals
- Requirement: Collect 50 Temple of Time monsters
Grandis
Grandis (I)
| Grandis (I) | |||||
|---|---|---|---|---|---|
| Monster | Monster | Monster | Monster | Monster | Reward |
 Caterpillar ★ |
 Lady Bug ★ |
 Sparrow ★ |
 Balloon Mouse ★ |
 Red Poison Frog ★ |
Trifling Exploration Box x 1 |
 Green Poison Frog ★ |
 Delinquent Chick ★ |
 Punk Chick ★ |
 Mane Fur Hyena ★ |
 Fang Hyena ★ |
Trifling Exploration Box x 1 |
Sleepy Grobbler ★ |
Alert Grobbler ★ |
Grumpy Grobbler ★ |
 Limestone Tokka ★ |
 Amethyst Tokka ★ |
Trifling Exploration Box x 1 |
 Laloong ★ |
 Kaloong ★ |
 Nefarious Monk Initiate ★ |
 Nefarious Monk Apprentice ★ |
 Nefarious Monk Master ★ |
Trifling Exploration Box x 1 |
 Heretic Monk Initiate ★ |
 Heretic Monk Apprentice ★ |
 Heretic Leader ★ |
 Onyx Stonegar ★ |
 Gravi Stonegar ★ |
Adequate Exploration Box x 1 |
| Overall Reward |
|---|
| File:Use Selective 4 Slot Coupon.png Selective 4 Slot Coupon x 1 |
Grandis (II)
| Grandis (II) | |||||
|---|---|---|---|---|---|
| Monster | Monster | Monster | Monster | Monster | Reward |
 Blue Speeyor ★ |
 Red Speeyor ★ |
 Yellow Speeyor ★ |
Trifling Exploration Box x 1 | ||
 Dinogoth ★ |
 Dinoram ★ |
 Dinodon ★ |
 Specter Battle Hound ★ |
 Specter Tamer ★ |
Adequate Exploration Box x 1 |
 Specter Miner ★ |
 Specter Shieldbearer ★ |
 Guerrilla Specter ★ |
 Power Specter ★ |
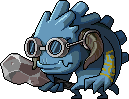 Specter Engineer ★ |
Adequate Exploration Box x 1 |
 Warrior Specter ★ |
 Magician Specter ★ |
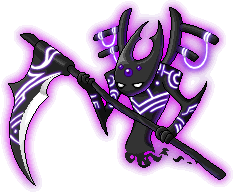 Petrifying Reaper Specter ★★★ |
 Purple Reagent Rock ★ |
 Red Reagent Rock ★ |
Decent Exploration Box x 1 |
 Magnus ★★★★★ |
 Velderoth ★★★★★ |
 Treglow ★★★★★ |
 Victor ★★★★★ |
 Red Totem Staff ★ |
Substantial Exploration Box x 1 |
| Overall Reward |
|---|
Specter Cube Chair x 1 |
Grandis (III)
| Grandis (III) | |||||
|---|---|---|---|---|---|
| Monster | Monster | Monster | Monster | Monster | Reward |
 Green Grossular ★ |
 Purple Amethyst ★ |
 Fire Pyrope ★ |
 Dark Obsidian ★ |
 Blue Larimar ★ |
Trifling Exploration Box x 1 |
 Shining Gold ★ |
 Shining Vinegold ★ |
 Moving Practice Robot ★ |
 Tainted Practice Robot ★ |
Trifling Exploration Box x 1 | |
 Hedgehog ★ |
 Mutant Hedgehog ★ |
 Nutria ★ |
 Mutant Nutria ★ |
Trifling Exploration Box x 1 | |
 Ooze Waste ★ |
 Flame Waste ★ |
 Scrap Iron Waste ★ |
 Specter Stray Dog ★ |
 Mutant Specter Stray Dog ★ |
Trifling Exploration Box x 1 |
 Market Hoodlum ★ |
 Dumpy Hoodlum ★ |
 Hazard's Rotten Crony ★ |
 Hazard's Rotten Crony ★ |
 Hazard's Mean Crony ★ |
Adequate Exploration Box x 1 |
| Overall Reward |
|---|
Mysterious Meso Pouch x 1 |
Grandis (IV)
| Grandis (IV) | |||||
|---|---|---|---|---|---|
| Monster | Monster | Monster | Monster | Monster | Reward |
 Desert Mush ★ |
 Ferocious Desert Mush ★ |
 Sand Tortoise ★ |
 Crystal Sand Tortoise ★ |
 Crystal Hermit Crab ★ |
Trifling Exploration Box x 1 |
 Bomber Hermit Crab ★ |
 Gale Fox ★ |
 Ferocious Gale Fox ★ |
Trifling Exploration Box x 1 | ||
 Sand Helm ★ |
 Sand Armor ★ |
 Illusion Soldier A ★ |
 Illusion Soldier B ★ |
Trifling Exploration Box x 1 | |
 Flutterbuzz ★ |
 Pom Puff Bush ★ |
 Spiney Puff Bush ★ |
 Nettled Squirrel ★ |
 Gassy Vicious Squirrel ★★★ |
Adequate Exploration Box x 1 |
 Snowy Stjartmes ★ |
 Stormy Stjartmes ★ |
 Cloud Guardian ★ |
 Wind Guardian ★ |
 Sky Guardian ★ |
Decent Exploration Box x 1 |
| Overall Reward |
|---|
Sky Guardian Spirit Cube Chair x 1 |
Medals
- Requirement: Collect 50 Grandis monsters
Arcane River
Arcane River (I)
| Arcane River (I) | |||||
|---|---|---|---|---|---|
| Monster | Monster | Monster | Monster | Monster | Reward |
 Happy Erda ★★ |
 Raging Erda ★★ |
 Sad Erda ★★ |
 Joyful Erda ★★ |
Adequate Exploration Box x 1 | |
 Stone Erda ★★ |
 Blazing Erda ★★ |
 Soulful Erda ★★ |
Adequate Exploration Box x 1 | ||
 Shadowy Tranquil Erda ★★★ |
 Lantern Erda ★★ |
 Arma's Follower ★★ |
 Arma ★★★★ |
Decent Exploration Box x 1 | |
 Pinedeer ★★ |
 Bighorn Pinedeer ★★ |
 Ewenana ★★ |
 Ramanana ★★ |
Adequate Exploration Box x 1 | |
 Flyon ★★ |
 Angry Flyon ★★ |
 Unripe Wolfruit ★★ |
 Poisonous Ripe Wolfruit ★★★ |
 Slurpy Tree ★★★★ |
Decent Exploration Box x 1 |
| Overall Reward |
|---|
Ripe Wolfruit Cube Chair x 1 |
Arcane River (II)
| Arcane River (II) | |||||
|---|---|---|---|---|---|
| Monster | Monster | Monster | Monster | Monster | Reward |
 Green Catfish ★★ |
 Blue Catfish ★★ |
 Rhyturtle ★★ |
 Boss Rhyturtle ★★ |
Adequate Exploration Box x 1 | |
 Crilia ★★ |
 Fragile Patriarch Crilia ★★★ |
 Birdshark ★★ |
 Patriarch Birdshark ★★ |
Decent Exploration Box x 1 | |
 Dreamkeeper ★★ |
 Paper Bag Alley Citizen ★★ |
 Wood Board Alley Citizen ★★ |
 Gallina ★★ |
 Gallus ★★ |
Adequate Exploration Box x 1 |
 Angry Victory Plate ★★ |
 Crooked Victory Plate ★★ |
 Unstoppable Red Dancing Shoes ★★★ |
 Angry Masquerade Citizen ★★ |
 Insane Masquerade Citizen ★★ |
Decent Exploration Box x 1 |
 Lucid ★★★★★ |
 Nightmare Golem ★★ |
 Nightmare Mushroom ★★ |
 Blue-eyed Gargoyle ★★ |
 Red-eyed Gargoyle ★★ |
Substantial Exploration Box x 1 |
| Overall Reward |
|---|
Mysterious Meso Pouch x 5 |
Arcane River (III)
| Arcane River (III) | |||||
|---|---|---|---|---|---|
| Monster | Monster | Monster | Monster | Monster | Reward |
 Water Spirit ★★ |
 Sun Spirit ★★ |
 Earth Spirit ★★ |
 Spirit Debris ★★ |
Adequate Exploration Box x 1 | |
 Snow Cloud Spirit ★★ |
 Shadowy Thunder Cloud Spirit ★★★ |
 Toxic Spirit ★★ |
 Volatile Spirit ★★ |
Decent Exploration Box x 1 | |
 Corrupt Spirit of Harmony ★★★★ |
 Discordant Spirit ★★ |
 Befuddled Spirit ★★ |
 Anguished Spirit ★★ |
 Mournful Spirit ★★ |
Decent Exploration Box x 1 |
 Xenoroid Echo Type A ★★ |
 Xenoroid Echo Type B ★★ |
 Blue Shadow ★★ |
 Red Shadow ★★ |
 Experiment Gone Wrong ★★ |
Adequate Exploration Box x 1 |
 Big Experiment Gone Wrong ★★ |
 Thralled Guard ★★ |
 Seal Master Thralled Warhammer Knight ★★★ |
 Thralled Wizard ★★ |
 Thralled Archer ★★ |
Decent Exploration Box x 1 |
| Overall Reward |
|---|
Nameless Cat Cube Chair x 1 |
Arcane River (IV)
| Arcane River (IV) | |||||
|---|---|---|---|---|---|
| Monster | Monster | Monster | Monster | Monster | Reward |
 Ahtuin ★★ |
 Atus ★★ |
 Bellalion ★★ |
 Bellalis ★★ |
 Aranya ★★ |
Adequate Exploration Box x 1 |
 Aranea ★★ |
 Keeper of Light ★★ |
 Keeper of Darkness ★★ |
 Light Executor ★★ |
 Overwhelming Dark Executor ★★★ |
Decent Exploration Box x 1 |
 Soot Beast ★ |
 Soot Talon ★★ |
 Soot Slug ★★ |
 Soot Core ★★ |
 Will ★★★★★ |
Decent Exploration Box x 1 |
 Crushing Glare ★★ |
 Burst Glare ★★ |
 Entangled Fragment ★★ |
 Faith Fragment ★★ |
 Giant Monster Gloom ★★★★★ |
Decent Exploration Box x 1 |
 Dark Miscreation ★★ |
 Dark Construct ★★ |
 Giant Golem ★★ |
 Despairing Wing ★★ |
 Despairing Blade ★★ |
Adequate Exploration Box x 1 |
| Overall Reward |
|---|
Mysterious Meso Pouch x 7 |
Arcane River (V)
| Arcane River (V) | |||||
|---|---|---|---|---|---|
| Monster | Monster | Monster | Monster | Monster | Reward |
 Silent Knight ★★ |
 Silent Scout ★★ |
 Silent Rogue ★★ |
 Greed Echo ★★ |
 Verus Hilla ★★★★★ |
Decent Exploration Box x 1 |
 Silent Watchman ★★ |
 Silent Assassin ★★ |
 Despairing Soul ★★ |
 Despairing Prisoner ★★ |
 Blackheart Negative ★★ |
Adequate Exploration Box x 1 |
 Ancestion ★★ |
 Transcendion ★★ |
 Ascendion ★★ |
Adequate Exploration Box x 1 | ||
 Foreberion ★★ |
 Embrion ★★ |
 Corrupted Warrior ★★ |
 Guard Captain Darknell ★★★★★ |
Decent Exploration Box x 1 | |
 Black Mage ★★★★★ |
Substantial Exploration Box x 1 | ||||
| Overall Reward |
|---|
Verus Hilla Cube Chair x 1 |
Medals
- Requirement: Collect 50 Arcane River monsters