No edit summary |
|||
| (20 intermediate revisions by the same user not shown) | |||
| Line 1: | Line 1: | ||
{{DISPLAYTITLE|Special Monsters}} |
{{DISPLAYTITLE|Special Monsters}} |
||
| + | |||
| − | The monsters listed here can be found in specific Theme Dungeons, Storylines, and Blockbusters. |
||
| + | The monsters listed here can be found in specific Storylines, Daily Quests, and training maps. |
||
| + | |||
| + | '''Click on one of the following pages to navigate:''' |
||
| + | {{Page|Special Mobs}} |
||
__TOC__ |
__TOC__ |
||
==Elite Bosses== |
==Elite Bosses== |
||
| − | Note: The stats of Elite Bosses change based on the highest level non-boss monster in the map you are currently training in |
+ | Note: The stats of Elite Bosses change based on the highest level non-boss monster in the map you are currently training in. |
| + | {{Mob Table Styling|Varying}} |
||
| − | {|style="text-align:center;background:#F0F8FF;" class="wikitable" width="100%" |
||
| − | |- |
||
| − | !rowspan="2" width="40%"|Picture<br />Name |
||
| − | !colspan="6"|Monster's Stats |
||
| − | |- |
||
| − | !width="10%"|<small>Level</small> |
||
| − | !width="10%"|<small>HP</small> |
||
| − | !width="10%"|<small>MP</small> |
||
| − | !width="10%"|<small>PDR</small> |
||
| − | !width="10%"|<small>MDR</small> |
||
| − | !width="10%"|<small>EXP</small> |
||
|-8220022 |
|-8220022 |
||
|[[File:Mob Black Knight.png]]<br />'''[[File:Mobicon Black Knight.png]] [[Black Knight#Elite Boss|Black Knight]] (Boss)''' |
|[[File:Mob Black Knight.png]]<br />'''[[File:Mobicon Black Knight.png]] [[Black Knight#Elite Boss|Black Knight]] (Boss)''' |
||
| − | |{{Varying Level |
+ | |{{Varying Level|EliteBoss}} |
|Varying |
|Varying |
||
|Varying |
|Varying |
||
| Line 26: | Line 20: | ||
|-8220023 |
|-8220023 |
||
|[[File:Mob Mad Mage.png]]<br />'''[[File:Mobicon Mad Mage.png]] [[Mad Mage#Elite Boss|Mad Mage]] (Boss)''' |
|[[File:Mob Mad Mage.png]]<br />'''[[File:Mobicon Mad Mage.png]] [[Mad Mage#Elite Boss|Mad Mage]] (Boss)''' |
||
| − | |{{Varying Level |
+ | |{{Varying Level|EliteBoss}} |
|Varying |
|Varying |
||
|Varying |
|Varying |
||
| Line 34: | Line 28: | ||
|-8220024 |
|-8220024 |
||
|[[File:Mob Rampant Cyborg.png]]<br />'''[[File:Mobicon Rampant Cyborg.png]] [[Rampant Cyborg#Elite Boss|Rampant Cyborg]] (Boss)''' |
|[[File:Mob Rampant Cyborg.png]]<br />'''[[File:Mobicon Rampant Cyborg.png]] [[Rampant Cyborg#Elite Boss|Rampant Cyborg]] (Boss)''' |
||
| − | |{{Varying Level |
+ | |{{Varying Level|EliteBoss}} |
|Varying |
|Varying |
||
|Varying |
|Varying |
||
| Line 42: | Line 36: | ||
|-8220025 |
|-8220025 |
||
|[[File:Mob Vicious Hunter.png]]<br />'''[[File:Mobicon Vicious Hunter.png]] [[Vicious Hunter#Elite Boss|Vicious Hunter]] (Boss)''' |
|[[File:Mob Vicious Hunter.png]]<br />'''[[File:Mobicon Vicious Hunter.png]] [[Vicious Hunter#Elite Boss|Vicious Hunter]] (Boss)''' |
||
| − | |{{Varying Level |
+ | |{{Varying Level|EliteBoss}} |
|Varying |
|Varying |
||
|Varying |
|Varying |
||
| Line 50: | Line 44: | ||
|-8220026 |
|-8220026 |
||
|[[File:Mob Bad Brawler.png]]<br />'''[[File:Mobicon Bad Brawler.png]] [[Bad Brawler#Elite Boss|Bad Brawler]] (Boss)''' |
|[[File:Mob Bad Brawler.png]]<br />'''[[File:Mobicon Bad Brawler.png]] [[Bad Brawler#Elite Boss|Bad Brawler]] (Boss)''' |
||
| − | |{{Varying Level |
+ | |{{Varying Level|EliteBoss}} |
| + | |Varying |
||
| + | |Varying |
||
| + | |Varying % |
||
| + | |Varying % |
||
| + | |Varying |
||
| + | |} |
||
| + | ==Phantom Forest Field/Elite Bosses== |
||
| + | Note: The stats of Elite Bosses change based on the highest level non-boss monster in the map you are currently training in. |
||
| + | {{Mob Table Styling|Varying}} |
||
| + | |-9601280 |
||
| + | |[[File:Mob Masters Killian and LeFay.png|250px]]<br />'''[[File:Mobicon Masters Killian and LeFay.png]] [[Masters Killian and LeFay]] (Boss)''' |
||
| + | |{{Varying Level|CrimsonwoodElite}} |
||
| + | |Varying |
||
| + | |Varying |
||
| + | |Varying % |
||
| + | |Varying % |
||
| + | |Varying |
||
| + | |-9601281 |
||
| + | |[[File:Mob Phantom of Naricain.png|250px]]<br />'''[[File:Mobicon Phantom of Naricain.png]] [[Phantom of Naricain]] (Boss)''' |
||
| + | |{{Varying Level|CrimsonwoodElite}} |
||
| + | |Varying |
||
| + | |Varying |
||
| + | |Varying % |
||
| + | |Varying % |
||
| + | |Varying |
||
| + | |-9601282 |
||
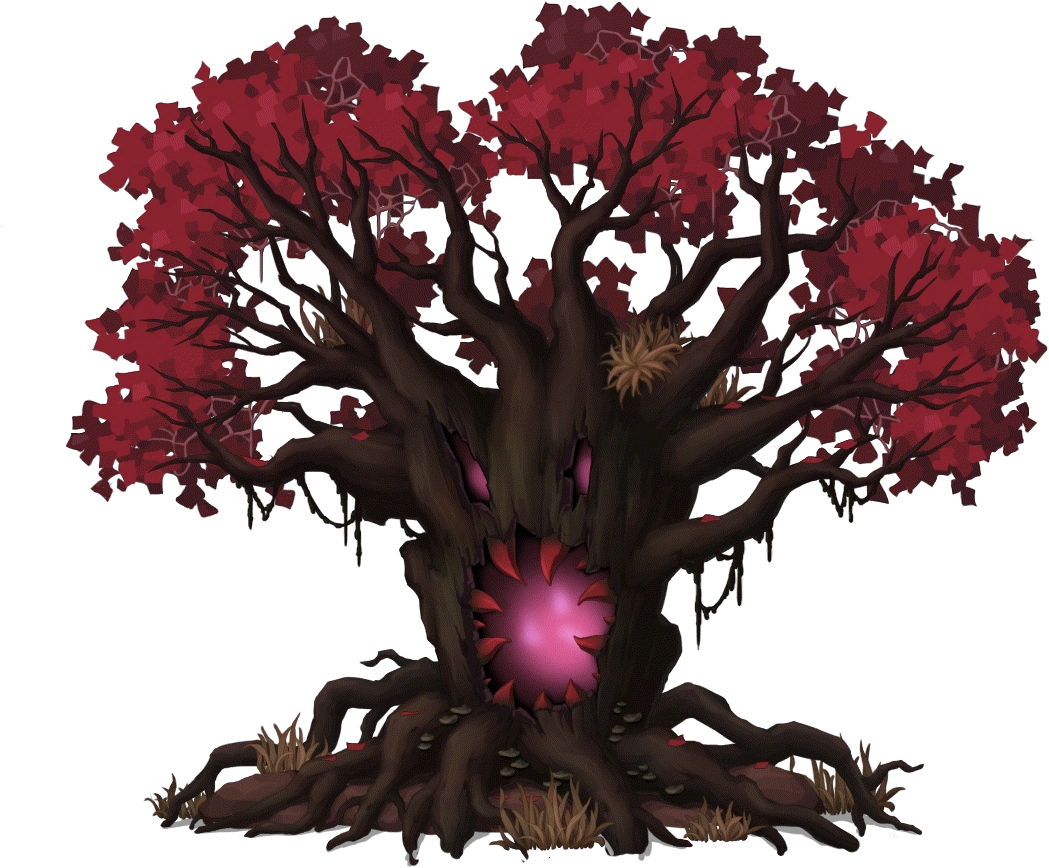
| + | |[[File:Mob Large Phantom Tree.png|250px]]<br />'''[[File:Mobicon Large Phantom Tree.png]] [[Large Phantom Tree]] (Boss)''' |
||
| + | |{{Varying Level|CrimsonwoodElite}} |
||
|Varying |
|Varying |
||
|Varying |
|Varying |
||
| Line 60: | Line 82: | ||
==Bounty Hunter Portals (10 - 275)== |
==Bounty Hunter Portals (10 - 275)== |
||
===Bounty Hunt=== |
===Bounty Hunt=== |
||
| − | Note: The stats of monsters listed here change based on the highest level non-boss monster in the map you are currently training in |
+ | Note: The stats of monsters listed here change based on the highest level non-boss monster in the map you are currently training in. |
| + | {{Mob Table Styling|Varying}} |
||
| − | {|style="text-align:center;background:#F0F8FF;" class="wikitable" width="100%" |
||
| − | |- |
||
| − | !rowspan="2" width="40%"|Picture<br />Name |
||
| − | !colspan="6"|Monster's Stats |
||
| − | |- |
||
| − | !width="10%"|<small>Level</small> |
||
| − | !width="10%"|<small>HP</small> |
||
| − | !width="10%"|<small>MP</small> |
||
| − | !width="10%"|<small>PDR</small> |
||
| − | !width="10%"|<small>MDR</small> |
||
| − | !width="10%"|<small>EXP</small> |
||
|-9830000 |
|-9830000 |
||
|[[File:Mob Primitive Boar.png]]<br />'''[[Primitive Boar#Bounty Hunter Portal|Primitive Boar]] (Boss)''' |
|[[File:Mob Primitive Boar.png]]<br />'''[[Primitive Boar#Bounty Hunter Portal|Primitive Boar]] (Boss)''' |
||
| − | |{{Varying Level |
+ | |{{Varying Level|BountyHunter}} |
|Varying |
|Varying |
||
|Varying |
|Varying |
||
| Line 82: | Line 94: | ||
|-9830001 |
|-9830001 |
||
|[[File:Mob Chao.png]]<br />'''[[Chao#Bounty Hunter Portal|Tchau]] (Boss)''' |
|[[File:Mob Chao.png]]<br />'''[[Chao#Bounty Hunter Portal|Tchau]] (Boss)''' |
||
| − | |{{Varying Level |
+ | |{{Varying Level|BountyHunter}} |
|Varying |
|Varying |
||
|Varying |
|Varying |
||
| Line 90: | Line 102: | ||
|-9830002 |
|-9830002 |
||
|[[File:Mob Mean Mama Monkey.png]]<br />'''[[Mean Mama Monkey#Bounty Hunter Portal|Mean Mama Monkey]] (Boss)''' |
|[[File:Mob Mean Mama Monkey.png]]<br />'''[[Mean Mama Monkey#Bounty Hunter Portal|Mean Mama Monkey]] (Boss)''' |
||
| − | |{{Varying Level |
+ | |{{Varying Level|BountyHunter}} |
|Varying |
|Varying |
||
|Varying |
|Varying |
||
| Line 98: | Line 110: | ||
|-9830003 |
|-9830003 |
||
|[[File:Mob Teeny White Monkey.png]]<br />'''[[Teeny White Monkey#Bounty Hunter Portal|Teeny White Monkey]] (Boss)''' |
|[[File:Mob Teeny White Monkey.png]]<br />'''[[Teeny White Monkey#Bounty Hunter Portal|Teeny White Monkey]] (Boss)''' |
||
| − | |{{Varying Level |
+ | |{{Varying Level|BountyHunter}} |
|Varying |
|Varying |
||
|Varying |
|Varying |
||
| Line 106: | Line 118: | ||
|-9830004 |
|-9830004 |
||
|[[File:Mob SnowFro the Fruitnificent.png]]<br />'''[[SnowFro the Fruitnificent#Bounty Hunter Portal|White Monkey Master]] (Boss)''' |
|[[File:Mob SnowFro the Fruitnificent.png]]<br />'''[[SnowFro the Fruitnificent#Bounty Hunter Portal|White Monkey Master]] (Boss)''' |
||
| − | |{{Varying Level |
+ | |{{Varying Level|BountyHunter}} |
|Varying |
|Varying |
||
|Varying |
|Varying |
||
| Line 114: | Line 126: | ||
|-9830005 |
|-9830005 |
||
|[[File:Mob Corrupted Cornian.png]]<br />'''[[Corrupted Cornian#Bounty Hunter Portal|Corrupted Cornian]] (Boss)''' |
|[[File:Mob Corrupted Cornian.png]]<br />'''[[Corrupted Cornian#Bounty Hunter Portal|Corrupted Cornian]] (Boss)''' |
||
| − | |{{Varying Level |
+ | |{{Varying Level|BountyHunter}} |
|Varying |
|Varying |
||
|Varying |
|Varying |
||
| Line 122: | Line 134: | ||
|-9830006 |
|-9830006 |
||
|[[File:Mob Corrupted Kentaurus.png]]<br />'''[[Corrupted Kentaurus#Bounty Hunter Portal|Corrupted Kentaurus]] (Boss)''' |
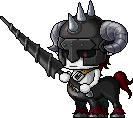
|[[File:Mob Corrupted Kentaurus.png]]<br />'''[[Corrupted Kentaurus#Bounty Hunter Portal|Corrupted Kentaurus]] (Boss)''' |
||
| − | |{{Varying Level |
+ | |{{Varying Level|BountyHunter}} |
|Varying |
|Varying |
||
|Varying |
|Varying |
||
| Line 130: | Line 142: | ||
|-9830007 |
|-9830007 |
||
|[[File:Mob Corrupted Wyvern.png]]<br />'''[[Corrupted Wyvern#Bounty Hunter Portal|Corrupted Wyvern]] (Boss)''' |
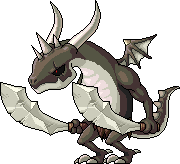
|[[File:Mob Corrupted Wyvern.png]]<br />'''[[Corrupted Wyvern#Bounty Hunter Portal|Corrupted Wyvern]] (Boss)''' |
||
| − | |{{Varying Level |
+ | |{{Varying Level|BountyHunter}} |
|Varying |
|Varying |
||
|Varying |
|Varying |
||
| Line 138: | Line 150: | ||
|-9830008 |
|-9830008 |
||
|[[File:Mob Dragonoir.png|200px]]<br />'''[[Dragonoir#Bounty Hunter Portal|Dragonoir]] (Boss)''' |
|[[File:Mob Dragonoir.png|200px]]<br />'''[[Dragonoir#Bounty Hunter Portal|Dragonoir]] (Boss)''' |
||
| − | |{{Varying Level |
+ | |{{Varying Level|BountyHunter}} |
|Varying |
|Varying |
||
|Varying |
|Varying |
||
| Line 146: | Line 158: | ||
|-9830009 |
|-9830009 |
||
|[[File:Mob Frostprey.png]]<br />'''[[Frostprey#Bounty Hunter Portal|Frostprey]] (Boss)''' |
|[[File:Mob Frostprey.png]]<br />'''[[Frostprey#Bounty Hunter Portal|Frostprey]] (Boss)''' |
||
| − | |{{Varying Level |
+ | |{{Varying Level|BountyHunter}} |
|Varying |
|Varying |
||
|Varying |
|Varying |
||
| Line 154: | Line 166: | ||
|-9830010 |
|-9830010 |
||
|[[File:Mob Phoenix.png]]<br />'''[[Phoenix/Monster#Bounty Hunter Portal|Phoenix]] (Boss)''' |
|[[File:Mob Phoenix.png]]<br />'''[[Phoenix/Monster#Bounty Hunter Portal|Phoenix]] (Boss)''' |
||
| − | |{{Varying Level |
+ | |{{Varying Level|BountyHunter}} |
|Varying |
|Varying |
||
|Varying |
|Varying |
||
| Line 162: | Line 174: | ||
|-9830011 |
|-9830011 |
||
|[[File:Mob Soaring Hawk.png]]<br />'''[[Soaring Hawk#Bounty Hunter Portal|Soaring Hawk]] (Boss)''' |
|[[File:Mob Soaring Hawk.png]]<br />'''[[Soaring Hawk#Bounty Hunter Portal|Soaring Hawk]] (Boss)''' |
||
| − | |{{Varying Level |
+ | |{{Varying Level|BountyHunter}} |
|Varying |
|Varying |
||
|Varying |
|Varying |
||
| Line 170: | Line 182: | ||
|-9830012 |
|-9830012 |
||
|[[File:Mob Soaring Eagle.png]]<br />'''[[Soaring Eagle#Bounty Hunter Portal|Soaring Eagle]] (Boss)''' |
|[[File:Mob Soaring Eagle.png]]<br />'''[[Soaring Eagle#Bounty Hunter Portal|Soaring Eagle]] (Boss)''' |
||
| − | |{{Varying Level |
+ | |{{Varying Level|BountyHunter}} |
|Varying |
|Varying |
||
|Varying |
|Varying |
||
| Line 178: | Line 190: | ||
|-9830013 |
|-9830013 |
||
|[[File:Mob Griffey (2).png]]<br />'''[[Griffey#Bounty Hunter Portal|Griffey]] (Boss)''' |
|[[File:Mob Griffey (2).png]]<br />'''[[Griffey#Bounty Hunter Portal|Griffey]] (Boss)''' |
||
| − | |{{Varying Level |
+ | |{{Varying Level|BountyHunter}} |
|Varying |
|Varying |
||
|Varying |
|Varying |
||
| Line 186: | Line 198: | ||
|-9830014 |
|-9830014 |
||
|[[File:Mob Master Omen.png]]<br />'''[[Master Omen#Bounty Hunter Portal|Master Omen]] (Boss)''' |
|[[File:Mob Master Omen.png]]<br />'''[[Master Omen#Bounty Hunter Portal|Master Omen]] (Boss)''' |
||
| − | |{{Varying Level |
+ | |{{Varying Level|BountyHunter}} |
|Varying |
|Varying |
||
|Varying |
|Varying |
||
| Line 193: | Line 205: | ||
|Varying |
|Varying |
||
|-9830015 |
|-9830015 |
||
| − | |[[File:Mob Reaper Specter.png]]<br />'''[[ |
+ | |[[File:Mob Reaper Specter.png]]<br />'''[[Reaper Specter#Bounty Hunter Portal|Toto]] (Boss)''' |
| − | |{{Varying Level |
+ | |{{Varying Level|BountyHunter}} |
|Varying |
|Varying |
||
|Varying |
|Varying |
||
| Line 202: | Line 214: | ||
|-9830016 |
|-9830016 |
||
|[[File:Mob Corrupted Tree Spirit.png]]<br />'''[[Corrupted Tree Spirit#Bounty Hunter Portal|Corrupted Tree Spirit]] (Boss)''' |
|[[File:Mob Corrupted Tree Spirit.png]]<br />'''[[Corrupted Tree Spirit#Bounty Hunter Portal|Corrupted Tree Spirit]] (Boss)''' |
||
| − | |{{Varying Level |
+ | |{{Varying Level|BountyHunter}} |
|Varying |
|Varying |
||
|Varying |
|Varying |
||
| Line 210: | Line 222: | ||
|-9830017 |
|-9830017 |
||
|[[File:Mob Omen.png]]<br />'''[[Omen#Bounty Hunter Portal|Omen]] (Boss)''' |
|[[File:Mob Omen.png]]<br />'''[[Omen#Bounty Hunter Portal|Omen]] (Boss)''' |
||
| − | |{{Varying Level |
+ | |{{Varying Level|BountyHunter}} |
|Varying |
|Varying |
||
|Varying |
|Varying |
||
| Line 218: | Line 230: | ||
|-9830018 |
|-9830018 |
||
|[[File:Mob King Omen.png|200px]]<br />'''[[King Omen#Bounty Hunter Portal|King Omen]] (Boss)''' |
|[[File:Mob King Omen.png|200px]]<br />'''[[King Omen#Bounty Hunter Portal|King Omen]] (Boss)''' |
||
| − | |{{Varying Level |
+ | |{{Varying Level|BountyHunter}} |
|Varying |
|Varying |
||
|Varying |
|Varying |
||
| Line 226: | Line 238: | ||
|} |
|} |
||
===Guard the Castle Gates=== |
===Guard the Castle Gates=== |
||
| − | Note: The stats of monsters listed here change based on the highest level non-boss monster in the map you are currently training in |
+ | Note: The stats of monsters listed here change based on the highest level non-boss monster in the map you are currently training in. |
| + | {{Mob Table Styling|Varying}} |
||
| − | {|style="text-align:center;background:#F0F8FF;" class="wikitable" width="100%" |
||
| − | |- |
||
| − | !rowspan="2" width="40%"|Picture<br />Name |
||
| − | !colspan="6"|Monster's Stats |
||
| − | |- |
||
| − | !width="10%"|<small>Level</small> |
||
| − | !width="10%"|<small>HP</small> |
||
| − | !width="10%"|<small>MP</small> |
||
| − | !width="10%"|<small>PDR</small> |
||
| − | !width="10%"|<small>MDR</small> |
||
| − | !width="10%"|<small>EXP</small> |
||
|-9831000 |
|-9831000 |
||
|[[File:Mob Sr. Bellflower Root.png]]<br />'''[[Sr. Bellflower Root#Bounty Hunter Portal|Sr. Bellflower Root]] (Boss)''' |
|[[File:Mob Sr. Bellflower Root.png]]<br />'''[[Sr. Bellflower Root#Bounty Hunter Portal|Sr. Bellflower Root]] (Boss)''' |
||
| − | |{{Varying Level |
+ | |{{Varying Level|BountyHunter}} |
|Varying |
|Varying |
||
|Varying |
|Varying |
||
| Line 248: | Line 250: | ||
|-9831001 |
|-9831001 |
||
|[[File:Mob Bellflower Root.png]]<br />'''[[Bellflower Root#Bounty Hunter Portal|Bellflower Root]] (Boss)''' |
|[[File:Mob Bellflower Root.png]]<br />'''[[Bellflower Root#Bounty Hunter Portal|Bellflower Root]] (Boss)''' |
||
| − | |{{Varying Level |
+ | |{{Varying Level|BountyHunter}} |
|Varying |
|Varying |
||
|Varying |
|Varying |
||
| Line 256: | Line 258: | ||
|-9831002 |
|-9831002 |
||
|[[File:Mob Gigantic Bellflower Root.png]]<br />'''[[Gigantic Bellflower Root#Bounty Hunter Portal|Gigantic Bellflower Root]] (Boss)''' |
|[[File:Mob Gigantic Bellflower Root.png]]<br />'''[[Gigantic Bellflower Root#Bounty Hunter Portal|Gigantic Bellflower Root]] (Boss)''' |
||
| − | |{{Varying Level |
+ | |{{Varying Level|BountyHunter}} |
|Varying |
|Varying |
||
|Varying |
|Varying |
||
| Line 264: | Line 266: | ||
|-9831006 |
|-9831006 |
||
|[[File:Mob Scarred Bear.png]]<br />'''[[Scarred Bear#Bounty Hunter Portal|Scarred Bear]] (Boss)''' |
|[[File:Mob Scarred Bear.png]]<br />'''[[Scarred Bear#Bounty Hunter Portal|Scarred Bear]] (Boss)''' |
||
| − | |{{Varying Level |
+ | |{{Varying Level|BountyHunter}} |
|Varying |
|Varying |
||
|Varying |
|Varying |
||
| Line 272: | Line 274: | ||
|-9831007 |
|-9831007 |
||
|[[File:Mob Panda.png]]<br />'''[[Panda#Bounty Hunter Portal|Panda]] (Boss)''' |
|[[File:Mob Panda.png]]<br />'''[[Panda#Bounty Hunter Portal|Panda]] (Boss)''' |
||
| − | |{{Varying Level |
+ | |{{Varying Level|BountyHunter}} |
|Varying |
|Varying |
||
|Varying |
|Varying |
||
| Line 280: | Line 282: | ||
|-9831008 |
|-9831008 |
||
|[[File:Mob Tae Roon.png]]<br />'''[[Tae Roon#Bounty Hunter Portal|Tae Roon]] (Boss)''' |
|[[File:Mob Tae Roon.png]]<br />'''[[Tae Roon#Bounty Hunter Portal|Tae Roon]] (Boss)''' |
||
| − | |{{Varying Level |
+ | |{{Varying Level|BountyHunter}} |
|Varying |
|Varying |
||
|Varying |
|Varying |
||
| Line 288: | Line 290: | ||
|-9831013 |
|-9831013 |
||
|[[File:Mob Leviathan (2).png]]<br />'''[[Leviathan#Bounty Hunter Portal|Red Leviathan]] (Boss)''' |
|[[File:Mob Leviathan (2).png]]<br />'''[[Leviathan#Bounty Hunter Portal|Red Leviathan]] (Boss)''' |
||
| − | |{{Varying Level |
+ | |{{Varying Level|BountyHunter}} |
|Varying |
|Varying |
||
|Varying |
|Varying |
||
| Line 296: | Line 298: | ||
|-9831014 |
|-9831014 |
||
|[[File:Mob Manon.png]]<br />'''[[Manon#Bounty Hunter Portal|Manon]] (Boss)''' |
|[[File:Mob Manon.png]]<br />'''[[Manon#Bounty Hunter Portal|Manon]] (Boss)''' |
||
| − | |{{Varying Level |
+ | |{{Varying Level|BountyHunter}} |
|Varying |
|Varying |
||
|Varying |
|Varying |
||
| Line 304: | Line 306: | ||
|} |
|} |
||
===Catch the Stormwing=== |
===Catch the Stormwing=== |
||
| − | Note: The stats of monsters listed here change based on the highest level non-boss monster in the map you are currently training in |
+ | Note: The stats of monsters listed here change based on the highest level non-boss monster in the map you are currently training in. |
| + | {{Mob Table Styling|Varying}} |
||
| − | {|style="text-align:center;background:#F0F8FF;" class="wikitable" width="100%" |
||
| − | |- |
||
| − | !rowspan="2" width="40%"|Picture<br />Name |
||
| − | !colspan="6"|Monster's Stats |
||
| − | |- |
||
| − | !width="10%"|<small>Level</small> |
||
| − | !width="10%"|<small>HP</small> |
||
| − | !width="10%"|<small>MP</small> |
||
| − | !width="10%"|<small>PDR</small> |
||
| − | !width="10%"|<small>MDR</small> |
||
| − | !width="10%"|<small>EXP</small> |
||
|-9832001 |
|-9832001 |
||
|[[File:Mob Stormwing.png]]<br />'''[[Stormwing]]''' |
|[[File:Mob Stormwing.png]]<br />'''[[Stormwing]]''' |
||
| − | |{{Varying Level |
+ | |{{Varying Level|BountyHunter}} |
|Varying |
|Varying |
||
|Varying |
|Varying |
||
| Line 326: | Line 318: | ||
|-9832002 |
|-9832002 |
||
|[[File:Mob Evil Eye.png]]<br />'''[[Evil Eye (Monster)#Bounty Hunter Portal|Evil Eye]]''' |
|[[File:Mob Evil Eye.png]]<br />'''[[Evil Eye (Monster)#Bounty Hunter Portal|Evil Eye]]''' |
||
| − | |{{Varying Level |
+ | |{{Varying Level|BountyHunter}} |
|Varying |
|Varying |
||
|Varying |
|Varying |
||
| Line 334: | Line 326: | ||
|-9832003 |
|-9832003 |
||
|[[File:Mob Stirge.png]]<br />'''[[Stirge#Bounty Hunter Portal|Stirge]]''' |
|[[File:Mob Stirge.png]]<br />'''[[Stirge#Bounty Hunter Portal|Stirge]]''' |
||
| − | |{{Varying Level |
+ | |{{Varying Level|BountyHunter}} |
|Varying |
|Varying |
||
|Varying |
|Varying |
||
| Line 342: | Line 334: | ||
|-9832004 |
|-9832004 |
||
|[[File:Mob Golden Bee.png]]<br />'''[[Golden Bee#Bounty Hunter Portal|Golden Bee]]''' |
|[[File:Mob Golden Bee.png]]<br />'''[[Golden Bee#Bounty Hunter Portal|Golden Bee]]''' |
||
| − | |{{Varying Level |
+ | |{{Varying Level|BountyHunter}} |
|Varying |
|Varying |
||
|Varying |
|Varying |
||
| Line 350: | Line 342: | ||
|-9832005 |
|-9832005 |
||
|[[File:Mob Gold Slime.png]]<br />'''[[Gold Slime#Bounty Hunter Portal|Gold Slime]]''' |
|[[File:Mob Gold Slime.png]]<br />'''[[Gold Slime#Bounty Hunter Portal|Gold Slime]]''' |
||
| − | |{{Varying Level |
+ | |{{Varying Level|BountyHunter}} |
|Varying |
|Varying |
||
|Varying |
|Varying |
||
| Line 358: | Line 350: | ||
|-9832006 |
|-9832006 |
||
|[[File:Mob Flyeye.png]]<br />'''[[Flyeye#Bounty Hunter Portal|Flyeye]]''' |
|[[File:Mob Flyeye.png]]<br />'''[[Flyeye#Bounty Hunter Portal|Flyeye]]''' |
||
| − | |{{Varying Level |
+ | |{{Varying Level|BountyHunter}} |
|Varying |
|Varying |
||
|Varying |
|Varying |
||
| Line 366: | Line 358: | ||
|-9832010 |
|-9832010 |
||
|[[File:Mob Stone Golem.png]]<br />'''[[Stone Golem#Bounty Hunter Portal|Stone Golem]]''' |
|[[File:Mob Stone Golem.png]]<br />'''[[Stone Golem#Bounty Hunter Portal|Stone Golem]]''' |
||
| − | |{{Varying Level |
+ | |{{Varying Level|BountyHunter}} |
|Varying |
|Varying |
||
|Varying |
|Varying |
||
| Line 374: | Line 366: | ||
|-9832011 |
|-9832011 |
||
|[[File:Mob Icy Mixed Golem.png]]<br />'''[[Icy Mixed Golem#Bounty Hunter Portal|Icy Mixed Golem]]''' |
|[[File:Mob Icy Mixed Golem.png]]<br />'''[[Icy Mixed Golem#Bounty Hunter Portal|Icy Mixed Golem]]''' |
||
| − | |{{Varying Level |
+ | |{{Varying Level|BountyHunter}} |
|Varying |
|Varying |
||
|Varying |
|Varying |
||
| Line 382: | Line 374: | ||
|-9832012 |
|-9832012 |
||
|[[File:Mob Yeti.png]]<br />'''[[Yeti#Bounty Hunter Portal|Yeti]]''' |
|[[File:Mob Yeti.png]]<br />'''[[Yeti#Bounty Hunter Portal|Yeti]]''' |
||
| − | |{{Varying Level |
+ | |{{Varying Level|BountyHunter}} |
|Varying |
|Varying |
||
|Varying |
|Varying |
||
| Line 390: | Line 382: | ||
|-9832013 |
|-9832013 |
||
|[[File:Mob Dark Yeti.png]]<br />'''[[Dark Yeti#Bounty Hunter Portal|Dark Yeti]]''' |
|[[File:Mob Dark Yeti.png]]<br />'''[[Dark Yeti#Bounty Hunter Portal|Dark Yeti]]''' |
||
| − | |{{Varying Level |
+ | |{{Varying Level|BountyHunter}} |
|Varying |
|Varying |
||
|Varying |
|Varying |
||
| Line 398: | Line 390: | ||
|-9832014 |
|-9832014 |
||
|[[File:Mob Wild Kargo.png]]<br />'''[[Wild Kargo#Bounty Hunter Portal|Wild Kargo]]''' |
|[[File:Mob Wild Kargo.png]]<br />'''[[Wild Kargo#Bounty Hunter Portal|Wild Kargo]]''' |
||
| − | |{{Varying Level |
+ | |{{Varying Level|BountyHunter}} |
|Varying |
|Varying |
||
|Varying |
|Varying |
||
| Line 406: | Line 398: | ||
|-9832015 |
|-9832015 |
||
|[[File:Mob Tauromacis.png]]<br />'''[[Tauromacis#Bounty Hunter Portal|Tauromacis]]''' |
|[[File:Mob Tauromacis.png]]<br />'''[[Tauromacis#Bounty Hunter Portal|Tauromacis]]''' |
||
| − | |{{Varying Level |
+ | |{{Varying Level|BountyHunter}} |
|Varying |
|Varying |
||
|Varying |
|Varying |
||
| Line 414: | Line 406: | ||
|-9832016 |
|-9832016 |
||
|[[File:Mob Taurospear.png]]<br />'''[[Taurospear#Bounty Hunter Portal|Taurospear]]''' |
|[[File:Mob Taurospear.png]]<br />'''[[Taurospear#Bounty Hunter Portal|Taurospear]]''' |
||
| − | |{{Varying Level |
+ | |{{Varying Level|BountyHunter}} |
|Varying |
|Varying |
||
|Varying |
|Varying |
||
| Line 422: | Line 414: | ||
|-9832017 |
|-9832017 |
||
|[[File:Mob Blue Dragon Turtle.png]]<br />'''[[Blue Dragon Turtle#Bounty Hunter Portal|Blue Dragon Turtle]]''' |
|[[File:Mob Blue Dragon Turtle.png]]<br />'''[[Blue Dragon Turtle#Bounty Hunter Portal|Blue Dragon Turtle]]''' |
||
| − | |{{Varying Level |
+ | |{{Varying Level|BountyHunter}} |
|Varying |
|Varying |
||
|Varying |
|Varying |
||
| Line 430: | Line 422: | ||
|-9832018 |
|-9832018 |
||
|[[File:Mob Red Dragon Turtle.png]]<br />'''[[Red Dragon Turtle#Bounty Hunter Portal|Red Dragon Turtle]]''' |
|[[File:Mob Red Dragon Turtle.png]]<br />'''[[Red Dragon Turtle#Bounty Hunter Portal|Red Dragon Turtle]]''' |
||
| − | |{{Varying Level |
+ | |{{Varying Level|BountyHunter}} |
|Varying |
|Varying |
||
|Varying |
|Varying |
||
| Line 438: | Line 430: | ||
|-9832019 |
|-9832019 |
||
|[[File:Mob Brexton.png]]<br />'''[[Brexton#Bounty Hunter Portal|Brexton]]''' |
|[[File:Mob Brexton.png]]<br />'''[[Brexton#Bounty Hunter Portal|Brexton]]''' |
||
| − | |{{Varying Level |
+ | |{{Varying Level|BountyHunter}} |
|Varying |
|Varying |
||
|Varying |
|Varying |
||
| Line 446: | Line 438: | ||
|-9832020 |
|-9832020 |
||
|[[File:Mob Yeti and Pepe.png]]<br />'''[[Yeti and Pepe#Bounty Hunter Portal|Yeti and Pepe]]''' |
|[[File:Mob Yeti and Pepe.png]]<br />'''[[Yeti and Pepe#Bounty Hunter Portal|Yeti and Pepe]]''' |
||
| − | |{{Varying Level |
+ | |{{Varying Level|BountyHunter}} |
|Varying |
|Varying |
||
|Varying |
|Varying |
||
| Line 454: | Line 446: | ||
|-9832021 |
|-9832021 |
||
|[[File:Mob Dark Yeti and Pepe.png]]<br />'''[[Dark Yeti and Pepe#Bounty Hunter Portal|Dark Yeti and Pepe]]''' |
|[[File:Mob Dark Yeti and Pepe.png]]<br />'''[[Dark Yeti and Pepe#Bounty Hunter Portal|Dark Yeti and Pepe]]''' |
||
| − | |{{Varying Level |
+ | |{{Varying Level|BountyHunter}} |
|Varying |
|Varying |
||
|Varying |
|Varying |
||
| Line 462: | Line 454: | ||
|-9832022 |
|-9832022 |
||
|[[File:Mob Snowman.png]]<br />'''[[Snowman#Bounty Hunter Portal|Snowman]] (Boss)''' |
|[[File:Mob Snowman.png]]<br />'''[[Snowman#Bounty Hunter Portal|Snowman]] (Boss)''' |
||
| − | |{{Varying Level |
+ | |{{Varying Level|BountyHunter}} |
|Varying |
|Varying |
||
|Varying |
|Varying |
||
| Line 472: | Line 464: | ||
==Legion Raid (60 - 275)== |
==Legion Raid (60 - 275)== |
||
Note: The stats of the Wyverns/Whelps change based on your level. The giant dragons will have their total HP listed here. Note that you can only deal 20% of its health. Afterwards, only your Legion attackers will be able to damage them. |
Note: The stats of the Wyverns/Whelps change based on your level. The giant dragons will have their total HP listed here. Note that you can only deal 20% of its health. Afterwards, only your Legion attackers will be able to damage them. |
||
| + | {{Mob Table Styling|No EXP}} |
||
| − | {|style="text-align:center;background:#F0F8FF;" class="wikitable" width="100%" |
||
| − | |- |
||
| − | !rowspan="2" width="40%"|Picture<br />Name |
||
| − | !colspan="6"|Monster's Stats |
||
| − | |- |
||
| − | !width="10%"|<small>Level</small> |
||
| − | !width="10%"|<small>HP</small> |
||
| − | !width="10%"|<small>MP</small> |
||
| − | !width="10%"|<small>PDR</small> |
||
| − | !width="10%"|<small>MDR</small> |
||
| − | !width="10%"|<small>EXP</small> |
||
|-9833106 |
|-9833106 |
||
|[[File:Mob Red Wyvern.png]]<br />'''[[Red Dragon Whelp]] (Boss)''' |
|[[File:Mob Red Wyvern.png]]<br />'''[[Red Dragon Whelp]] (Boss)''' |
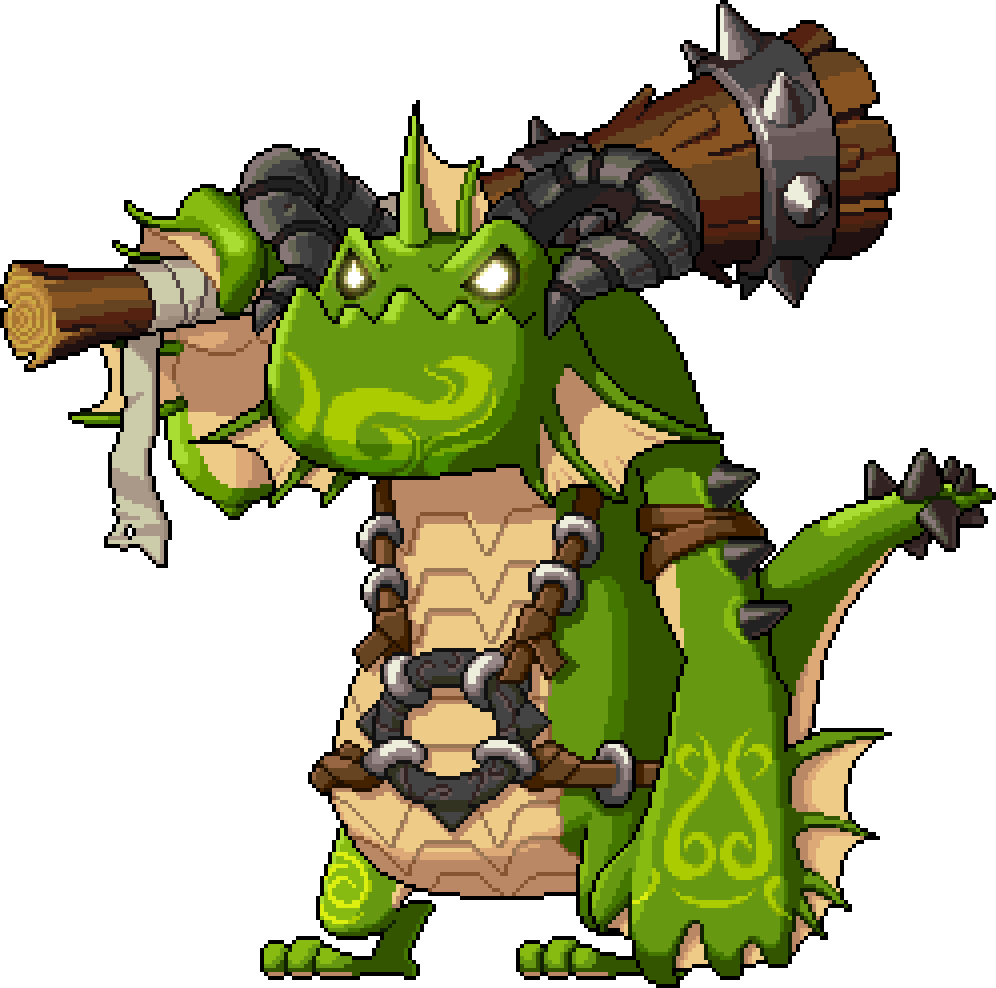
||
| Line 490: | Line 472: | ||
|Varying % |
|Varying % |
||
|Varying % |
|Varying % |
||
| + | |0 |
||
| − | |Varying |
||
|-9833107 |
|-9833107 |
||
|[[File:Mob Blue Wyvern.png]]<br />'''[[Blue Dragon Whelp]] (Boss)''' |
|[[File:Mob Blue Wyvern.png]]<br />'''[[Blue Dragon Whelp]] (Boss)''' |
||
| Line 498: | Line 480: | ||
|Varying % |
|Varying % |
||
|Varying % |
|Varying % |
||
| + | |0 |
||
| − | |Varying |
||
|-9833108 |
|-9833108 |
||
|[[File:Mob Dark Wyvern.png]]<br />'''[[Black Dragon Whelp]] (Boss)''' |
|[[File:Mob Dark Wyvern.png]]<br />'''[[Black Dragon Whelp]] (Boss)''' |
||
| Line 506: | Line 488: | ||
|Varying % |
|Varying % |
||
|Varying % |
|Varying % |
||
| + | |0 |
||
| − | |Varying |
||
|-9833109 |
|-9833109 |
||
|[[File:Mob Corrupted Wyvern.png]]<br />'''[[Fallen Dragon Whelp]] (Boss)''' |
|[[File:Mob Corrupted Wyvern.png]]<br />'''[[Fallen Dragon Whelp]] (Boss)''' |
||
| Line 514: | Line 496: | ||
|Varying % |
|Varying % |
||
|Varying % |
|Varying % |
||
| + | |0 |
||
| − | |Varying |
||
|-9833110 |
|-9833110 |
||
|[[File:Mob Corrupted Wyvern.png]]<br />'''[[Fallen Flyer Whelp]] (Boss)''' |
|[[File:Mob Corrupted Wyvern.png]]<br />'''[[Fallen Flyer Whelp]] (Boss)''' |
||
| Line 522: | Line 504: | ||
|Varying % |
|Varying % |
||
|Varying % |
|Varying % |
||
| + | |0 |
||
| − | |Varying |
||
|-9833111 |
|-9833111 |
||
|[[File:Mob Golden Wyvern.png]]<br />'''[[Golden Wyvern]] (Boss)''' |
|[[File:Mob Golden Wyvern.png]]<br />'''[[Golden Wyvern]] (Boss)''' |
||
| Line 530: | Line 512: | ||
|Varying % |
|Varying % |
||
|Varying % |
|Varying % |
||
| + | |0 |
||
| − | |Varying |
||
|-9833101+9833201 |
|-9833101+9833201 |
||
|[[File:Mob Spark Dragon.png|200px]]<br />'''[[File:Mobicon Spark Dragon.png]] [[Spark Dragon]] (Boss)''' |
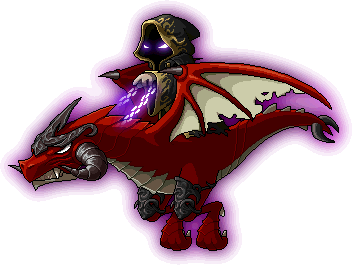
|[[File:Mob Spark Dragon.png|200px]]<br />'''[[File:Mobicon Spark Dragon.png]] [[Spark Dragon]] (Boss)''' |
||
| Line 571: | Line 553: | ||
|50% |
|50% |
||
|0 |
|0 |
||
| + | |} |
||
| + | ==Hyperspace Cube (90 - 275)== |
||
| + | Note: The stats of the Omega Nenne and Omega Tutu change based on your level. |
||
| + | {{Mob Table Styling|Varying}} |
||
| + | |-9410850 |
||
| + | |[[File:Mob Nenne Clone.png]]<br />'''[[Nenne Clone]]''' |
||
| + | |10 |
||
| + | |15,000 |
||
| + | |4,000 |
||
| + | |0% |
||
| + | |0% |
||
| + | |0 |
||
| + | |-9410851 |
||
| + | |[[File:Mob Grouchy Nenne Clone.png]]<br />'''[[Grouchy Nenne Clone]]''' |
||
| + | |10 |
||
| + | |10,000 |
||
| + | |450 |
||
| + | |5% |
||
| + | |5% |
||
| + | |0 |
||
| + | |-9410852 |
||
| + | |[[File:Mob Alpha Nenne.png]]<br />'''[[File:Mobicon Alpha Nenne.png]] [[Alpha Nenne]] (Boss)''' |
||
| + | |10 |
||
| + | |100,000 |
||
| + | |0 |
||
| + | |10% |
||
| + | |10% |
||
| + | |0 |
||
| + | |-9410853 |
||
| + | |[[File:Mob Lingling Clone.png]]<br />'''[[Lingling Clone]]''' |
||
| + | |10 |
||
| + | |12,000 |
||
| + | |0 |
||
| + | |0% |
||
| + | |0% |
||
| + | |0 |
||
| + | |-9410854 |
||
| + | |[[File:Mob Lingling Infiltrator.png]]<br />'''[[Lingling Infiltrator]]''' |
||
| + | |10 |
||
| + | |12,000 |
||
| + | |0 |
||
| + | |0% |
||
| + | |0% |
||
| + | |0 |
||
| + | |-9410855 |
||
| + | |[[File:Mob Alpha Lingling.png]]<br />'''[[File:Mobicon Alpha Lingling.png]] [[Alpha Lingling]] (Boss)''' |
||
| + | |10 |
||
| + | |50,000 |
||
| + | |1,000 |
||
| + | |0% |
||
| + | |0% |
||
| + | |0 |
||
| + | |-9410856 |
||
| + | |[[File:Mob Tutu Clone.png]]<br />'''[[Tutu Clone]]''' |
||
| + | |10 |
||
| + | |4,000 |
||
| + | |0 |
||
| + | |0% |
||
| + | |0% |
||
| + | |0 |
||
| + | |-9410857 |
||
| + | |[[File:Mob Alpha Tutu.png]]<br />'''[[File:Mobicon Alpha Tutu.png]] [[Alpha Tutu]] (Boss)''' |
||
| + | |10 |
||
| + | |50,000 |
||
| + | |75,000 |
||
| + | |0% |
||
| + | |0% |
||
| + | |0 |
||
| + | |-9410858 |
||
| + | |[[File:Mob Space Pirate.png]]<br />'''[[Space Pirate]]''' |
||
| + | |10 |
||
| + | |7,000 |
||
| + | |0 |
||
| + | |0% |
||
| + | |0% |
||
| + | |0 |
||
| + | |-9410859 |
||
| + | |[[File:Mob Space Pirate (2).png]]<br />'''[[Space Pirate]]''' |
||
| + | |10 |
||
| + | |10,000 |
||
| + | |450 |
||
| + | |0% |
||
| + | |0% |
||
| + | |0 |
||
| + | |-9410860 |
||
| + | |[[File:Mob Space Pirate Officer.png]]<br />'''[[Space Pirate Officer]]''' |
||
| + | |10 |
||
| + | |10,000 |
||
| + | |450 |
||
| + | |0% |
||
| + | |0% |
||
| + | |0 |
||
| + | |-9410801 |
||
| + | |[[File:Mob Omega Tutu.png]]<br />'''[[File:Mobicon Omega Tutu.png]] [[Omega Tutu]] (Boss)''' |
||
| + | |90 - 275 |
||
| + | |Varying |
||
| + | |Varying |
||
| + | |Varying % |
||
| + | |Varying % |
||
| + | |Varying |
||
| + | |-9410821 |
||
| + | |[[File:Mob Omega Nenne.png]]<br />'''[[File:Mobicon Omega Nenne.png]] [[Omega Nenne]] (Boss)''' |
||
| + | |90 - 275 |
||
| + | |Varying |
||
| + | |Varying |
||
| + | |Varying % |
||
| + | |Varying % |
||
| + | |Varying |
||
|} |
|} |
||
==Evolution System (105 - 160)== |
==Evolution System (105 - 160)== |
||
Note: The stats of monsters listed here change based on your level, as well as based on cores placed to enhance them. |
Note: The stats of monsters listed here change based on your level, as well as based on cores placed to enhance them. |
||
| + | {{Mob Table Styling|Varying}} |
||
| − | {|style="text-align:center;background:#F0F8FF;" class="wikitable" width="100%" |
||
| − | |- |
||
| − | !rowspan="2" width="40%"|Picture<br />Name |
||
| − | !colspan="6"|Monster's Stats |
||
| − | |- |
||
| − | !width="10%"|<small>Level</small> |
||
| − | !width="10%"|<small>HP</small> |
||
| − | !width="10%"|<small>MP</small> |
||
| − | !width="10%"|<small>PDR</small> |
||
| − | !width="10%"|<small>MDR</small> |
||
| − | !width="10%"|<small>EXP</small> |
||
|-9306000 |
|-9306000 |
||
|[[File:Mob System Monster N1.png]]<br />'''[[System Monster N1]] (Mini-Boss)''' |
|[[File:Mob System Monster N1.png]]<br />'''[[System Monster N1]] (Mini-Boss)''' |
||
| Line 798: | Line 878: | ||
==FriendStory (100 - 275)== |
==FriendStory (100 - 275)== |
||
Note: The stats of monsters listed here change based on your level. |
Note: The stats of monsters listed here change based on your level. |
||
| + | {{Mob Table Styling|Varying}} |
||
| − | {|style="text-align:center;background:#F0F8FF;" class="wikitable" width="100%" |
||
| − | |- |
||
| − | !rowspan="2" width="40%"|Picture<br />Name |
||
| − | !colspan="6"|Monster's Stats |
||
| − | |- |
||
| − | !width="10%"|<small>Level</small> |
||
| − | !width="10%"|<small>HP</small> |
||
| − | !width="10%"|<small>MP</small> |
||
| − | !width="10%"|<small>PDR</small> |
||
| − | !width="10%"|<small>MDR</small> |
||
| − | !width="10%"|<small>EXP</small> |
||
|-2700020 |
|-2700020 |
||
|[[File:Mob Mote.png]]<br/>'''[[Mote]]''' |
|[[File:Mob Mote.png]]<br/>'''[[Mote]]''' |
||
| Line 933: | Line 1,003: | ||
===Old Shinsoo International School Building (100 - 275)=== |
===Old Shinsoo International School Building (100 - 275)=== |
||
Note: The stats of monsters listed here change based on your level. |
Note: The stats of monsters listed here change based on your level. |
||
| + | {{Mob Table Styling|Varying}} |
||
| − | {|style="text-align:center;background:#F0F8FF;" class="wikitable" width="100%" |
||
| − | |- |
||
| − | !rowspan="2" width="40%"|Picture<br />Name |
||
| − | !colspan="6"|Monster's Stats |
||
| − | |- |
||
| − | !width="10%"|<small>Level</small> |
||
| − | !width="10%"|<small>HP</small> |
||
| − | !width="10%"|<small>MP</small> |
||
| − | !width="10%"|<small>PDR</small> |
||
| − | !width="10%"|<small>MDR</small> |
||
| − | !width="10%"|<small>EXP</small> |
||
|-2700000 |
|-2700000 |
||
|[[File:Mob Bandage Mon.png]]<br/>'''[[Bandage Mon]]''' |
|[[File:Mob Bandage Mon.png]]<br/>'''[[Bandage Mon]]''' |
||
| Line 1,081: | Line 1,141: | ||
|Varying |
|Varying |
||
|} |
|} |
||
| − | |||
| − | |||
==Mushroom Shrine Tales (100 - 275)== |
==Mushroom Shrine Tales (100 - 275)== |
||
Note: The stats of most monsters listed here change based on your level. |
Note: The stats of most monsters listed here change based on your level. |
||
| + | {{Mob Table Styling|Varying}} |
||
| − | {|style="text-align:center;background:#F0F8FF;" class="wikitable" width="100%" |
||
| − | |- |
||
| − | !rowspan="2" width="40%"|Picture<br />Name |
||
| − | !colspan="6"|Monster's Stats |
||
| − | |- |
||
| − | !width="10%"|<small>Level</small> |
||
| − | !width="10%"|<small>HP</small> |
||
| − | !width="10%"|<small>MP</small> |
||
| − | !width="10%"|<small>PDR</small> |
||
| − | !width="10%"|<small>MDR</small> |
||
| − | !width="10%"|<small>EXP</small> |
||
|-9400035 |
|-9400035 |
||
|[[File:Mob Wandering Fire Raccoon.png]]<br />'''[[Bunbuku Tanuki]]''' |
|[[File:Mob Wandering Fire Raccoon.png]]<br />'''[[Bunbuku Tanuki]]''' |
||
| Line 1,268: | Line 1,316: | ||
|[[File:Mob Genkou.png]]<br />'''[[File:Mobicon Genkou.png]] [[Genkou/Monster|Genkou]] (Boss)''' |
|[[File:Mob Genkou.png]]<br />'''[[File:Mobicon Genkou.png]] [[Genkou/Monster|Genkou]] (Boss)''' |
||
|100 - 275 |
|100 - 275 |
||
| + | |Varying |
||
| + | |Varying |
||
| + | |Varying % |
||
| + | |Varying % |
||
| + | |Varying |
||
| + | |} |
||
| + | |||
| + | ==Ghost Park (125 - 145)== |
||
| + | ===Normal=== |
||
| + | Note: The stats of monsters listed here change based on your level, as well as based on charms placed to enhance them. |
||
| + | {{Mob Table Styling|Varying}} |
||
| + | |-9802000 |
||
| + | |[[File:Mob Young Ghost.png]]<br />'''[[Young Ghost]] (Mini-Boss)''' |
||
| + | |125 - 145 |
||
| + | |Varying |
||
| + | |Varying |
||
| + | |Varying % |
||
| + | |Varying % |
||
| + | |Varying |
||
| + | |-9802001 |
||
| + | |[[File:Mob Gentleman Ghost.png]]<br />'''[[Gentleman Ghost]] (Mini-Boss)''' |
||
| + | |125 - 145 |
||
| + | |Varying |
||
| + | |Varying |
||
| + | |Varying % |
||
| + | |Varying % |
||
| + | |Varying |
||
| + | |-9802002 |
||
| + | |[[File:Mob Lord Ghost.png]]<br />'''[[Lord Ghost]] (Mini-Boss)''' |
||
| + | |125 - 145 |
||
| + | |Varying |
||
| + | |Varying |
||
| + | |Varying % |
||
| + | |Varying % |
||
| + | |Varying |
||
| + | |-9802003-9802005 |
||
| + | |[[File:Mob Banshee.png]]<br />'''[[Banshee]]<br />(Invincible, Boss)''' |
||
| + | |125 - 145 |
||
|Varying |
|Varying |
||
|Varying |
|Varying |
||
| Line 1,277: | Line 1,363: | ||
==Commerci Trade Voyages (140 - 275)== |
==Commerci Trade Voyages (140 - 275)== |
||
Note: The stats of most monsters listed here change based on your level. The only monsters with their exact stats listed here are Grosso Polpo and Livyatan. |
Note: The stats of most monsters listed here change based on your level. The only monsters with their exact stats listed here are Grosso Polpo and Livyatan. |
||
| + | {{Mob Table Styling|Varying}} |
||
| − | {|style="text-align:center;background:#F0F8FF;" class="wikitable" width="100%" |
||
| − | |- |
||
| − | !rowspan="2" width="40%"|Picture<br />Name |
||
| − | !colspan="6"|Monster's Stats |
||
| − | |- |
||
| − | !width="10%"|<small>Level</small> |
||
| − | !width="10%"|<small>HP</small> |
||
| − | !width="10%"|<small>MP</small> |
||
| − | !width="10%"|<small>PDR</small> |
||
| − | !width="10%"|<small>MDR</small> |
||
| − | !width="10%"|<small>EXP</small> |
||
|-9390800/9390823 |
|-9390800/9390823 |
||
|[[File:Mob Blood Pirate Swabby.png]]<br />'''[[Captain Blood Pirate]]''' |
|[[File:Mob Blood Pirate Swabby.png]]<br />'''[[Captain Blood Pirate]]''' |
||
| Line 1,363: | Line 1,439: | ||
==Commerci Trade Union (140 - 275)== |
==Commerci Trade Union (140 - 275)== |
||
Note: The stats of most monsters listed here change based on the average level of the party. Only their base stats will be listed here, and are therefore not what you should expect when doing this. The only monsters with their exact stats listed here are Grosso Polpo and Livyatan. |
Note: The stats of most monsters listed here change based on the average level of the party. Only their base stats will be listed here, and are therefore not what you should expect when doing this. The only monsters with their exact stats listed here are Grosso Polpo and Livyatan. |
||
| + | {{Mob Table Styling|Varying}} |
||
| − | {|style="text-align:center;background:#F0F8FF;" class="wikitable" width="100%" |
||
| − | |- |
||
| − | !rowspan="2" width="40%"|Picture<br />Name |
||
| − | !colspan="6"|Monster's Stats |
||
| − | |- |
||
| − | !width="10%"|<small>Level</small> |
||
| − | !width="10%"|<small>HP</small> |
||
| − | !width="10%"|<small>MP</small> |
||
| − | !width="10%"|<small>PDR</small> |
||
| − | !width="10%"|<small>MDR</small> |
||
| − | !width="10%"|<small>EXP</small> |
||
|-9390800/9390823 |
|-9390800/9390823 |
||
|[[File:Mob Blood Pirate Swabby.png]]<br />'''[[Captain Blood Pirate]]''' |
|[[File:Mob Blood Pirate Swabby.png]]<br />'''[[Captain Blood Pirate]]''' |
||
| Line 1,441: | Line 1,507: | ||
==Dream Defender (220 - 275)== |
==Dream Defender (220 - 275)== |
||
Note: The stats of monsters listed here change based on your level and your stage of Dream Defender. |
Note: The stats of monsters listed here change based on your level and your stage of Dream Defender. |
||
| + | {{Mob Table Styling|No EXP}} |
||
| − | {|style="text-align:center;background:#F0F8FF;" class="wikitable" width="100%" |
||
| − | |- |
||
| − | !rowspan="2" width="40%"|Picture<br />Name |
||
| − | !colspan="6"|Monster's Stats |
||
| − | |- |
||
| − | !width="10%"|<small>Level</small> |
||
| − | !width="10%"|<small>HP</small> |
||
| − | !width="10%"|<small>MP</small> |
||
| − | !width="10%"|<small>PDR</small> |
||
| − | !width="10%"|<small>MDR</small> |
||
| − | !width="10%"|<small>EXP</small> |
||
|-9833070.9833074 |
|-9833070.9833074 |
||
|[[File:Mob Sleepytime Music Box.png]]<br />'''[[Sleepytime Music Box]] (Ally, Boss)''' |
|[[File:Mob Sleepytime Music Box.png]]<br />'''[[Sleepytime Music Box]] (Ally, Boss)''' |
||
| Line 1,459: | Line 1,515: | ||
|Varying % |
|Varying % |
||
|Varying % |
|Varying % |
||
| + | |0 |
||
| − | |Varying |
||
|-9833080.9833084 |
|-9833080.9833084 |
||
|[[File:Mob Nightmare Music Box.png]]<br />'''[[Nightmare Music Box]] (Boss)''' |
|[[File:Mob Nightmare Music Box.png]]<br />'''[[Nightmare Music Box]] (Boss)''' |
||
| Line 1,467: | Line 1,523: | ||
|Varying % |
|Varying % |
||
|Varying % |
|Varying % |
||
| + | |0 |
||
| − | |Varying |
||
|-9833090/9833092/9833094/9833096/9833098 |
|-9833090/9833092/9833094/9833096/9833098 |
||
|[[File:Mob Dreamkeeper.png]]<br />'''[[Nightmarekeeper]] (Boss)''' |
|[[File:Mob Dreamkeeper.png]]<br />'''[[Nightmarekeeper]] (Boss)''' |
||
| Line 1,475: | Line 1,531: | ||
|Varying % |
|Varying % |
||
|Varying % |
|Varying % |
||
| + | |0 |
||
| − | |Varying |
||
|-9833091/9833093/9833095/9833097/9833099 |
|-9833091/9833093/9833095/9833097/9833099 |
||
|[[File:Mob Blue-eyed Gargoyle.png]]<br />'''[[Nightmare Gargoyle]] (Boss)''' |
|[[File:Mob Blue-eyed Gargoyle.png]]<br />'''[[Nightmare Gargoyle]] (Boss)''' |
||
| Line 1,483: | Line 1,539: | ||
|Varying % |
|Varying % |
||
|Varying % |
|Varying % |
||
| + | |0 |
||
| − | |Varying |
||
|} |
|} |
||
==Spirit Savior== |
==Spirit Savior== |
||
| + | {{Mob Table Styling|No EXP}} |
||
| − | {|style="text-align:center;background:#F0F8FF;" class="wikitable" width="100%" |
||
| − | |- |
||
| − | !rowspan="2" width="40%"|Picture<br />Name |
||
| − | !colspan="6"|Monster's Stats |
||
| − | |- |
||
| − | !width="5%"|<small>Level</small> |
||
| − | !width="15%"|<small>HP</small> |
||
| − | !width="10%"|<small>MP</small> |
||
| − | !width="5%"|<small>PDR</small> |
||
| − | !width="5%"|<small>MDR</small> |
||
| − | !width="15%"|<small>EXP</small> |
||
|-8644101.8644112 |
|-8644101.8644112 |
||
|[[File:Mob Bound Rock Spirit.png]]<br />'''[[Bound Rock Spirit]]''' |
|[[File:Mob Bound Rock Spirit.png]]<br />'''[[Bound Rock Spirit]]''' |
||
| Line 1,505: | Line 1,551: | ||
|50% |
|50% |
||
|0 |
|0 |
||
| − | |-8644201 |
+ | |-8644201-8644205 |
|[[File:Mob Toxic Spirit.png]]<br />'''[[Toxic Stalker]] (Invincible, Boss)''' |
|[[File:Mob Toxic Spirit.png]]<br />'''[[Toxic Stalker]] (Invincible, Boss)''' |
||
|230 |
|230 |
||
| Line 1,515: | Line 1,561: | ||
|} |
|} |
||
==Research Lab Defense (230 - 275)== |
==Research Lab Defense (230 - 275)== |
||
| + | {{Mob Table Styling|Varying}} |
||
| − | The monsters listed below are for one of the daily quests in Morass. Note: The stats of monsters listed here change based on your level. |
||
| − | {|style="text-align:center;background:#F0F8FF;" class="wikitable" width="100%" |
||
| − | |- |
||
| − | !rowspan="2" width="40%"|Picture<br />Name |
||
| − | !colspan="6"|Monster's Stats |
||
| − | |- |
||
| − | !width="10%"|<small>Level</small> |
||
| − | !width="10%"|<small>HP</small> |
||
| − | !width="10%"|<small>MP</small> |
||
| − | !width="10%"|<small>PDR</small> |
||
| − | !width="10%"|<small>MDR</small> |
||
| − | !width="10%"|<small>EXP</small> |
||
|-8644439 |
|-8644439 |
||
|[[File:Mob Blue Shadow.png]]<br />'''[[Blue Shadow#Research Lab Defense|Blue Shadow]]''' |
|[[File:Mob Blue Shadow.png]]<br />'''[[Blue Shadow#Research Lab Defense|Blue Shadow]]''' |
||
| Line 1,600: | Line 1,635: | ||
|Varying |
|Varying |
||
|} |
|} |
||
| + | ==Labyrinth of Suffering Dungeon== |
||
| + | {{Mob Table Styling|No EXP}} |
||
| + | |-9833267 |
||
| + | |[[File:Mob Pikeman Skeleknight Negative (Purple 1).png]]<br />'''[[Pikeman Skeleknight Negative#Purple|Pikeman Skeleknight Negative]]''' |
||
| + | |255 |
||
| + | |581,026,600 |
||
| + | |60,000 |
||
| + | |10% |
||
| + | |10% |
||
| + | |0 |
||
| + | |-9833270 |
||
| + | |[[File:Mob Pikeman Skeleknight Negative (Blue 1).png]]<br />'''[[Pikeman Skeleknight Negative#Blue|Pikeman Skeleknight Negative]]''' |
||
| + | |255 |
||
| + | |581,026,600 |
||
| + | |60,000 |
||
| + | |10% |
||
| + | |10% |
||
| + | |0 |
||
| + | |-9833269 |
||
| + | |[[File:Mob Pikeman Skeleknight Negative (Green).png]]<br />'''[[Pikeman Skeleknight Negative#Green|Pikeman Skeleknight Negative]]''' |
||
| + | |255 |
||
| + | |581,026,600 |
||
| + | |60,000 |
||
| + | |10% |
||
| + | |10% |
||
| + | |0 |
||
| + | |-9833303 |
||
| + | |[[File:Mob Despairing Soul.png]]<br />'''[[Despairing Soul#Labyrinth of Suffering Dungeon|Despairing Soul]]''' |
||
| + | |259 |
||
| + | |622,956,400 |
||
| + | |60,000 |
||
| + | |10% |
||
| + | |10% |
||
| + | |0 |
||
| + | |-9833322 |
||
| + | |[[File:Mob Despairing Soul.png]]<br />'''[[Despairing Soul#Giant|Despairing Soul]]''' |
||
| + | |259 |
||
| + | |6,229,564,000 |
||
| + | |60,000 |
||
| + | |10% |
||
| + | |10% |
||
| + | |0 |
||
| + | |-9833289 |
||
| + | |[[File:Mob Necro Damien.png|200px]]<br />'''[[File:Mobicon Necro Damien.png]] [[Necro Damien#Labyrinth of Suffering Dungeon|Necro Damien]] (Boss)''' |
||
| + | |259 |
||
| + | |18,688,692,000 |
||
| + | |100,000 |
||
| + | |30% |
||
| + | |30% |
||
| + | |0 |
||
| + | |-9833290 |
||
| + | |[[File:Mob Necro Lotus.png]]<br />'''[[File:Mobicon Necro Lotus.png]] [[Necro Lotus#Labyrinth of Suffering Dungeon|Necro Lotus]] (Boss)''' |
||
| + | |259 |
||
| + | |18,688,692,000 |
||
| + | |10,000,000 |
||
| + | |10% |
||
| + | |10% |
||
| + | |0 |
||
| + | |-9833326 |
||
| + | |[[File:Mob Labyrinth Core (3).png|200px]]<br />'''[[File:Mobicon Labyrinth Core (3).png]] [[Labyrinth Core#Labyrinth of Suffering Deep Core|Labyrinth Core]] (Boss)''' |
||
| + | |259 |
||
| + | |14,700,000,000 |
||
| + | |10,000,000 |
||
| + | |300% |
||
| + | |300% |
||
| + | |0 |
||
| + | |} |
||
| + | |||
{{Monsters}} |
{{Monsters}} |
||
[[Category:Monsters]] |
[[Category:Monsters]] |
||
Revision as of 16:15, 16 February 2020
The monsters listed here can be found in specific Storylines, Daily Quests, and training maps.
Click on one of the following pages to navigate:
Elite Bosses
Note: The stats of Elite Bosses change based on the highest level non-boss monster in the map you are currently training in.
| Picture and Name | Monster's Stats | |||||
|---|---|---|---|---|---|---|
| Level | HP | MP | PDR | MDR | EXP | |
 |
140 - 265 | Varying | Varying | Varying % | Varying % | Varying |
 |
140 - 265 | Varying | Varying | Varying % | Varying % | Varying |
 |
140 - 265 | Varying | Varying | Varying % | Varying % | Varying |
 |
140 - 265 | Varying | Varying | Varying % | Varying % | Varying |
 |
140 - 265 | Varying | Varying | Varying % | Varying % | Varying |
Phantom Forest Field/Elite Bosses
Note: The stats of Elite Bosses change based on the highest level non-boss monster in the map you are currently training in.
| Picture and Name | Monster's Stats | |||||
|---|---|---|---|---|---|---|
| Level | HP | MP | PDR | MDR | EXP | |
 |
Varying | Varying | Varying % | Varying % | Varying | |
 |
Varying | Varying | Varying % | Varying % | Varying | |
 |
Varying | Varying | Varying % | Varying % | Varying | |
Bounty Hunter Portals (10 - 275)
Bounty Hunt
Note: The stats of monsters listed here change based on the highest level non-boss monster in the map you are currently training in.
| Picture and Name | Monster's Stats | |||||
|---|---|---|---|---|---|---|
| Level | HP | MP | PDR | MDR | EXP | |
 Primitive Boar (Boss) |
10 - 300 | Varying | Varying | Varying % | Varying % | Varying |
 Tchau (Boss) |
10 - 300 | Varying | Varying | Varying % | Varying % | Varying |
 Mean Mama Monkey (Boss) |
10 - 300 | Varying | Varying | Varying % | Varying % | Varying |
Teeny White Monkey (Boss) |
10 - 300 | Varying | Varying | Varying % | Varying % | Varying |
 White Monkey Master (Boss) |
10 - 300 | Varying | Varying | Varying % | Varying % | Varying |
 Corrupted Cornian (Boss) |
10 - 300 | Varying | Varying | Varying % | Varying % | Varying |
 Corrupted Kentaurus (Boss) |
10 - 300 | Varying | Varying | Varying % | Varying % | Varying |
 Corrupted Wyvern (Boss) |
10 - 300 | Varying | Varying | Varying % | Varying % | Varying |
 Dragonoir (Boss) |
10 - 300 | Varying | Varying | Varying % | Varying % | Varying |
 Frostprey (Boss) |
10 - 300 | Varying | Varying | Varying % | Varying % | Varying |
 Phoenix (Boss) |
10 - 300 | Varying | Varying | Varying % | Varying % | Varying |
 Soaring Hawk (Boss) |
10 - 300 | Varying | Varying | Varying % | Varying % | Varying |
 Soaring Eagle (Boss) |
10 - 300 | Varying | Varying | Varying % | Varying % | Varying |
| File:Mob Griffey (2).png Griffey (Boss) |
10 - 300 | Varying | Varying | Varying % | Varying % | Varying |
 Master Omen (Boss) |
10 - 300 | Varying | Varying | Varying % | Varying % | Varying |
 Toto (Boss) |
10 - 300 | Varying | Varying | Varying % | Varying % | Varying |
 Corrupted Tree Spirit (Boss) |
10 - 300 | Varying | Varying | Varying % | Varying % | Varying |
 Omen (Boss) |
10 - 300 | Varying | Varying | Varying % | Varying % | Varying |
 King Omen (Boss) |
10 - 300 | Varying | Varying | Varying % | Varying % | Varying |
.png)
Guard the Castle Gates
Note: The stats of monsters listed here change based on the highest level non-boss monster in the map you are currently training in.
| Picture and Name | Monster's Stats | |||||
|---|---|---|---|---|---|---|
| Level | HP | MP | PDR | MDR | EXP | |
 Sr. Bellflower Root (Boss) |
10 - 300 | Varying | Varying | Varying % | Varying % | Varying |
 Bellflower Root (Boss) |
10 - 300 | Varying | Varying | Varying % | Varying % | Varying |
 Gigantic Bellflower Root (Boss) |
10 - 300 | Varying | Varying | Varying % | Varying % | Varying |
 Scarred Bear (Boss) |
10 - 300 | Varying | Varying | Varying % | Varying % | Varying |
 Panda (Boss) |
10 - 300 | Varying | Varying | Varying % | Varying % | Varying |
 Tae Roon (Boss) |
10 - 300 | Varying | Varying | Varying % | Varying % | Varying |
| File:Mob Leviathan (2).png Red Leviathan (Boss) |
10 - 300 | Varying | Varying | Varying % | Varying % | Varying |
 Manon (Boss) |
10 - 300 | Varying | Varying | Varying % | Varying % | Varying |
.png)
Catch the Stormwing
Note: The stats of monsters listed here change based on the highest level non-boss monster in the map you are currently training in.
| Picture and Name | Monster's Stats | |||||
|---|---|---|---|---|---|---|
| Level | HP | MP | PDR | MDR | EXP | |
 Stormwing |
10 - 300 | Varying | Varying | Varying % | Varying % | Varying |
 Evil Eye |
10 - 300 | Varying | Varying | Varying % | Varying % | Varying |
Stirge |
10 - 300 | Varying | Varying | Varying % | Varying % | Varying |
 Golden Bee |
10 - 300 | Varying | Varying | Varying % | Varying % | Varying |
Gold Slime |
10 - 300 | Varying | Varying | Varying % | Varying % | Varying |
Flyeye |
10 - 300 | Varying | Varying | Varying % | Varying % | Varying |
 Stone Golem |
10 - 300 | Varying | Varying | Varying % | Varying % | Varying |
 Icy Mixed Golem |
10 - 300 | Varying | Varying | Varying % | Varying % | Varying |
 Yeti |
10 - 300 | Varying | Varying | Varying % | Varying % | Varying |
 Dark Yeti |
10 - 300 | Varying | Varying | Varying % | Varying % | Varying |
 Wild Kargo |
10 - 300 | Varying | Varying | Varying % | Varying % | Varying |
 Tauromacis |
10 - 300 | Varying | Varying | Varying % | Varying % | Varying |
 Taurospear |
10 - 300 | Varying | Varying | Varying % | Varying % | Varying |
 Blue Dragon Turtle |
10 - 300 | Varying | Varying | Varying % | Varying % | Varying |
 Red Dragon Turtle |
10 - 300 | Varying | Varying | Varying % | Varying % | Varying |
 Brexton |
10 - 300 | Varying | Varying | Varying % | Varying % | Varying |
 Yeti and Pepe |
10 - 300 | Varying | Varying | Varying % | Varying % | Varying |
 Dark Yeti and Pepe |
10 - 300 | Varying | Varying | Varying % | Varying % | Varying |
 Snowman (Boss) |
10 - 300 | Varying | Varying | Varying % | Varying % | Varying |
Legion Raid (60 - 275)
Note: The stats of the Wyverns/Whelps change based on your level. The giant dragons will have their total HP listed here. Note that you can only deal 20% of its health. Afterwards, only your Legion attackers will be able to damage them.
| Picture and Name | Monster's Stats | |||||
|---|---|---|---|---|---|---|
| Level | HP | MP | PDR | MDR | EXP | |
 Red Dragon Whelp (Boss) |
60 - 275 | Varying | Varying | Varying % | Varying % | 0 |
 Blue Dragon Whelp (Boss) |
60 - 275 | Varying | Varying | Varying % | Varying % | 0 |
 Black Dragon Whelp (Boss) |
60 - 275 | Varying | Varying | Varying % | Varying % | 0 |
Fallen Dragon Whelp (Boss) |
60 - 275 | Varying | Varying | Varying % | Varying % | 0 |
Fallen Flyer Whelp (Boss) |
60 - 275 | Varying | Varying | Varying % | Varying % | 0 |
 Golden Wyvern (Boss) |
60 - 275 | Varying | Varying | Varying % | Varying % | 0 |
 |
60 | 250,000,000,000 | 45,000 | 50% | 50% | 0 |
 |
60 | 500,000,000,000 | 45,000 | 50% | 50% | 0 |
 |
60 | 750,000,000,000 | 45,000 | 50% | 50% | 0 |
 |
60 | 1,000,000,000,000 | 45,000 | 50% | 50% | 0 |
 |
60 | 1,250,000,000,000 | 45,000 | 50% | 50% | 0 |
Hyperspace Cube (90 - 275)
Note: The stats of the Omega Nenne and Omega Tutu change based on your level.
| Picture and Name | Monster's Stats | |||||
|---|---|---|---|---|---|---|
| Level | HP | MP | PDR | MDR | EXP | |
 Nenne Clone |
10 | 15,000 | 4,000 | 0% | 0% | 0 |
Grouchy Nenne Clone |
10 | 10,000 | 450 | 5% | 5% | 0 |
 |
10 | 100,000 | 0 | 10% | 10% | 0 |
 Lingling Clone |
10 | 12,000 | 0 | 0% | 0% | 0 |
 Lingling Infiltrator |
10 | 12,000 | 0 | 0% | 0% | 0 |
 |
10 | 50,000 | 1,000 | 0% | 0% | 0 |
Tutu Clone |
10 | 4,000 | 0 | 0% | 0% | 0 |
 |
10 | 50,000 | 75,000 | 0% | 0% | 0 |
 Space Pirate |
10 | 7,000 | 0 | 0% | 0% | 0 |
 Space Pirate |
10 | 10,000 | 450 | 0% | 0% | 0 |
 Space Pirate Officer |
10 | 10,000 | 450 | 0% | 0% | 0 |
 |
90 - 275 | Varying | Varying | Varying % | Varying % | Varying |
 |
90 - 275 | Varying | Varying | Varying % | Varying % | Varying |
Evolution System (105 - 160)
Note: The stats of monsters listed here change based on your level, as well as based on cores placed to enhance them.
| Picture and Name | Monster's Stats | |||||
|---|---|---|---|---|---|---|
| Level | HP | MP | PDR | MDR | EXP | |
 System Monster N1 (Mini-Boss) |
105 - 160 | Varying | Varying | Varying % | Varying % | Varying |
 System Monster N2 (Mini-Boss) |
105 - 160 | Varying | Varying | Varying % | Varying % | Varying |
 System Monster N3 (Mini-Boss) |
105 - 160 | Varying | Varying | Varying % | Varying % | Varying |
 Guidance System |
105 - 160 | Varying | Varying | Varying % | Varying % | Varying |
 System Monster N4 (Mini-Boss) |
105 - 160 | Varying | Varying | Varying % | Varying % | Varying |
 Infinity (Mini-Boss) |
105 - 160 | Varying | Varying | Varying % | Varying % | Varying |
|
105 - 160 | Varying | Varying | Varying % | Varying % | Varying |
 |
105 - 160 | Varying | Varying | Varying % | Varying % | Varying |
 |
105 - 160 | Varying | Varying | Varying % | Varying % | Varying |
 System Monster N5 (Mini-Boss) |
105 - 160 | Varying | Varying | Varying % | Varying % | Varying |
System Monster N5-1 (Mini-Boss) |
105 - 160 | Varying | Varying | Varying % | Varying % | Varying |
 System Monster E10 (Boss) |
105 - 160 | Varying | Varying | Varying % | Varying % | Varying |
System Monster F1 (Mini-Boss) |
105 - 160 | Varying | Varying | Varying % | Varying % | Varying |
 Protectron (Mini-Boss) |
105 - 160 | Varying | Varying | Varying % | Varying % | Varying |
System Monster N4 (Mini-Boss) |
105 - 160 | Varying | Varying | Varying % | Varying % | Varying |
Division (Mini-Boss) |
105 - 160 | Varying | Varying | Varying % | Varying % | Varying |
 Standard Model T-1 (Mini-Boss) |
105 - 160 | Varying | Varying | Varying % | Varying % | Varying |
 Enhanced Model T-2 (Mini-Boss) |
105 - 160 | Varying | Varying | Varying % | Varying % | Varying |
System Monster G6 (Mini-Boss) |
105 - 160 | Varying | Varying | Varying % | Varying % | Varying |
 |
105 - 160 | Varying | Varying | Varying % | Varying % | Varying |
 |
105 - 160 | Varying | Varying | Varying % | Varying % | Varying |
 |
105 - 160 | Varying | Varying | Varying % | Varying % | Varying |
 Fabricated Ifrit (Boss) |
105 - 160 | Varying | Varying | Varying % | Varying % | Varying |
 |
105 - 160 | Varying | Varying | Varying % | Varying % | Varying |
 |
105 - 160 | Varying | Varying | Varying % | Varying % | Varying |
 |
105 - 160 | Varying | Varying | Varying % | Varying % | Varying |
FriendStory (100 - 275)
Note: The stats of monsters listed here change based on your level.
| Picture and Name | Monster's Stats | |||||
|---|---|---|---|---|---|---|
| Level | HP | MP | PDR | MDR | EXP | |
 Mote |
100 - 275 | Varying | Varying | Varying % | Varying % | Varying |
| File:Mob Shooting Mote.png Shooting Mote |
100 - 275 | Varying | Varying | Varying % | Varying % | Varying |
| File:Mob Flying Mote.png Flying Mote |
100 - 275 | Varying | Varying | Varying % | Varying % | Varying |
| File:Mob Rolling Mote.png Rolling Mote |
100 - 275 | Varying | Varying | Varying % | Varying % | Varying |
 Poison Mote |
100 - 275 | Varying | Varying | Varying % | Varying % | Varying |
 Hallow Mote |
100 - 275 | Varying | Varying | Varying % | Varying % | Varying |
 |
100 - 275 | Varying | Varying | Varying % | Varying % | Varying |
 |
100 - 275 | Varying | Varying | Varying % | Varying % | Varying |
 |
100 - 275 | Varying | Varying | Varying % | Varying % | Varying |
 |
100 - 275 | Varying | Varying | Varying % | Varying % | Varying |
 |
100 - 275 | Varying | Varying | Varying % | Varying % | Varying |
 |
100 - 275 | Varying | Varying | Varying % | Varying % | Varying |
 Hard Rocker |
100 - 275 | Varying | Varying | Varying % | Varying % | Varying |
 True Rocker |
100 - 275 | Varying | Varying | Varying % | Varying % | Varying |
 |
100 - 275 | Varying | Varying | Varying % | Varying % | Varying |
Old Shinsoo International School Building (100 - 275)
Note: The stats of monsters listed here change based on your level.
| Picture and Name | Monster's Stats | |||||
|---|---|---|---|---|---|---|
| Level | HP | MP | PDR | MDR | EXP | |
 Bandage Mon |
100 - 275 | Varying | Varying | Varying % | Varying % | Varying |
 Thermo Mon |
100 - 275 | Varying | Varying | Varying % | Varying % | Varying |
 |
100 - 275 | Varying | Varying | Varying % | Varying % | Varying |
 Squeeze Mon |
100 - 275 | Varying | Varying | Varying % | Varying % | Varying |
 Agrippa Mon |
100 - 275 | Varying | Varying | Varying % | Varying % | Varying |
 |
100 - 275 | Varying | Varying | Varying % | Varying % | Varying |
 Farsighted Mon |
100 - 275 | Varying | Varying | Varying % | Varying % | Varying |
 Ember Mon |
100 - 275 | Varying | Varying | Varying % | Varying % | Varying |
 |
100 - 275 | Varying | Varying | Varying % | Varying % | Varying |
 Science! |
100 - 275 | Varying | Varying | Varying % | Varying % | Varying |
 Harp Mon |
100 - 275 | Varying | Varying | Varying % | Varying % | Varying |
 Drum Mon |
100 - 275 | Varying | Varying | Varying % | Varying % | Varying |
 |
100 - 275 | Varying | Varying | Varying % | Varying % | Varying |
 Shy Mon |
100 - 275 | Varying | Varying | Varying % | Varying % | Varying |
 Bashful Mon |
100 - 275 | Varying | Varying | Varying % | Varying % | Varying |
 |
100 - 275 | Varying | Varying | Varying % | Varying % | Varying |
 |
100 - 275 | Varying | Varying | Varying % | Varying % | Varying |
Mushroom Shrine Tales (100 - 275)
Note: The stats of most monsters listed here change based on your level.
| Picture and Name | Monster's Stats | |||||
|---|---|---|---|---|---|---|
| Level | HP | MP | PDR | MDR | EXP | |
 Bunbuku Tanuki |
100 - 275 | Varying | Varying | Varying % | Varying % | Varying |
 Crazed Oni |
100 - 275 | Varying | Varying | Varying % | Varying % | Varying |
 Berserk Oni |
100 - 275 | Varying | Varying | Varying % | Varying % | Varying |
 Suspicious Oni |
100 - 275 | Varying | Varying | Varying % | Varying % | Varying |
Giant Crazed Oni |
100 - 275 | Varying | Varying | Varying % | Varying % | Varying |
 |
100 - 275 | Varying | Varying | Varying % | Varying % | Varying |
 Lost Specter |
100 - 275 | Varying | Varying | Varying % | Varying % | Varying |
 Dusk Viper |
100 - 275 | Varying | Varying | Varying % | Varying % | Varying |
Pale Specter |
100 - 275 | Varying | Varying | Varying % | Varying % | Varying |
 Skeletal Samurai (Boss) |
100 - 275 | Varying | Varying | Varying % | Varying % | Varying |
Skeletal Samurai (Boss, Invincible) |
200 | 330,000,000 | 500 | 10% | 10% | 0 |
 Giant Specter |
200 | 2,000,000,000 | 100,000 | 120% | 120% | 0 |
 Field Fox |
100 - 275 | Varying | Varying | Varying % | Varying % | Varying |
 Night Fox |
100 - 275 | Varying | Varying | Varying % | Varying % | Varying |
Stone Golem |
100 - 275 | Varying | Varying | Varying % | Varying % | Varying |
| File:Mob Extra A.png Subordinate 1 |
100 - 275 | Varying | Varying | Varying % | Varying % | Varying |
| File:Mob Extra B.png Subordinate 2 |
100 - 275 | Varying | Varying | Varying % | Varying % | Varying |
Oni Toy Thief |
100 - 275 | Varying | Varying | Varying % | Varying % | Varying |
 |
100 - 275 | Varying | Varying | Varying % | Varying % | Varying |
Anguish Crow |
100 - 275 | Varying | Varying | Varying % | Varying % | Varying |
 Manifestation of Anguish |
100 - 275 | Varying | Varying | Varying % | Varying % | Varying |
 |
100 - 275 | Varying | Varying | Varying % | Varying % | Varying |
Ghost Park (125 - 145)
Normal
Note: The stats of monsters listed here change based on your level, as well as based on charms placed to enhance them.
| Picture and Name | Monster's Stats | |||||
|---|---|---|---|---|---|---|
| Level | HP | MP | PDR | MDR | EXP | |
 Young Ghost (Mini-Boss) |
125 - 145 | Varying | Varying | Varying % | Varying % | Varying |
 Gentleman Ghost (Mini-Boss) |
125 - 145 | Varying | Varying | Varying % | Varying % | Varying |
 Lord Ghost (Mini-Boss) |
125 - 145 | Varying | Varying | Varying % | Varying % | Varying |
 Banshee (Invincible, Boss) |
125 - 145 | Varying | Varying | Varying % | Varying % | Varying |
Commerci Trade Voyages (140 - 275)
Note: The stats of most monsters listed here change based on your level. The only monsters with their exact stats listed here are Grosso Polpo and Livyatan.
| Picture and Name | Monster's Stats | |||||
|---|---|---|---|---|---|---|
| Level | HP | MP | PDR | MDR | EXP | |
 Captain Blood Pirate |
140 - 275 | Varying | Varying | Varying % | Varying % | Varying |
 Siren |
140 - 275 | Varying | Varying | Varying % | Varying % | Varying |
 Ocean Reef Runner |
140 - 275 | Varying | Varying | Varying % | Varying % | Varying |
 Coral Reef Runner |
140 - 275 | Varying | Varying | Varying % | Varying % | Varying |
 Coral Crab |
140 - 275 | Varying | Varying | Varying % | Varying % | Varying |
 |
160 | 172,000,000 | 30,000 | 40% | 40% | 3,603,400 |
 |
160 | 2,096,000,000 | 45,000 | 25% | 25% | 2,919,609 |
 |
160 | 2,608,000,000 | 52,500 | 45% | 45% | 4,844,950 |
 |
160 | 3,760,000,000 | 60,000 | 40% | 40% | 8,877,840 |
Commerci Trade Union (140 - 275)
Note: The stats of most monsters listed here change based on the average level of the party. Only their base stats will be listed here, and are therefore not what you should expect when doing this. The only monsters with their exact stats listed here are Grosso Polpo and Livyatan.
| Picture and Name | Monster's Stats | |||||
|---|---|---|---|---|---|---|
| Level | HP | MP | PDR | MDR | EXP | |
Captain Blood Pirate |
140 - 275 | Varying | Varying | Varying % | Varying % | Varying |
Siren |
140 - 275 | Varying | Varying | Varying % | Varying % | Varying |
Coral Reef Runner |
140 - 275 | Varying | Varying | Varying % | Varying % | Varying |
 Brave Captain Blood Warrior |
140 - 275 | Varying | Varying | Varying % | Varying % | Varying |
 Swift Siren |
140 - 275 | Varying | Varying | Varying % | Varying % | Varying |
 Livyatan Spawn |
140 - 275 | Varying | Varying | Varying % | Varying % | Varying |
|
160 | 7,232,000,000 | 52,500 | 45% | 45% | 4,844,950 |
|
160 | 10,240,000,000 | 60,000 | 40% | 40% | 8,877,840 |
Dream Defender (220 - 275)
Note: The stats of monsters listed here change based on your level and your stage of Dream Defender.
| Picture and Name | Monster's Stats | |||||
|---|---|---|---|---|---|---|
| Level | HP | MP | PDR | MDR | EXP | |
 Sleepytime Music Box (Ally, Boss) |
220 - 275 | Varying | Varying | Varying % | Varying % | 0 |
 Nightmare Music Box (Boss) |
220 - 275 | Varying | Varying | Varying % | Varying % | 0 |
 Nightmarekeeper (Boss) |
220 - 275 | Varying | Varying | Varying % | Varying % | 0 |
 Nightmare Gargoyle (Boss) |
220 - 275 | Varying | Varying | Varying % | Varying % | 0 |
Spirit Savior
| Picture and Name | Monster's Stats | |||||
|---|---|---|---|---|---|---|
| Level | HP | MP | PDR | MDR | EXP | |
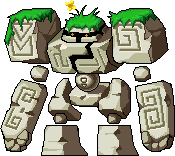
 Bound Rock Spirit |
225 | 500,000,000 | 10 | 50% | 50% | 0 |
 Toxic Stalker (Invincible, Boss) |
230 | 288,184,000 | 50,000 | 10% | 10% | 0 |
Research Lab Defense (230 - 275)
| Picture and Name | Monster's Stats | |||||
|---|---|---|---|---|---|---|
| Level | HP | MP | PDR | MDR | EXP | |
 Blue Shadow |
230 - 275 | Varying | Varying | Varying % | Varying % | Varying |
 Red Shadow |
230 - 275 | Varying | Varying | Varying % | Varying % | Varying |
 Experiment Gone Wrong |
230 - 275 | Varying | Varying | Varying % | Varying % | Varying |
 Big Experiment Gone Wrong |
230 - 275 | Varying | Varying | Varying % | Varying % | Varying |
 Thralled Guard |
230 - 275 | Varying | Varying | Varying % | Varying % | Varying |
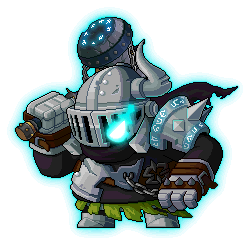 Thralled Warhammer Knight |
230 - 275 | Varying | Varying | Varying % | Varying % | Varying |
 Thralled Wizard |
230 - 275 | Varying | Varying | Varying % | Varying % | Varying |
 Thralled Archer |
230 - 275 | Varying | Varying | Varying % | Varying % | Varying |
 Vanishing Erda |
230 - 275 | Varying | Varying | Varying % | Varying % | Varying |
Labyrinth of Suffering Dungeon
| Picture and Name | Monster's Stats | |||||
|---|---|---|---|---|---|---|
| Level | HP | MP | PDR | MDR | EXP | |
| File:Mob Pikeman Skeleknight Negative (Purple 1).png Pikeman Skeleknight Negative |
255 | 581,026,600 | 60,000 | 10% | 10% | 0 |
| File:Mob Pikeman Skeleknight Negative (Blue 1).png Pikeman Skeleknight Negative |
255 | 581,026,600 | 60,000 | 10% | 10% | 0 |
| File:Mob Pikeman Skeleknight Negative (Green).png Pikeman Skeleknight Negative |
255 | 581,026,600 | 60,000 | 10% | 10% | 0 |
 Despairing Soul |
259 | 622,956,400 | 60,000 | 10% | 10% | 0 |
Despairing Soul |
259 | 6,229,564,000 | 60,000 | 10% | 10% | 0 |
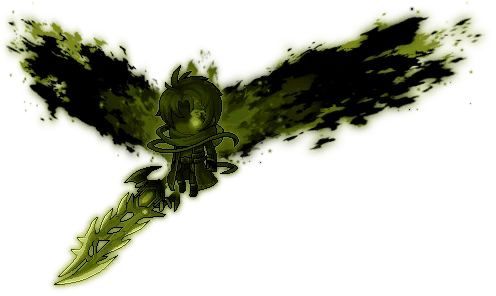 |
259 | 18,688,692,000 | 100,000 | 30% | 30% | 0 |
 |
259 | 18,688,692,000 | 10,000,000 | 10% | 10% | 0 |
| File:Mob Labyrinth Core (3).png File:Mobicon Labyrinth Core (3).png Labyrinth Core (Boss) |
259 | 14,700,000,000 | 10,000,000 | 300% | 300% | 0 |
.png)
.png)
.png)
.png)
.png)