No edit summary Tag: sourceedit |
No edit summary |
||
| (14 intermediate revisions by the same user not shown) | |||
| Line 1: | Line 1: | ||
| + | {{PQInfobox |
||
| − | {{PQ |
||
| − | | |
+ | |title1=[[File:MapIcon kentaInDanger.png]] Kenta in Danger |
| + | |suggested_level=160 - 179 |
||
| − | |image=KentaInDanger icon.png |
||
| + | |max_level=275 |
||
| − | |level=160- 179 |
||
| + | |party_member_count=2 - 6 |
||
| − | |levelmax=250 |
||
| + | |prequest= |
||
| − | |players=2 - 6 |
||
| − | |link=[[Quests/49/(Party Quest) Kenta in Danger|[Party Quest] Kenta in Danger]] |
||
}} |
}} |
||
| ⚫ | |||
| ⚫ | Kenta in Danger is a party quest located in the Aqua Road region, and accessible via [[Spiegelmann's Guest House]] via the Dimensional Mirror, as well as through a portal at [[Dangerous Sea Gorge I]]. It can be started by talking to the [[Dolphin#Kenta in Danger|Dolphin]] at [[Forked Road: Dangerous Sea (Entrance Map)|Forked Road: Dangerous Sea <Entrance Map>]]. |
||
| ⚫ | |||
| + | |||
| ⚫ | |||
==Stage 1== |
==Stage 1== |
||
| Line 21: | Line 21: | ||
</center> |
</center> |
||
| − | When you first enter, Kenta will be calling to you from below, and you will find him underneath a pile of debris from the wrecked ship. Break the debris by using normal attacks to get Kenta out of there. Once you finish, gather 10 Air Bubbles from the surrounding Sharks and Cold Sharks to help Kenta breathe underwater. Talk to Kenta, who will then start climbing to the top of the map, and you will have to protect him from surrounding monsters. Once he reaches the top, advance to the next stage. |
+ | When you first enter, Kenta will be calling to you from below, and you will find him underneath a pile of debris from the wrecked ship. Break the debris by using normal attacks to get Kenta out of there. Once you finish, gather 10 Air Bubbles from the surrounding Sharks and Cold Sharks to help Kenta breathe underwater. Talk to Kenta, who will then start climbing to the top of the map, and you will have to protect him from surrounding monsters. Once he reaches the top, advance to the next stage. Once someone attempts to enter the top portal, everyone in the party will be prompted to press the UP arrow when the button moves in the yellow area. If someone does not press UP within the next few seconds, the party will be kicked out of the PQ. |
Note: the less damage Kenta takes from monsters throughout this PQ, the more EXP you will receive at the end as a bonus. |
Note: the less damage Kenta takes from monsters throughout this PQ, the more EXP you will receive at the end as a bonus. |
||
| Line 35: | Line 35: | ||
</center> |
</center> |
||
| − | In this stage, Kenta will need to be protected from surrounding monsters, while at the same time, you will need to seal up caves with rocks. To do so, press the space bar (or the button you use as NPC Chat/Harvesting) on top of one of the rocks, move to one of the open caves, and press the button again. You will need to gather 3 rocks to seal the cave ( |
+ | In this stage, Kenta will need to be protected from surrounding monsters, while at the same time, you will need to seal up caves with rocks. To do so, press the space bar (or the button you use as NPC Chat/Harvesting) on top of one of the rocks, move to one of the open caves, and press the button again. You will need to gather 3 rocks to seal the cave (sometimes the rock will fall to the bottom of the cave, and you will need to gather another rock as a result). Once all the caves are sealed up, Kenta will climb to the top of the map, and you can advance to the next stage, which leads into a cave. |
==Stage 3== |
==Stage 3== |
||
| Line 47: | Line 47: | ||
</center> |
</center> |
||
| − | Now inside the cave, you will see a cave blocked up with rocks to the left of Kenta. Everyone has to move near the rocks, and |
+ | Now inside the cave, you will see a cave blocked up with rocks to the left of Kenta. Everyone has to move near the rocks, and the party leader will have to talk to Kenta. Everyone in the party will be prompted to press CTRL when the button moves in the yellow area; afterwards, the rocks will fall down, causing the cave to flood with water. As the water level rises, you will have to rise to the top of the map with Kenta, while avoiding the Ghost Whales that float below. These whales are invincible and can deal 30% of your HP as damage. Once you float to the top of the map, Cave Bats will start spawning, and you will have to eliminate them. Once all of them are dead, a lever will appear next to Kenta. You will have to adjust it so that you can bounce off the right side to the top of the map. Enter the portal on the top of the map to advance to the next stage. |
==Stage 4== |
==Stage 4== |
||
| Line 58: | Line 58: | ||
|} |
|} |
||
</center> |
</center> |
||
| − | This is the final stage of this Party Quest, which features two Pianuses, one on each side of the map. Each one can cast the same skills as the real Pianus, including 1/1, Dispel, Seal, Weapon Cancel, and Magic Cancel. The right side can also summon Bloody Booms. Each Pianus drops a [[Pianus Scale]]. |
+ | This is the final stage of this Party Quest, which features two Pianuses, one on each side of the map. Each one can cast the same skills as the real Pianus, including 1/1, Dispel, Seal, Weapon Cancel, and Magic Cancel. The right side can also summon Bloody Booms. Each Pianus drops a [[Pianus Scale]], which can be exchanged for rewards from the Dolphin. |
==Rewards== |
==Rewards== |
||
| + | ;Upon Completion: |
||
| ⚫ | |||
| + | *Level-based EXP |
||
| + | **Bonus EXP based on how much HP Kenta has remaining (5% bonus EXP for every 15% HP Kenta has left; 76% HP or higher required to obtain 30% bonus EXP) |
||
| + | *+44 Willpower EXP |
||
| + | *+26 Charm EXP |
||
| + | |||
| + | ;Pianus Scale Rewards: |
||
| ⚫ | |||
*'''Requirement:''' 10 [[Pianus Scale]]s |
*'''Requirement:''' 10 [[Pianus Scale]]s |
||
| Line 73: | Line 80: | ||
*[[File:Use Scroll 60%.png]]<br />[[Kenta Pet Equip Scroll for LUK 60%]] |
*[[File:Use Scroll 60%.png]]<br />[[Kenta Pet Equip Scroll for LUK 60%]] |
||
**'''Requirement:''' 5 [[Pianus Scale]]s |
**'''Requirement:''' 5 [[Pianus Scale]]s |
||
| + | |||
| + | ==Monsters== |
||
| + | {{Mob Table Styling|Varying}} |
||
| + | |-9300446 |
||
| + | |[[File:Mob Shark.png]]<br />'''[[Shark#Dangerous Sea 1|Shark]]''' |
||
| + | |{{Varying Level|Kenta}} |
||
| + | |Varying |
||
| + | |Varying |
||
| + | |Varying % |
||
| + | |Varying % |
||
| + | |Varying |
||
| + | |-9300447 |
||
| + | |[[File:Mob Cold Shark.png]]<br />'''[[Cold Shark#Dangerous Sea 1|Cold Shark]]''' |
||
| + | |{{Varying Level|Kenta}} |
||
| + | |Varying |
||
| + | |Varying |
||
| + | |Varying % |
||
| + | |Varying % |
||
| + | |Varying |
||
| + | |-9300460 |
||
| + | |[[File:Mob Kenta.png]]<br />'''[[File:Mobicon Kenta.png]] [[Kenta/Monster|Kenta]] (Ally, Mini-Boss)''' |
||
| + | |{{Varying Level|Kenta}} |
||
| + | |Varying |
||
| + | |Varying |
||
| + | |Varying % |
||
| + | |Varying % |
||
| + | |Varying |
||
| + | |-9300448 |
||
| + | |[[File:Mob Bloody Boom.png]]<br />'''[[Bloody Boom#Dangerous Sea 2|Bloody Boom]] (Boss)''' |
||
| + | |{{Varying Level|Kenta}} |
||
| + | |Varying |
||
| + | |Varying |
||
| + | |Varying % |
||
| + | |Varying % |
||
| + | |Varying |
||
| + | |-9300443 |
||
| + | |[[File:Mob Bone Fish.png]]<br />'''[[Bone Fish#Kenta in Danger|Bone Fish]]''' |
||
| + | |{{Varying Level|Kenta}} |
||
| + | |Varying |
||
| + | |Varying |
||
| + | |Varying % |
||
| + | |Varying % |
||
| + | |Varying |
||
| + | |-9300444 |
||
| + | |[[File:Mob Squid.png]]<br />'''[[Squid#Kenta in Danger|Squid]]''' |
||
| + | |{{Varying Level|Kenta}} |
||
| + | |Varying |
||
| + | |Varying |
||
| + | |Varying % |
||
| + | |Varying % |
||
| + | |Varying |
||
| + | |-9300445 |
||
| + | |[[File:Mob Risell Squid.png]]<br />'''[[Risell Squid#Kenta in Danger|Risell Squid]]''' |
||
| + | |{{Varying Level|Kenta}} |
||
| + | |Varying |
||
| + | |Varying |
||
| + | |Varying % |
||
| + | |Varying % |
||
| + | |Varying |
||
| + | |-9300462 |
||
| + | |[[File:Mob Shark.png]]<br />'''[[Shark#Dangerous Sea 2|Shark]]''' |
||
| + | |{{Varying Level|Kenta}} |
||
| + | |Varying |
||
| + | |Varying |
||
| + | |Varying % |
||
| + | |Varying % |
||
| + | |Varying |
||
| + | |-9300463 |
||
| + | |[[File:Mob Cold Shark.png]]<br />'''[[Cold Shark#Dangerous Sea 2|Cold Shark]]''' |
||
| + | |{{Varying Level|Kenta}} |
||
| + | |Varying |
||
| + | |Varying |
||
| + | |Varying % |
||
| + | |Varying % |
||
| + | |Varying |
||
| + | |-9300888 |
||
| + | |[[File:Mob Ghost Whale.png]]<br />'''[[Ghost Whale]] (Invincible)''' |
||
| + | |{{Varying Level|Kenta}} |
||
| + | |Varying |
||
| + | |Varying |
||
| + | |Varying % |
||
| + | |Varying % |
||
| + | |Varying |
||
| + | |-9300889 |
||
| + | |[[File:Mob Stirge.png]]<br />'''[[Cave Bat]]''' |
||
| + | |{{Varying Level|Kenta}} |
||
| + | |Varying |
||
| + | |Varying |
||
| + | |Varying % |
||
| + | |Varying % |
||
| + | |Varying |
||
| + | |-9300469 |
||
| + | |[[File:Mob Bloody Boom.png]]<br />'''[[Bloody Boom#Summon|Bloody Boom]] (Boss)''' |
||
| + | |{{Varying Level|Kenta}} |
||
| + | |Varying |
||
| + | |Varying |
||
| + | |Varying % |
||
| + | |Varying % |
||
| + | |Varying |
||
| + | |-9300461 |
||
| + | |[[File:Mob Pianus.png|260px]]<br />'''[[File:Mobicon Pianus.png]] [[Pianus#Right (PQ)|Pianus]] (Boss)''' |
||
| + | |{{Varying Level|Kenta}} |
||
| + | |Varying |
||
| + | |Varying |
||
| + | |Varying % |
||
| + | |Varying % |
||
| + | |Varying |
||
| + | |-9300468 |
||
| + | |[[File:Mob Pianus (2).png|260px]]<br />'''[[File:Mobicon Pianus (2).png]] [[Pianus#Left (PQ)|Pianus]] (Boss)''' |
||
| + | |{{Varying Level|Kenta}} |
||
| + | |Varying |
||
| + | |Varying |
||
| + | |Varying % |
||
| + | |Varying % |
||
| + | |Varying |
||
| + | |} |
||
{{Party Quests}} |
{{Party Quests}} |
||
Revision as of 08:07, 10 October 2019
Kenta in Danger is a party quest located in the Aqua Road region, and accessible via Spiegelmann's Guest House via the Dimensional Mirror, as well as through a portal at Dangerous Sea Gorge I. It can be started by talking to the Dolphin at Forked Road: Dangerous Sea <Entrance Map>.
The objective of Kenta in Danger is to help protect Kenta while he performs his research in the Dangerous Sea.
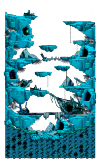
Stage 1
|
| Dangerous Sea 1 |
When you first enter, Kenta will be calling to you from below, and you will find him underneath a pile of debris from the wrecked ship. Break the debris by using normal attacks to get Kenta out of there. Once you finish, gather 10 Air Bubbles from the surrounding Sharks and Cold Sharks to help Kenta breathe underwater. Talk to Kenta, who will then start climbing to the top of the map, and you will have to protect him from surrounding monsters. Once he reaches the top, advance to the next stage. Once someone attempts to enter the top portal, everyone in the party will be prompted to press the UP arrow when the button moves in the yellow area. If someone does not press UP within the next few seconds, the party will be kicked out of the PQ.
Note: the less damage Kenta takes from monsters throughout this PQ, the more EXP you will receive at the end as a bonus.
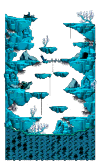
Stage 2
|
| Dangerous Sea 2 |
In this stage, Kenta will need to be protected from surrounding monsters, while at the same time, you will need to seal up caves with rocks. To do so, press the space bar (or the button you use as NPC Chat/Harvesting) on top of one of the rocks, move to one of the open caves, and press the button again. You will need to gather 3 rocks to seal the cave (sometimes the rock will fall to the bottom of the cave, and you will need to gather another rock as a result). Once all the caves are sealed up, Kenta will climb to the top of the map, and you can advance to the next stage, which leads into a cave.
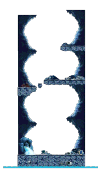
Stage 3
|
| Dangerous Cave 1 |
Now inside the cave, you will see a cave blocked up with rocks to the left of Kenta. Everyone has to move near the rocks, and the party leader will have to talk to Kenta. Everyone in the party will be prompted to press CTRL when the button moves in the yellow area; afterwards, the rocks will fall down, causing the cave to flood with water. As the water level rises, you will have to rise to the top of the map with Kenta, while avoiding the Ghost Whales that float below. These whales are invincible and can deal 30% of your HP as damage. Once you float to the top of the map, Cave Bats will start spawning, and you will have to eliminate them. Once all of them are dead, a lever will appear next to Kenta. You will have to adjust it so that you can bounce off the right side to the top of the map. Enter the portal on the top of the map to advance to the next stage.
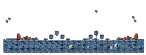
Stage 4
|
| Dangerous Cave 2 |
This is the final stage of this Party Quest, which features two Pianuses, one on each side of the map. Each one can cast the same skills as the real Pianus, including 1/1, Dispel, Seal, Weapon Cancel, and Magic Cancel. The right side can also summon Bloody Booms. Each Pianus drops a Pianus Scale, which can be exchanged for rewards from the Dolphin.
Rewards
- Upon Completion
- Level-based EXP
- Bonus EXP based on how much HP Kenta has remaining (5% bonus EXP for every 15% HP Kenta has left; 76% HP or higher required to obtain 30% bonus EXP)
- +44 Willpower EXP
- +26 Charm EXP
- Pianus Scale Rewards
- Requirement: 10 Pianus Scales
One of the following scrolls:

Kenta Pet Equip Scroll for HP
Kenta Pet Equip Scroll for MP
Kenta Pet Equip Scroll for STR 60%
Kenta Pet Equip Scroll for INT 60%
Kenta Pet Equip Scroll for DEX 60%
Kenta Pet Equip Scroll for LUK 60%- Requirement: 5 Pianus Scales
Monsters
| Picture and Name | Monster's Stats | |||||
|---|---|---|---|---|---|---|
| Level | HP | MP | PDR | MDR | EXP | |
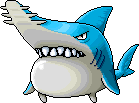
 Shark |
160 - 179 | Varying | Varying | Varying % | Varying % | Varying |
 Cold Shark |
160 - 179 | Varying | Varying | Varying % | Varying % | Varying |
 |
160 - 179 | Varying | Varying | Varying % | Varying % | Varying |
 Bloody Boom (Boss) |
160 - 179 | Varying | Varying | Varying % | Varying % | Varying |
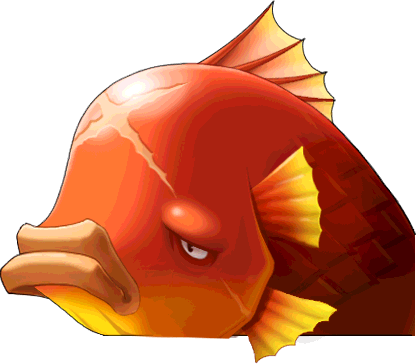
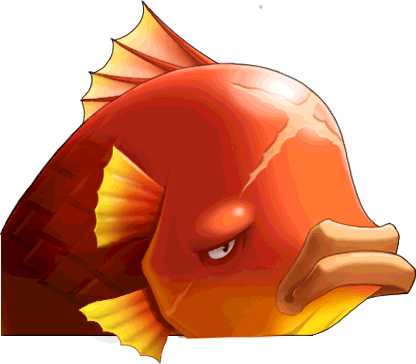
 Bone Fish |
160 - 179 | Varying | Varying | Varying % | Varying % | Varying |
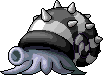 Squid |
160 - 179 | Varying | Varying | Varying % | Varying % | Varying |
 Risell Squid |
160 - 179 | Varying | Varying | Varying % | Varying % | Varying |
Shark |
160 - 179 | Varying | Varying | Varying % | Varying % | Varying |
Cold Shark |
160 - 179 | Varying | Varying | Varying % | Varying % | Varying |
 Ghost Whale (Invincible) |
160 - 179 | Varying | Varying | Varying % | Varying % | Varying |
Cave Bat |
160 - 179 | Varying | Varying | Varying % | Varying % | Varying |
Bloody Boom (Boss) |
160 - 179 | Varying | Varying | Varying % | Varying % | Varying |
 |
160 - 179 | Varying | Varying | Varying % | Varying % | Varying |
 |
160 - 179 | Varying | Varying | Varying % | Varying % | Varying |
| Party Quests and Dungeons | ||
|---|---|---|
| Normal Party Quests | ||
|
| ||
| Cross World Party Quests | ||
|
| ||
| Exclusive | ||
| Arcane River Special Content | ||
|
| ||
| Ranked | ||
| Exclusive | ||